Author

Nwa Ogaranya

Browsing


Vaginal Dryness: 9 Proven Non-Hormonal Solutions

Nobody warned you about this part. Not your doctor, not your mother, and certainly not the stack of pregnancy books on your nightstand. Yet here you are, dealing with a symptom that makes wearing underwear feel like sandpaper and sex feel like a punishment. You deserve better, and you are absolutely not alone.

Vaginal dryness is one of the most common and least talked-about complaints in women’s health, affecting women across every decade of life, from their twenties all the way through menopause and beyond. According to the Cleveland Clinic, more than 15% of women under 50 experience vaginal dryness before menopause, and that number climbs to over 50% after menopause. But the conversation around solutions has, for too long, started and ended with hormones.

Here is the thing: hormones are not your only option, and for many women, they are not an option at all. If you are breastfeeding, a breast cancer survivor, sensitive to hormone therapy, or simply prefer a natural approach, there are real, evidence-backed solutions waiting for you. This guide covers nine of the most effective ones, explains exactly how to use each, and tells you what to realistically expect from each approach.

Whether your dryness appeared out of nowhere after delivery, crept in during perimenopause, or has been a quiet passenger since your last medication change, one of these solutions, or a combination of them, is about to change your daily life for the better.

Vaginal Dryness


What Actually Causes Vaginal Dryness and Why It Matters for Treatment

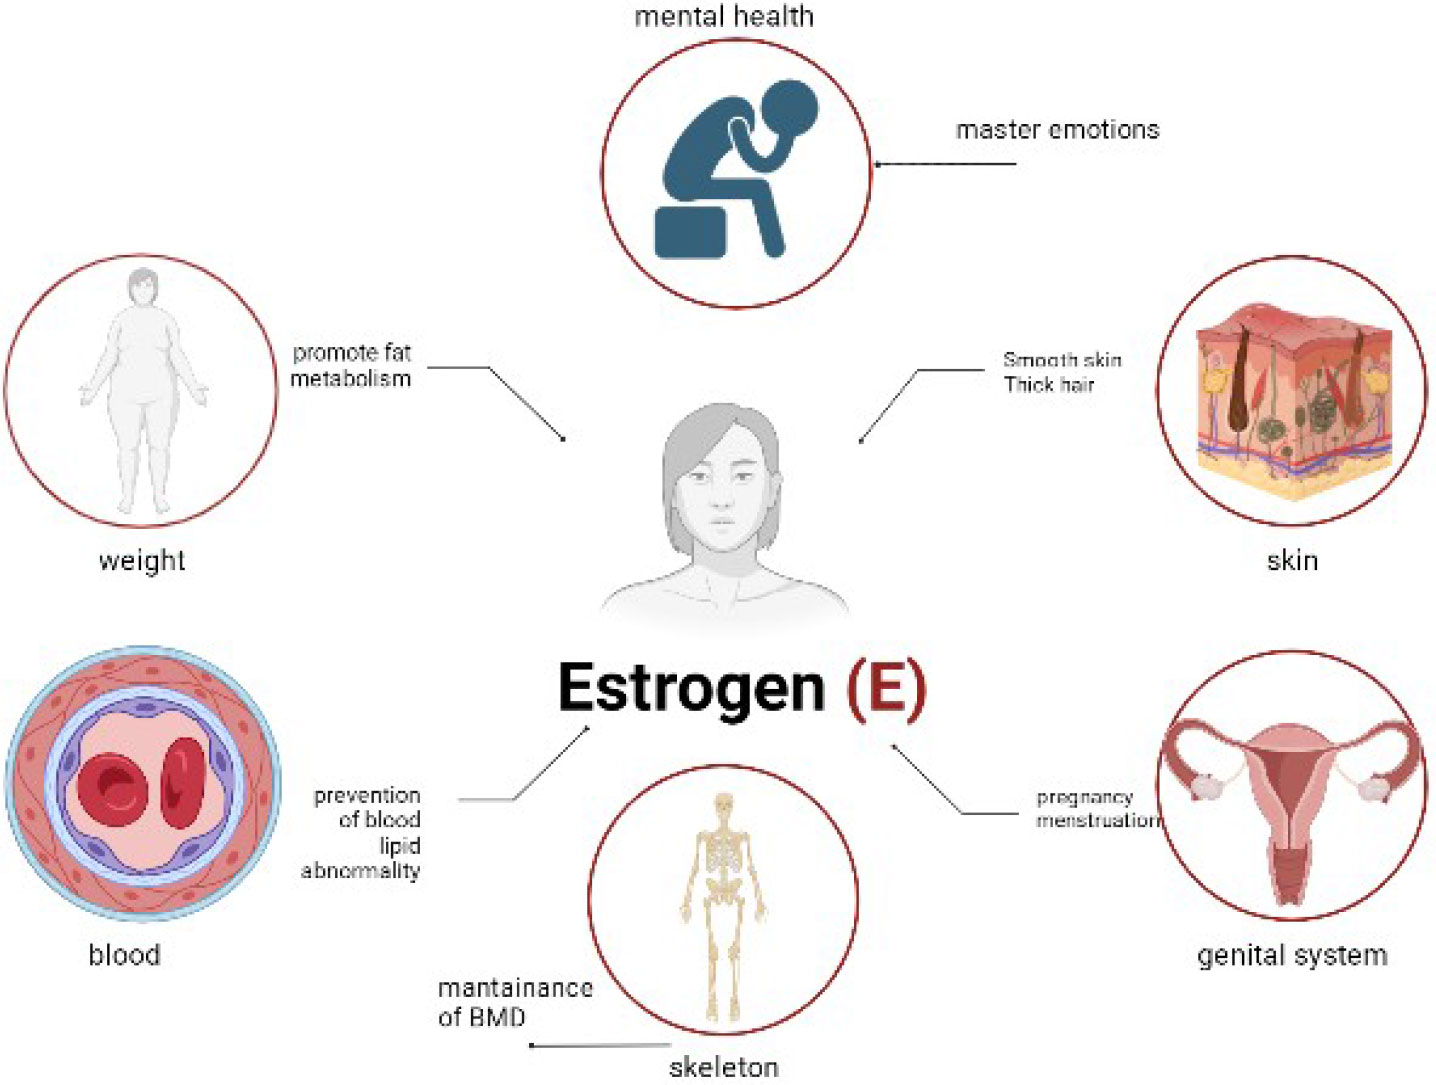
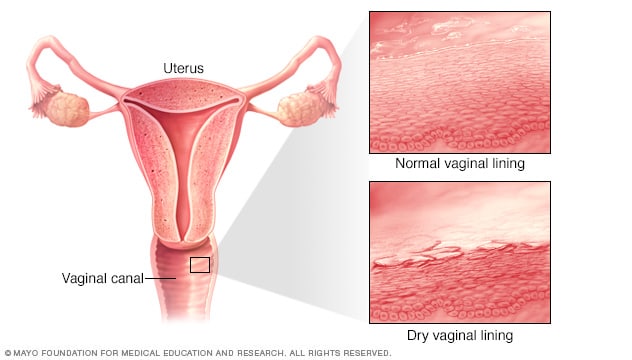
Before jumping into solutions, it helps to understand what is going on below the surface. Vaginal moisture depends heavily on estrogen. This hormone maintains the thickness, elasticity, and self-lubrication of vaginal tissue. When estrogen drops for any reason, the vaginal walls thin out and the tissue produces less natural fluid. The result is dryness, irritation, burning, and often pain during sex.

The tricky part is that estrogen can dip for many reasons, and this is why vaginal dryness is not just a menopause issue.

Common causes include:

  • Breastfeeding. During lactation, the hormone prolactin rises to support milk production, and estrogen drops significantly. Research shows vaginal dryness is more than seven times more common in breastfeeding women than in those using infant formula.
  • Perimenopause and menopause. As ovarian function declines, estrogen production slows, leading to progressive vaginal tissue changes.
  • Certain medications. Antihistamines, some antidepressants, and hormonal birth control can all reduce natural lubrication as a side effect.
  • Stress and anxiety. Mental stress increases cortisol, which in turn suppresses sex hormones and reduces blood flow to the genitals, directly reducing arousal and natural moisture.
  • Cancer treatments. Chemotherapy, radiation to the pelvic area, and medications used in breast cancer treatment can all reduce estrogen levels significantly.
  • Cigarette smoking. A 2017 study found that women who smoke are significantly more likely to experience vaginal dryness, as smoking accelerates the breakdown of estrogen and damages vaginal tissue cells.
  • Harsh soaps and douching. Products with fragrances or aggressive chemicals disrupt the vagina’s natural pH, stripping away protective moisture.

Understanding your particular cause helps you choose the most targeted solution. A breastfeeding mother and a 54-year-old woman in menopause may both experience dryness, but their most effective first-line treatment might look slightly different.


Solution 1: Water-Based Vaginal Lubricants for Instant Vaginal Dryness Relief

Think of lubricants as the immediate first responders of vaginal dryness treatment. They do not fix the underlying tissue changes, but they do one job extraordinarily well: they eliminate friction, right now, when you need them most.

Water-based lubricants are the most widely recommended option. They are compatible with latex condoms, easy to clean up, and gentle on vaginal tissue. Look for formulas that are pH-balanced, fragrance-free, and free from glycerin (which can trigger yeast infections in some women). Popular well-tolerated options include Sliquid H2O, Good Clean Love, and Astroglide Natural.

How to use them correctly:

  • Apply to both the vaginal opening and the partner’s body, or toy, immediately before sexual activity.
  • Reapply as needed throughout. Dryness mid-session is not a personal failure; it is biology.
  • Avoid products containing parabens, glycerin, or propylene glycol if you have a history of yeast infections or vulvar sensitivity.

What to expect: Instant improvement in comfort during intercourse. Lubricants do not provide long-term hydration or repair vaginal tissue, so they work best when paired with a regular moisturizing routine.

Symptoms helped: Pain during sex (dyspareunia), friction, tearing or micro-abrasions, and burning during intercourse.


Solution 2: Silicone-Based Lubricants for Long-Lasting Vaginal Dryness Comfort

Silicone lubricants are the marathon runners in the lubricant world. They last significantly longer than water-based formulas, do not dry out mid-session, and require less frequent reapplication. For women with more severe dryness, this makes a noticeable difference.

Silicone is also an excellent choice for water-based activities, since it is not water-soluble. It does not absorb into skin, which means it stays where you put it. Well-regarded options include Überlube, Pink, and ID Millennium.

How to use them correctly:

  • Apply a small amount to the vaginal opening before sex. A little goes a long way with silicone.
  • Do not use silicone lubricants with silicone sex toys, as the formula can degrade the toy material.
  • Use with latex and polyurethane condoms safely. They are fully condom-compatible.

What to expect: Longer-lasting lubrication than water-based formulas, with a silkier feel. These are purely functional for sexual activity and, like water-based options, do not address underlying tissue health.

Symptoms helped: Severe friction and pain during sex, reduced sensation, and discomfort that persists throughout intercourse.


Solution 3: Vaginal Moisturizers for Ongoing Non-Hormonal Vaginal Dryness Treatment

Here is the distinction that most women are not told: lubricants are for sex, and moisturizers are for healing. A vaginal moisturizer is applied regularly, several times per week, whether you are having sex or not. It works by hydrating the vaginal tissue itself, restoring the mucosa’s natural moisture balance over time.

This is the category where the science gets genuinely exciting. Studies have found that regular use of vaginal moisturizers can produce results comparable to low-dose topical estrogen for women with mild to moderate symptoms. The Mayo Clinic recommends options like Replens, K-Y Liquibeads, and Sliquid as reliable first-line choices.

How to use them correctly:

  • Apply internally using an applicator or your finger, typically at bedtime to minimize mess.
  • Use every two to three days consistently for the best results, not just when you feel symptomatic.
  • Give it time. Most women see meaningful improvement within four to eight weeks of regular use.

What to expect: Reduced daily irritation, improved tissue comfort even without sexual activity, and better baseline moisture that makes sex more comfortable when it happens.

Symptoms helped: Constant burning or itching, irritation from clothing, urinary discomfort, and pain during gynecological exams.


Solution 4: Hyaluronic Acid Suppositories, the Standout Star of Non-Hormonal Vaginal Dryness Relief

If you follow skincare science at all, hyaluronic acid is a name you know. It is one of the body’s natural humectants, meaning it binds to water and locks in moisture. What is less widely known is that the same mechanism that makes it a skincare powerhouse also makes it one of the most promising non-hormonal vaginal dryness treatments available.

When applied internally, hyaluronic acid adheres to the vaginal epithelial cells and draws water into the tissue, hydrating from the inside out. A landmark multicenter randomized controlled trial found that hyaluronic acid vaginal gel was comparable in effectiveness to estriol vaginal cream for reducing dryness and improving vaginal health scores. That is a significant finding, especially for women who cannot use any form of estrogen.

According to Mayo Clinic Press, vaginal moisturizers containing hyaluronic acid are among the most effective non-hormonal treatments available, with most women noticing meaningful improvement after eight to twelve weeks of regular use.

How to use them correctly:

  • Insert a suppository or gel applicator into the vagina at bedtime, at least every three days.
  • Look for pH-balanced, fragrance-free, paraben-free formulations specifically designed for vaginal use.
  • Popular options include Revaree by Bonafide, Hyalogyn, and Good Clean Love’s suppositories.

What to expect: Progressive improvement in daily comfort, tissue elasticity, and lubrication during sex. Unlike lubricants, the effect builds over time and continues even on days when you do not apply it.

Symptoms helped: Persistent dryness and burning, painful intercourse, reduced elasticity, irritation independent of sexual activity.


Solution 5: Pelvic Floor Physical Therapy for Vaginal Dryness and Intimacy

This one often surprises people. Physical therapy, for vaginal dryness? Yes, genuinely. And it is arguably the most underutilized, most transformative option on this entire list.

The pelvic floor is a group of muscles that support the uterus, bladder, and rectum. When these muscles are tight, overactive, or poorly coordinated, they restrict blood flow to the vaginal tissues, exacerbate pain during sex, and can amplify the experience of dryness even when moisture levels are not dramatically low. A pelvic floor physical therapist can assess exactly what your muscles are doing and guide you through targeted work to restore normal function.

For women who have experienced dyspareunia (painful sex) for an extended time, a common secondary pattern develops: the body begins to tense the pelvic floor in anticipation of pain. This protective bracing actually makes discomfort worse. A skilled therapist can interrupt this cycle through manual therapy, guided relaxation techniques, and a progressive home program.

What a typical program looks like:

  • An initial assessment of pelvic floor muscle tone, coordination, and strength.
  • Internal and external manual therapy to release tight or tender tissue.
  • Instruction in diaphragmatic breathing, which directly reduces pelvic floor tension.
  • A home exercise program that may include both relaxation and strengthening, depending on your specific pattern.

What to expect: Noticeable reduction in pain during sex, improved tissue comfort, and better overall pelvic awareness, typically within six to twelve weeks of regular therapy.

Symptoms helped: Painful intercourse, pelvic heaviness, urinary urgency or leakage, muscle tension that compounds dryness-related discomfort.


Solution 6: Kegel Exercises to Improve Blood Flow and Vaginal Lubrication Naturally

Kegel exercises are the most well-known pelvic floor exercise, and for good reason. Named after gynecologist Dr. Arnold Kegel, these rhythmic contractions of the pelvic floor muscles strengthen the muscles that surround the vagina and increase circulation to the entire region. Better blood flow means better tissue health, better arousal response, and, over time, improved natural lubrication.

The key word in that sentence is “natural lubrication.” While Kegels are not a replacement for topical treatments, they support your body’s own capacity to produce moisture, especially when performed consistently alongside other solutions.

How to perform them correctly:

  • Identify the right muscles by imagining you are stopping the flow of urine mid-stream. Those are your pelvic floor muscles.
  • Squeeze and lift these muscles for three to five seconds, then fully release for an equal amount of time.
  • Aim for three sets of ten repetitions daily. Fully releasing after each squeeze is just as important as the contraction itself.
  • Do not hold your breath or squeeze your buttocks, thighs, or abdomen. The work should be isolated.

A common mistake: Many women with pelvic pain have a pelvic floor that is already too tight. If Kegels worsen your discomfort rather than helping, stop and consult a pelvic floor physical therapist before continuing.

What to expect: Gradual improvement in pelvic circulation, better bladder control, and enhanced arousal response over six to twelve weeks of consistent practice.

Symptoms helped: Urinary leakage, reduced vaginal sensation, pain during intercourse related to poor muscle tone, and reduced arousal.


Solution 7: Diet, Hydration, and Phytoestrogens for Vaginal Dryness Support

What you eat and drink has a more direct effect on vaginal moisture than most women realize. The tissue of the vaginal wall requires adequate hydration to maintain its suppleness. Chronic mild dehydration is a quiet contributor to dryness that many women overlook entirely.

Drinking at least eight cups of water daily is a simple, no-cost starting point. Beyond hydration, certain foods offer compounds that gently support estrogen-related tissue health without functioning as hormones in the clinical sense.

Phytoestrogens are plant compounds that weakly mimic the action of estrogen in the body. They are found naturally in many foods and have been studied for their potential to ease vaginal dryness, particularly in postmenopausal women. Research published by MedlinePlus suggests that a diet rich in soy foods may improve vaginal dryness symptoms due to the phytoestrogen isoflavone content.

Foods that support vaginal tissue health:

  • Soy products (tofu, tempeh, edamame): Rich in isoflavones, the most studied phytoestrogens.
  • Flaxseeds and walnuts: High in omega-3 fatty acids, which support tissue membrane integrity and moisture retention.
  • Avocado: Contains healthy fats linked to hormone production and improved vaginal lubrication.
  • Leafy greens (spinach, kale): High in magnesium, which plays a supportive role in hormone balance.
  • Pumpkin seeds and almonds: Zinc-rich foods associated with hormonal balance and improved libido.

What to expect: Dietary changes are slow-acting but cumulative. Combined with topical solutions, a supportive diet can meaningfully reduce dryness symptoms over two to three months.

Symptoms helped: Chronic dryness linked to dietary deficiency, reduced tissue elasticity, general inflammation in vaginal tissues.


Solution 8: Eliminating Irritants and Resetting Your Vaginal Environment for Dryness Relief

This solution is free, takes about ten minutes, and produces results faster than almost anything else on this list. Many cases of vaginal dryness and irritation are not caused by estrogen alone; they are worsened, sometimes dramatically, by everyday products that disrupt the vaginal environment.

The vagina is self-cleaning. It maintains its own carefully balanced pH, between 3.8 and 4.5, which is naturally slightly acidic. Disrupting this balance strips away the protective mucus layer and leaves tissue exposed, dry, and inflamed.

Common culprits to remove immediately:

  • Scented soaps, body washes, and bubble baths used near the vulva or inside the vagina.
  • Douches of any kind. There is no medical justification for douching, and strong evidence that it causes more harm than it prevents.
  • Scented or dyed toilet paper and sanitary products. Unscented, fragrance-free products are always the better choice for sensitive tissue.
  • Fabric softeners or laundry detergents with strong fragrances that remain in underwear fabric.
  • Certain condom types with spermicide or flavoring that can cause significant local irritation.

Switching to gentle, unscented products and washing only the external vulva with warm water (or a mild, unfragranced soap) is the foundation of vaginal health maintenance. Think of it as removing the noise so you can hear what your body actually needs.

What to expect: For many women, eliminating irritants alone brings noticeable reduction in burning and itching within one to two weeks.

Symptoms helped: Burning, itching, discharge irregularity, contact irritation from clothing, and chemical-triggered dryness.


Solution 9: Extended Foreplay and Intentional Arousal Practices to Restore Comfort and Intimacy

This solution is the one most often omitted from clinical lists, which is a shame because it is both free and remarkably effective. Natural vaginal lubrication is primarily an arousal response. The Bartholin’s glands, located on either side of the vaginal opening, produce fluid when a woman is fully aroused. When sex is rushed, when arousal is incomplete, or when stress is high, these glands simply do not get the signal to activate fully.

This is not a performance issue. It is physiology. And the most straightforward way to address it is to give your body more time and more input before penetration.

Extended, intentional foreplay, defined as a minimum of fifteen to twenty minutes of arousal before penetrative sex, increases blood flow to the vaginal walls, stimulates the Bartholin’s glands, and promotes the trans-udate fluid that creates natural lubrication. For women already experiencing some level of dryness, this may not be sufficient on its own, but it reliably improves comfort when combined with a topical solution.

Practical approaches:

  • Communicate with your partner about taking more time before intercourse. This conversation, though it might feel awkward once, almost always improves intimacy.
  • Explore non-penetrative intimacy (massage, oral sex, mutual touch) during periods when penetrative sex is especially uncomfortable. These activities maintain connection without pressure.
  • Mindfulness practices before sex, even five minutes of slow breathing or body-scan meditation, can reduce the pelvic muscle guarding that amplifies dryness-related pain.
  • Reduce mental load before intimacy. Stress is one of the most potent suppressors of arousal, and arousal is the engine of natural lubrication.

What to expect: Improved natural lubrication during sexual activity, reduced pain, and greater emotional and physical satisfaction, particularly when combined with a regular moisturizer routine.

Symptoms helped: Low natural lubrication during sex, pain at penetration, reduced sensation, and intimacy avoidance driven by fear of discomfort.


Comparison Table: Non-Hormonal Vaginal Dryness Solutions at a Glance

Solution Type Frequency of Use Time to Results Best For Difficulty
Water-based lubricant Topical As needed (during sex) Immediate Instant comfort during sex Very Easy
Silicone-based lubricant Topical As needed (during sex) Immediate Long-lasting friction relief Very Easy
Vaginal moisturizer (polycarbophil) Topical 2 to 3x per week 4 to 8 weeks Daily dryness and irritation Easy
Hyaluronic acid suppository Topical Every 2 to 3 days 8 to 12 weeks Tissue repair and deep hydration Easy
Pelvic floor physical therapy Clinical Weekly sessions 6 to 12 weeks Pain during sex, muscle tension Moderate
Kegel exercises Self-directed Daily 6 to 12 weeks Blood flow, bladder leakage, sensation Easy to Moderate
Dietary changes and hydration Lifestyle Daily 2 to 3 months Systemic hormonal support Easy
Eliminating irritants Lifestyle Ongoing 1 to 2 weeks Chemically triggered dryness Very Easy
Extended foreplay and arousal Behavioral Per encounter Immediate to gradual Natural lubrication during sex Moderate

How to Build Your Personal Non-Hormonal Vaginal Dryness Protocol

The most effective approach is not choosing one solution from this list and hoping for the best. It is layering several complementary strategies to address the problem from multiple angles at once. Think of it as building a system rather than relying on a single fix.

A simple starting protocol might look like this. First, remove all potential irritants from your personal care routine immediately. Second, begin using a vaginal moisturizer or hyaluronic acid suppository every two to three days as your baseline treatment. Third, add a quality water-based lubricant for sexual activity. Fourth, commit to daily pelvic floor exercises or, better yet, consult a pelvic floor physical therapist if pain is part of your picture.

Support all of the above with adequate daily hydration and a diet that includes omega-3 fatty acids, leafy greens, and, if appropriate, soy-based phytoestrogens. Finally, give your intimate life the time it deserves by prioritizing full arousal before penetration.

Most women who follow a consistent multi-pronged approach like this see meaningful, lasting improvement within six to twelve weeks. That is not a long time given how significantly vaginal dryness affects daily comfort, confidence, and intimacy.

As the American College of Obstetricians and Gynecologists notes, vaginal dryness is a common and treatable condition, and women do not have to simply endure it. The solutions exist. Using them is an act of self-respect.


When to See a Doctor About Vaginal Dryness

Non-hormonal solutions work well for most women, but there are situations where a medical consultation is the right first step. See your gynecologist or healthcare provider if:

  • Dryness is accompanied by unusual vaginal discharge, odor, or bleeding.
  • You have tried over-the-counter solutions consistently for eight to twelve weeks without improvement.
  • Pain during sex is severe enough to prevent intercourse or is getting progressively worse.
  • You have a history of hormone-sensitive cancer and want guidance on the safest topical options.
  • You experience symptoms of a urinary tract infection alongside dryness, including burning with urination, urgency, or frequency.

A pelvic exam, and sometimes a blood test to check hormone levels, can help identify whether an underlying condition is driving your symptoms and open the door to additional treatments, including prescription non-hormonal options, if needed.


The Bottom Line: Vaginal Dryness Is Common, Treatable, and Not Your Fault

Vaginal dryness is not a sign of age, failure, or anything wrong with you as a person. It is a physiological response to changes in hormone levels, lifestyle factors, and occasionally the products in your bathroom cabinet. And it responds well to treatment.

You do not need to choose between suffering in silence or immediately reaching for a prescription. Nine legitimate, evidence-backed non-hormonal solutions are on this list, and at least three of them can be started today, for free, with things you already own or can buy at any pharmacy.

Start where you are. Make one change, and then another. Your body is not working against you. It just needs a little support.


Keep the Conversation Going

Did this help? Share this post with a friend, a sister, or a new mom who has been quietly dealing with the same thing and does not know where to start. The more openly we talk about this, the sooner women stop suffering for years before finding the solutions that were available all along.

Read Next: [Pelvic Floor Health After Baby: What No One Tells You in the First Year]

Drop a comment below: Which of these solutions have you tried? What worked for you? Your experience might be exactly what someone else needs to read today.


This article is for informational purposes only and does not constitute medical advice. Please consult your healthcare provider before beginning any new treatment, especially if you have a history of hormone-sensitive conditions.

12 Dangerous Postpartum Recovery Mistakes Silently Harming New Mothers in 2025

You survived pregnancy, labour, and the first chaotic weeks of motherhood. And now you are quietly falling apart, and nobody told you this was coming.

That persistent lower back ache, the leaking when you sneeze, the exhaustion that goes far beyond “tired,” the way your body feels like a stranger you are politely sharing space with. These are not just the inevitable costs of having a baby. In many cases, they are the direct consequences of postpartum recovery mistakes that are extraordinarily common, widely normalised, and almost never talked about honestly.

Postpartum

Why Postpartum Recovery Mistakes Are Silently Destroying New Mothers’ Health

Every year, at least 40 million women worldwide experience long-term health problems caused by childbirth, according to a landmark study published in The Lancet Global Health. These include pain during sex affecting more than a third of postpartum women, lower back pain in 32 percent of new mothers, urinary incontinence in up to 31 percent, and postpartum depression in 11 to 17 percent. The researchers behind that study made a pointed observation: many of these conditions occur well beyond the six-week mark where postnatal care typically ends.

That gap between when care stops and when problems actually show up is where postpartum recovery mistakes do their worst damage.

The system, for all its intentions, does not adequately prepare most women for the full reality of postpartum recovery. The six-week check happens, the green light gets given, and mothers go home still confused about whether their symptoms are normal, whether they should push through the pain, and whether what they are feeling emotionally qualifies as something to mention or something to quietly endure.

This article names the twelve most common postpartum recovery mistakes that women make in 2025. Not to shame anyone, because every single one of these mistakes is entirely understandable given how little honest guidance most new mothers receive. But because naming them clearly, with the research to back them up, is the first step toward fixing them.


Postpartum Recovery Mistake 1: Treating the Six-Week Check as a Full Medical Clearance

This is the most widespread postpartum recovery mistake of all, and the healthcare system itself is partly responsible for it. The six-week postnatal check is a screening visit, not a rehabilitation assessment. It looks for signs of surgical wound infection, checks blood pressure, discusses contraception, and asks a few questions about mood.

What it does not include, in most standard appointments, is any assessment of pelvic floor muscle function, deep core activation, diastasis recti screening, or a graded return-to-exercise evaluation. Yet many women walk away from that appointment believing they have been fully assessed and fully cleared.

The American College of Obstetricians and Gynecologists updated its guidelines to recommend postpartum support spanning twelve weeks rather than a single six-week visit, precisely because the evidence shows that six weeks is not enough. The uterine scar after a caesarean, the perineal tissue after a vaginal birth, the fascial connections throughout the core, and the pelvic floor ligaments still softened by relaxin are all in various stages of healing and remodelling at six weeks. Being “cleared” is not the same as being recovered.

What to do instead:

  • Ask your GP or midwife specifically about pelvic floor assessment at your six-week check.
  • Request a referral to a pelvic floor physiotherapist regardless of whether you have obvious symptoms.
  • Do not use the six-week check as the sole signal to return to high-impact exercise, heavy lifting, or core-intensive activity.

Postpartum Recovery Mistake 2: Skipping Pelvic Floor Physiotherapy Because You “Feel Fine”

The absence of obvious symptoms is not the same as the absence of dysfunction. This distinction is critically important, and it is one of the most consequential postpartum recovery mistakes a new mother can make.

Pelvic floor dysfunction after childbirth, whether vaginal or caesarean, frequently presents without obvious warning signs in the early weeks. The pelvic floor is a group of muscles, ligaments, and connective tissue at the base of the pelvis supporting the bladder, bowel, and uterus. After the sustained weight of pregnancy and the trauma of delivery, these structures commonly develop weakness, tension, or coordination problems that may not produce symptoms until months later, often triggered by a return to exercise, a second pregnancy, or the hormonal shifts around perimenopause.

Research published in PMC found that pelvic floor muscle training in the first year postpartum reduces the odds of urinary incontinence by 37 percent and pelvic organ prolapse by 56 percent compared with no training. That is a significant risk reduction available to every postpartum woman, but only if she accesses it.

Symptoms that pelvic floor physiotherapy directly addresses:

  • Urinary leakage with coughing, sneezing, laughing, or exercise (stress incontinence).
  • Urgency to urinate with little warning (urge incontinence).
  • Pelvic heaviness or a dragging sensation, particularly after standing for long periods.
  • Pain or reduced sensation during sex (dyspareunia).
  • Difficulty fully emptying the bladder or bowel.
  • Lower back and hip pain that is not explained by posture alone.

You do not need to be leaking or in pain to benefit from seeing a pelvic floor physiotherapist. You only need to have recently had a baby.


Postpartum Recovery Mistake 3: Doing Crunches and Sit-Ups Too Early in Postpartum Recovery

If there is a single exercise that new mothers should remove from their recovery routine in the first several months postpartum, it is the crunch. And its close relatives: the sit-up, the double leg raise, the boat pose, and any exercise that causes the midline of the abdomen to dome or tent upward during exertion.

Here is why. Most women who have recently given birth have some degree of diastasis recti abdominis (DRA), a separation of the two sides of the rectus abdominis along the midline connective tissue known as the linea alba. Research suggests over 60 percent of women have measurable abdominal separation at six to eight weeks postpartum. It is a normal consequence of the uterus expanding during pregnancy, but it does not mean that all exercises are safe to perform while it is present.

Exercises that increase intra-abdominal pressure without adequate deep core engagement force the linea alba to bear load that it is not yet capable of distributing effectively. The result is not just the visible doming that indicates the exercise is too demanding. It is the prolonged difficulty in closing the functional gap that keeps diastasis recti from resolving as efficiently as it otherwise would.

Signs an exercise is too demanding for your current core function:

  • A ridge or cone shape appears down the centre of the abdomen during the movement.
  • You feel pulling or pressure at the incision site (for c-section mothers).
  • Lower back pain or pelvic pressure increases during or after the exercise.
  • You notice urinary leakage triggered by the movement.

Start with diaphragmatic breathing and transverse abdominis activation. Build to glute bridges and modified movements. Work with a pelvic floor physiotherapist to screen for DRA before returning to abdominal exercises with any significant load or flexion.


Postpartum Recovery Mistake 4: Returning to Running Too Soon After Postpartum Recovery Begins

The cultural pressure on new mothers to “bounce back” is relentless and quietly harmful. For many women, returning to running is one of the most visible signals of that bounce-back, and it is also one of the most common ways that postpartum recovery mistakes turn into injuries and long-term pelvic floor dysfunction.

Running is a high-impact activity. Each footfall generates a ground reaction force roughly two to three times body weight, all of which passes through the pelvis and pelvic floor. The pelvic floor muscles must contract powerfully and repeatedly with every stride to maintain continence and support the pelvic organs during this load. In the first weeks and months after birth, when these muscles are still recovering from the physical demands of pregnancy and delivery, that load can exceed their capacity, producing symptoms immediately or weeks later.

The 2019 return-to-running guidelines endorsed by the Association of Chartered Physiotherapists in Sports and Exercise Medicine recommend waiting a minimum of three months before attempting to run postpartum, and only when a series of screening criteria have been met, including the complete absence of urinary leakage, pelvic heaviness, pain, and abdominal coning during impact activities. For many women, that timeline will extend to six months or beyond.

Before returning to running postpartum, you should be able to:

  • Walk briskly for 30 minutes without any pelvic floor symptoms.
  • Perform single-leg balance for ten seconds without pain or instability.
  • Jog on the spot for one minute without leakage, heaviness, or pain.
  • Complete 20 single-leg calf raises on each side without symptoms.

If any of these produce symptoms, your body is asking for more preparation time before impact loading begins. That is not failure. That is information.


Postpartum Recovery Mistake 5: Ignoring the Warning Signs of Postpartum Depression

Postpartum depression affects between 11 and 17 percent of new mothers in the first year after delivery, according to the World Health Organization. Despite that prevalence, it remains dramatically underdiagnosed and undertreated, in large part because the symptoms do not always look like what most people picture when they think of depression.

Postpartum depression does not always present as overwhelming sadness. It presents as rage at a partner who breathes too loudly. It presents as numbness toward the baby you love desperately but feel nothing toward in a given moment. It presents as the persistent, suffocating belief that you are failing, that everyone would be better off without you, that you are just too tired to be a good mother. It presents as anxiety so intense that you cannot sleep even when the baby sleeps.

There is also an important clinical connection between physical and mental postpartum recovery mistakes. Research from the University of Michigan found that urinary incontinence and persistent postpartum pain were independently associated with a positive screen for postpartum depression, suggesting that untreated pelvic floor dysfunction and undertreated physical symptoms can actively increase a woman’s risk of developing depression. These are not separate problems. They are deeply connected ones.

Signs that warrant a conversation with your GP:

  • Persistent feelings of hopelessness or worthlessness beyond the first two weeks postpartum.
  • Intrusive or frightening thoughts, including thoughts of harming yourself or your baby.
  • Inability to eat, sleep, or function even when given the opportunity.
  • Complete emotional disconnection from your baby or partner.
  • Anxiety or panic attacks that feel impossible to control.
  • Feeling like you are performing motherhood rather than experiencing it.

If you recognise yourself in any of these, please speak with your GP or midwife. Postpartum depression is treatable. You do not have to earn the right to ask for help.


Postpartum Recovery Mistake 6: Treating Sleep Deprivation as Inevitable and Unaddressable

“Sleep when the baby sleeps” is simultaneously the most well-intentioned and the most maddening piece of advice given to new mothers. Most of the time, when the baby sleeps there are approximately forty-seven other urgent demands presenting themselves. But dismissing sleep as simply not available is itself one of the most serious postpartum recovery mistakes a new mother can make.

Sleep deprivation is not just uncomfortable. It is physiologically disruptive in ways that directly impair physical recovery. During sleep, the body releases growth hormone, which supports tissue repair including healing of the perineum, the c-section incision, and the muscle fibre damage throughout the pelvic floor and core. Sleep deprivation increases cortisol levels, which in turn increase inflammation, slow wound healing, and suppress immune function. Current postnatal exercise guidelines note explicitly that sleep deprivation increases injury risk and should be factored into decisions about exercise intensity and volume.

The goal here is not to achieve the impossible standard of eight uninterrupted hours. It is to advocate for sleep prioritisation as a legitimate and non-negotiable component of recovery, not a luxury. Asking for help at night, accepting offers from family members, reducing non-essential commitments, and resisting the cultural pressure to demonstrate that you are “managing everything fine” are all acts of physical self-preservation, not weakness.


Postpartum Recovery Mistake 7: Undereating During Postpartum Recovery

The postpartum period brings with it enormous pressure to return to a pre-pregnancy weight as quickly as possible. Social media, magazines, celebrity culture, and well-meaning relatives all contribute to the message that the body that grew a baby should now rapidly shrink back to something more familiar. And many new mothers respond to that pressure by undereating, often without fully realising they are doing it.

This is a particularly consequential postpartum recovery mistake for breastfeeding women. Breastfeeding increases caloric expenditure by approximately 500 calories per day, and inadequate caloric intake during lactation can reduce milk supply, impair mood, and deplete micronutrient stores that are essential for maternal recovery.

Nutritional needs during postpartum recovery are significant. Iron is needed to replenish what was lost during delivery, with postpartum blood loss of 500 to 1,000 millilitres being considered normal after vaginal birth. Protein supports the repair of connective tissue, muscle, and the healing of surgical wounds. Calcium and vitamin D support bone density, which takes a hit during breastfeeding as the body prioritises calcium delivery to milk. Omega-3 fatty acids, particularly DHA, support both postpartum mood stabilisation and the development of the baby’s nervous system if you are breastfeeding.

Nutrients that deserve specific attention in postpartum recovery:

  • Iron: red meat, legumes, dark leafy greens, fortified cereals.
  • Protein: eggs, chicken, fish, lentils, Greek yoghurt, tofu.
  • Calcium: dairy, fortified plant milks, sardines, tahini, broccoli.
  • DHA/Omega-3: oily fish (salmon, mackerel, sardines), algae-based supplements for non-fish eaters.
  • Vitamin D: sunlight exposure, fortified foods, and supplementation where clinically indicated.

If you are struggling to eat well because you cannot find the time, energy, or appetite, that is a legitimate problem to raise with your GP, not a personal failure to optimise your diet.


Postpartum Recovery Mistake 8: Ignoring Scar Tissue Management in Postpartum Recovery

Whether you had a c-section, a perineal tear, an episiotomy, or any other form of birth-related tissue trauma, the scar that forms is a living structure that responds to treatment. Ignoring it is one of the most frequently overlooked postpartum recovery mistakes, with consequences that range from discomfort to significant restriction of movement, bladder urgency, and chronic pain.

After a c-section, scar tissue forms not just on the surface of the skin but through multiple layers of tissue including the fascia, the connective tissue that links the abdominal wall to the pelvic floor. As the scar matures, it can form adhesions, areas where tissue layers stick together rather than gliding freely over each other. These adhesions can create pulling sensations during movement, contribute to the “c-section shelf” of skin above the scar, restrict hip mobility, pull on the bladder producing urgency symptoms, and generate pain with intimacy.

After perineal tears or episiotomy, scar tissue in the perineum can cause dyspareunia (pain with sex), sensitivity or numbness, and restriction of the vaginal opening. All of these are manageable with appropriate scar desensitisation and manual therapy, but only if addressed.

Signs your c-section or perineal scar needs attention:

  • Numbness, hypersensitivity, or itching that has persisted beyond three months.
  • The scar does not move freely in all directions when you attempt to gently shift the skin.
  • A visible ridge or ledge of skin above a c-section scar (the shelf).
  • Pain when wearing waistbands or clothing that sits at scar level.
  • Bladder urgency that seems to be triggered by scar tightness rather than bladder fullness.

Scar massage can begin at the c-section incision at six weeks postpartum, once it is fully closed and free of infection signs. Perineal scar massage for episiotomy or tear repair can generally begin from around six weeks with guidance from a midwife or pelvic floor physiotherapist.


Postpartum Recovery Mistake 9: Dismissing Painful Sex as “Just Normal” After Birth

Dyspareunia, painful sex, affects more than a third of postpartum women according to research published in The Lancet Global Health. And yet in clinical practice, women consistently report being told that some discomfort with sex after birth is expected, that it will improve with time, and that patience is the primary prescription.

That advice, while offered with kindness, contributes to one of the most quietly damaging postpartum recovery mistakes: normalising a symptom that has effective treatments available and that, if left unaddressed, can compound in intensity, erode intimacy, and contribute to postpartum anxiety and depression.

Painful sex after childbirth can arise from multiple causes. In the early months, low oestrogen levels due to breastfeeding cause vaginal dryness and thinning of the vaginal walls, a condition known as genitourinary syndrome of menopause or, when occurring postpartum, sometimes called lactational atrophy. Perineal scarring from tears or episiotomy can produce localised pain at the vaginal opening. Pelvic floor hypertonicity, where the muscles are tight and unable to release properly, is a common cause of deep pain during penetration. Vaginismus, the involuntary contraction of the vaginal muscles, can develop in response to a traumatic birth experience.

All of these conditions are treatable. A pelvic floor physiotherapist can differentiate between them, guide you through appropriate exercises or manual therapy, and recommend vaginal moisturisers, lubricants, or topical oestrogen where appropriate. Your intimacy matters. Your comfort in your own body matters. “Just give it time” is not a treatment plan.


Postpartum Recovery Mistake 10: Lifting Heavy Objects Without Proper Core Activation

New mothers lift constantly. The baby, the car seat, the pram, the nappy bag that somehow weighs more than a small piece of luggage. And in the early weeks and months of postpartum recovery, the way those lifts are executed matters enormously, because lifting with a disengaged core or held breath places significant and repetitive load on healing tissue.

The Valsalva manoeuvre, holding the breath while exerting force, is a common natural pattern during heavy lifting. In a recovered core, it produces a brief and manageable spike in intra-abdominal pressure. In a postpartum core where the deep stabilising muscles are still reconnecting after surgery or delivery, that same pressure spike can overwhelm the pelvic floor, contribute to or worsen diastasis recti, and place stress on the pelvic organs.

Physiotherapists refer to the correct lifting technique in the postpartum period as “exhale on exertion.” On the breath out, the deep core and pelvic floor naturally coordinate to manage pressure. Initiating a lift as you exhale harnesses that natural coordination rather than working against it.

Safe lifting technique for postpartum recovery:

  • Bring the object close to your body before lifting.
  • Take a diaphragmatic breath in to prepare.
  • As you breathe out slowly, gently engage the pelvic floor (a subtle inward lift) and begin the movement.
  • Avoid holding your breath at any point during the lift.
  • Avoid twisting under load, particularly in the early weeks post c-section.

This technique takes about three days to feel natural and a lifetime to make instinctive. Starting now matters.


Postpartum Recovery Mistake 11: Isolating Yourself During Postpartum Recovery

Social isolation in the postpartum period is both extremely common and dramatically underrecognised as a health risk. Research consistently identifies lack of social support as one of the primary risk factors for postpartum depression, and qualitative studies of new mothers frequently highlight loneliness as one of the most unexpected and distressing aspects of early motherhood.

The particular cruelty of postpartum isolation is how invisible it is from the outside. You are surrounded by people congratulating you. You are managing the enormous logistics of keeping a new person alive. You may have a partner or family members present. And yet the specific kind of adult connection, the conversation that is not about feeding schedules and sleep regressions and whether you have tried swaddling, is deeply absent.

This matters clinically, not just emotionally. Chronic loneliness activates the same stress-response pathways as physical pain. It elevates cortisol, suppresses immune function, and impairs the quality of sleep. When you add those physiological effects to the already significant physical demands of postpartum recovery, isolation becomes a compounding factor that slows healing on multiple levels.

Postnatal groups, whether in-person or online, have measurable benefits for maternal mental health. Asking for help, receiving visitors, leaving the house even briefly, maintaining at least one relationship that existed before the baby arrived, all of these are health interventions in the truest sense.


Postpartum Recovery Mistake 12: Not Advocating for Yourself with Healthcare Providers

The final postpartum recovery mistake on this list is perhaps the most systemic and the hardest to address, because it requires pushing back against a healthcare culture that has historically under-investigated, under-treated, and sometimes outright dismissed the postpartum health concerns of women.

Studies have found repeatedly that women do not feel adequately prepared for the postpartum experience and that their concerns are frequently minimised by clinicians. Focus group research from a major urban teaching hospital found that nearly 80 percent of early postpartum mothers reported pain, and nearly a third reported urinary incontinence, yet mothers consistently described feeling unprepared for these symptoms and unsupported by providers when raising them.

Postpartum symptoms that deserve a medical conversation, not patient endurance, include persistent leaking of any kind, pain with sex beyond three to six months postpartum, symptoms of pelvic organ prolapse including heaviness, pressure, or a visible bulge at the vaginal opening, c-section scar pain or restriction beyond three months, ongoing diastasis recti that is not improving with appropriate exercise, and any mood symptoms that are affecting your daily functioning or sense of self.

According to comprehensive guidance on postpartum care from the Mayo Clinic, the postpartum period deserves the same attention to detail as pregnancy itself. You are not being dramatic. You are not being a bad patient. You are advocating for the basic right to recovery, and that is exactly what a system that actually cared for mothers would support.

How to advocate for yourself effectively:

  • Write symptoms down before your appointment. The brain that has been awake since 2am cannot always recall details under pressure.
  • Use specific language: “I leak urine when I exercise,” not “things feel a bit off.”
  • Ask directly: “Should I be referred to a pelvic floor physiotherapist?”
  • If your concern is dismissed without examination, request a second opinion.
  • Remember that your symptoms may appear after the traditional postpartum window. Bring them up anyway.

The Postpartum Recovery Mistakes Quick-Reference Table

Mistake Primary Risk When It Often Shows Up Easiest First Step
Treating 6-week check as full clearance Premature return to exercise Week 6 to 8 Ask GP for pelvic floor referral
Skipping pelvic floor physiotherapy Incontinence, prolapse, pain with sex Weeks 6 to 52 Book a pelvic floor physio assessment
Crunches and sit-ups too early Worsened diastasis recti, pelvic pressure Weeks 6 to 12 Replace with TrA activation and glute bridges
Running too soon Pelvic floor injury, urinary leakage Weeks 6 to 12 Follow 3-month minimum timeline, symptom-screen first
Missing signs of postpartum depression Prolonged mental health crisis Weeks 1 to 52 Speak with GP, complete Edinburgh Postnatal Depression Scale
Treating sleep deprivation as inevitable Impaired healing, elevated injury risk Weeks 1 to 12 Ask for help at night. Accept it without guilt.
Undereating during recovery Nutrient depletion, slowed healing, mood dysregulation Weeks 1 to 24 Focus on protein, iron, calcium, and DHA daily
Ignoring scar tissue management Adhesions, bladder urgency, pain with sex Weeks 6 to 52 Begin gentle scar massage at 6 weeks
Normalising painful sex Worsening dyspareunia, intimacy loss, anxiety Weeks 6 to 52 See a pelvic floor physiotherapist, use lubricant
Lifting without core activation Pelvic floor overload, DRA worsening Weeks 1 to 12 Practise exhale-on-exertion for every lift
Social isolation Postpartum depression risk, impaired healing Weeks 1 to 24 Join one postnatal group, digital or in-person
Not advocating for yourself Untreated conditions becoming chronic Weeks 6 to 52 Prepare a symptom list before every medical appointment

What the Research Actually Tells Us About Postpartum Recovery in 2025

The evidence base around postpartum recovery has advanced significantly in recent years, even as the translation of that evidence into standard clinical practice has lagged behind. A few key findings are worth summarising because they reframe how postpartum recovery mistakes are understood clinically.

First, the connection between physical and mental health in the postpartum period is far more direct than most care pathways acknowledge. Pelvic floor dysfunction, specifically urinary incontinence and persistent pain, is now recognised as an independent risk factor for postpartum depression. Women who are leaking, hurting, or struggling sexually are at meaningfully higher risk of depression, and treating one often helps the other.

Second, the World Health Organization’s 2023 review of postpartum health identified a striking gap in guideline quality: for 40 percent of the 32 priority postpartum conditions analysed, no high-quality clinical guidelines exist. This means that the care women receive is inconsistent not due to negligence alone but due to a genuine absence of evidence-based protocols. That is not an excuse for the gaps, but it is a context for why they exist.

Third, the postpartum period is now understood clinically not as a six-to-eight-week recovery window but as a twelve-month minimum rehabilitation period, with some conditions, particularly pelvic floor dysfunction and emotional recovery from traumatic birth, requiring even longer timelines. The “fourth trimester” concept that has gained traction in maternal health advocacy reflects this understanding, and it is backed by current evidence.


Conclusion: Your Recovery Deserves as Much Attention as Your Pregnancy Did

There is a quiet cultural bargain that new mothers are asked to accept: that the focused attention, the advice, the appointments, and the care that surrounded pregnancy should now be transferred entirely to the baby, and that the mother, having completed her biological task, will more or less reassemble herself in the background.

That bargain is a bad one. And the twelve postpartum recovery mistakes in this article are, in large part, its consequences.

You did something physiologically extraordinary. Your body grew a human being, sustained it for nine months, and then either expelled it through a process of intense muscular effort or was surgically opened to allow its delivery. The idea that six weeks is an adequate recovery window for that process is not medicine. It is a cultural myth dressed up in medical language.

Recovery from childbirth is not a sprint toward your pre-baby body. It is a year-long, layered process of physical and emotional reintegration that requires rest, nourishment, appropriate movement, professional support, and the particular grace of allowing yourself to need those things without apologising for it.

The women who recover well from postpartum challenges are not the ones who pushed hardest or rested least. They are the ones who paid attention to their bodies, asked for help early, and refused to normalise symptoms that deserved treatment. That approach is available to you. Starting now.


Your Next Steps

If this article helped you recognise a mistake you have been making, the best thing you can do is share it with another new mother who might not yet know what she does not know.

Share this with a new mama in your life. You might be handing her the piece of information that changes how she recovers.


Drop a comment below: Which of these postpartum recovery mistakes have you experienced? What do you wish someone had told you before or after your birth? Your story might be exactly what another new mother needs to read today.


This article is intended for informational purposes only and does not constitute medical advice. Every woman’s postpartum recovery is unique. Please consult your GP, midwife, or a qualified pelvic floor physiotherapist before making changes to your postpartum care or exercise plan.

6 Critical C-Section Recovery Tips Doctors Say Can Speed Up Healing After Birth

Nobody hands you a manual when they wheel you out of the operating theatre. One minute you are lying flat on a table with a curtain at your chest and a brand-new baby being held up over it, and the next you are expected to figure out how to sneeze without crying.

If you just had a cesarean section, or if you are preparing for one, this post is for you. Not the vague “rest and take it easy” advice that every pamphlet seems to offer, but the specific, evidence-based c-section recovery tips that doctors actually use with their own patients and that pelvic health physiotherapists wish more new mothers knew.


The Part Most Women Are Not Told About C-Section Recovery

A cesarean section is, by any clinical measure, major abdominal surgery. Seven layers of tissue are opened during the procedure: skin, fat, the anterior abdominal fascia, the rectus abdominis muscles (which are separated, not cut), the peritoneum, the uterine muscle, and the amniotic sac. All of those layers have to heal in the right sequence for your recovery to go smoothly.

And yet, for many women, the discharge summary is thin. The six-week postpartum visit, if it happens at all, is brief. The gap between “what you need to know” and “what you were actually told” can be enormous.

The good news is that your body already knows how to heal. It has been doing exactly that since the moment your surgery ended. Your job is to support that process, not fight it. These c-section recovery tips are designed to help you do precisely that, whether you are three days postpartum, three weeks out, or even three years down the line wondering why your scar still pulls when you twist.

According to current obstetric guidance, it generally takes about six to eight weeks to fully recover from a c-section. But full healing at the deeper tissue level, including the scar layers and the pelvic floor, takes considerably longer. Understanding that timeline is the first act of kindness you can offer yourself.

Let us get into it.


C-Section Recovery Tip 1: Manage Your Pain Proactively, Not Reactively

Here is something that surprises a lot of new mothers: staying ahead of the pain is not a sign of weakness. It is a medical strategy.

Many women try to tough it out between doses of pain medication, either because they are worried about their milk supply, concerned about becoming dependent on medication, or simply conditioned to believe that suffering through discomfort is the more virtuous option. None of that is accurate, and all of it slows your c-section recovery.

Why Staying Ahead of Pain Matters for Healing

When you are in pain, your body tenses. Tensing around an abdominal incision creates guarding, which is a natural muscular response where your core and surrounding muscles contract to protect the wound. That protective tension, while well-intentioned, reduces blood flow to the healing tissue, limits your ability to breathe deeply, and makes gentle movement (which your recovery depends on) feel impossible.

Taking your pain relief on schedule, before the previous dose has fully worn off, keeps your pain at a manageable level so that your body can actually relax and heal. Talk to your doctor or midwife about what is appropriate for you, including whether you are breastfeeding.

c-section

Common doctor-approved post-c-section pain management options include:

  • Ibuprofen and acetaminophen (paracetamol) in rotation. These two medications work through different mechanisms and can be safely alternated, providing more consistent coverage than either one alone. Always confirm timing and dosing with your care provider.
  • Prescription pain relief. In the first few days especially, your doctor may prescribe something stronger. Use it as directed rather than saving it “for when it gets really bad.” It is already really bad. That is what it is for.
  • Heat therapy. A warm (not hot) heating pad placed low on your abdomen can ease muscular aching around the incision site. Keep it on a low setting and never apply directly over the wound.
  • Abdominal support. A soft postpartum belly band or high-waisted support underwear can reduce the sensation of your abdomen pulling with every movement. Many women describe this as a game-changer in those first ten days.

A useful practical tip that almost nobody mentions: when you need to cough, sneeze, or laugh, press a pillow or folded blanket firmly against your lower abdomen first. This is called “splinting” the incision, and it dramatically reduces the sharp pain that comes with those involuntary abdominal movements. You will use this technique more than you expect to.


C-Section Recovery Tip 2: Move Early, But Move Gently and Deliberately

The worst thing you can do after a c-section is stay completely still. The second worst thing you can do is move too aggressively, too soon. The sweet spot between those two extremes is where your fastest, safest recovery lives.

Doctors consistently recommend getting up and walking as soon as it is safely possible after surgery, often within 12 to 24 hours if your vital signs are stable. This is not cruelty. Early, gentle movement significantly reduces the risk of deep vein thrombosis (DVT), which is a blood clot that can form in the leg veins when circulation is sluggish. DVT is one of the more serious post-surgical complications, and movement is one of the most effective ways to prevent it.

How to Move Safely in the Early Weeks

Early movement does not mean laps around the maternity ward. It means sitting up slowly, swinging your legs to the floor, standing upright (resist the urge to hunch forward, even though standing straight feels counterintuitive when your incision is sore), and taking short, slow walks.

Here is a timeline that reflects what most doctors recommend for physical activity after a c-section:

Days 1 to 3: Sit up, stand, and take short supported walks to the bathroom and back. Focus on slow, deliberate breathing and gentle movement only.

Days 4 to 14: Gradually increase walking distance each day, based on how you feel. Short walks around the house, then around the block. Nothing that causes pain or pulling at the incision site.

Weeks 3 to 6: Continue gentle walking. Introduce very gentle mobility work, like slow ankle circles while seated, shoulder rolls, and supported side-lying stretches. No lifting beyond your baby’s weight.

Weeks 6 to 12 (with medical clearance): Begin carefully guided core rehabilitation, ideally with a pelvic floor physiotherapist. Low-impact movement like gentle yoga, swimming, and walking can be reintroduced based on your individual progress.

Beyond 12 weeks: Gradual return to higher-impact activity, informed by your body’s signals and your physiotherapist’s assessment.

The key word in all of this is gradual. As one OB-GYN at Hackensack Meridian Health notes, the body needs a full six to eight weeks to fully recover from a c-section, and patience with yourself during that time is not optional. It is part of the treatment.


C-Section Recovery Tip 3: Take Incision Care Seriously Every Single Day

Your c-section incision is doing something extraordinary every minute of every day after surgery. It is rebuilding seven layers of tissue simultaneously. That process is delicate, and the care you give the wound in the first weeks directly affects not just whether it heals, but how well it heals long-term.

This is one of the c-section recovery tips that tends to get glossed over in the rush of new motherhood, because it requires you to actually look at your scar. Many women find this uncomfortable. That is completely understandable, and you can work around it gently. But caring for the incision area, even from a distance at first, is genuinely important.

Daily Incision Care: The Basics

The foundational principles of c-section incision care are simple:

  • Keep it clean. Wash the area gently with warm water and mild, fragrance-free soap during your daily shower. Let water run over it rather than scrubbing. Pat, do not rub, dry with a clean towel afterward.
  • Keep it dry between washes. Moisture trapped against the incision, especially if your abdomen folds over the scar area, creates a perfect environment for bacterial growth and infection. If this is an issue for you, placing a clean cotton cloth or gauze pad between your skin folds can help.
  • Watch for infection signs. These are not subtle when they appear. Call your doctor promptly if you notice redness spreading from the wound edges, swelling that is increasing rather than decreasing, warmth or hardness around the incision, any discharge that is yellow or green or has an odor, fever above 100.4 degrees Fahrenheit, or pain that is worsening rather than improving over time.
  • Avoid submerging the wound. Baths, swimming pools, and hot tubs should wait until your doctor explicitly clears you. Shower water running over the wound is fine; immersion is not.
  • Skip creams and ointments until cleared. Well-meaning friends will tell you to start rubbing coconut oil on the scar immediately. Hold off until the incision is fully closed and your doctor gives the go-ahead. Applying anything to an incompletely healed wound can introduce bacteria or interfere with normal tissue closure.

Your incision will likely look and feel different at various stages of healing. Some tightness and itchiness as the skin heals is normal and is actually a sign of active tissue repair. Some numbness around the scar is also common, as the nerves that were disrupted during surgery slowly regenerate. Both of these sensations typically improve with time and scar massage (more on that in the next tip).


C-Section Recovery Tip 4: Start Scar Massage as Soon as You Are Cleared

This is arguably the most underutilized of all c-section recovery tips, and pelvic health physiotherapists have been talking about it for years. C-section scar massage, done correctly and at the right time, can prevent complications that would otherwise quietly affect your body for months or even decades.

Here is why. When the body heals a surgical wound, it forms scar tissue. Scar tissue is perfectly functional at the surface level, but it is laid down in a somewhat random, cross-hatched pattern rather than the organized, parallel pattern of normal tissue. When left unaddressed, this scar tissue can adhere to the deeper layers beneath it, including the fascia, muscle, and in some cases the bladder or bowel. These adhesions can cause pelvic pain, lower back pain, urinary urgency or frequency, painful intercourse, constipation, and the characteristic “cesarean shelf” where tissue puffs out above the scar line.

According to pelvic physiotherapy specialists, beyond the sensitivity or pain that can develop along your scar, there are several more unsuspecting symptoms that can be caused by your cesarean scar, including pain with sex (typically pain with deeper penetration), lower back or pelvic pain, urinary urgency or increased frequency of urination, and impaired digestion or constipation.

When and How to Begin Scar Massage

The timing matters here and should always be guided by your care provider. A general framework used by many pelvic physiotherapists looks like this:

You have about 25% tensile strength built back up along your incision at 2 to 3 weeks postpartum, about 50% tensile strength at 6 weeks, and about 75% tensile strength at 12 weeks. That means gentle, indirect work can begin earlier than many people realize, while direct pressure over the scar itself should wait until the wound is fully closed and your doctor has cleared you.

Weeks 2 to 4 (indirect massage): Using clean, dry fingers, apply very light pressure in the skin above and below the scar, not directly on it. Use small circular motions or gentle push-and-release pressure. The goal is to stimulate circulation and prevent adhesions from anchoring before they have a chance to set.

Weeks 6 to 8 (direct gentle massage, with clearance): Begin moving the scar itself. Place two or three fingers directly on the healed incision and move it gently up, down, and side to side. You are not trying to force anything. You are asking the tissue to move in all directions and noticing where it feels restricted or stuck.

Weeks 8 to 12 and beyond: Increase firmness progressively, addressing the superficial, middle, and deep tissue layers over time. A pelvic physiotherapist can guide this progression and use additional techniques like myofascial release or cupping to address deeper adhesions.

Use a small amount of lubricant like vitamin E oil, coconut oil, or an unscented massage cream to reduce friction. Spend about 3 to 5 minutes on scar massage once or twice daily when in the active stages of healing.

One thing worth knowing: it is genuinely never too late to start. Pelvic physiotherapists regularly work with women who are years or even decades post-cesarean and see meaningful improvement in pain, mobility, and function once scar tissue work begins.


C-Section Recovery Tip 5: Rebuild Your Pelvic Floor, Because a C-Section Affects It Too

This surprises almost every woman who hears it for the first time. You had a cesarean. The baby did not come through the vaginal canal. Surely your pelvic floor got off scot-free?

It did not. Not even close.

During pregnancy, your pelvic floor carries the weight of a growing uterus for nine months. The hormonal changes of pregnancy, particularly the increase in relaxin, soften the connective tissue throughout your pelvis. Your bladder, bowel, and uterus are all supported by the pelvic floor, and all of that is true regardless of how you give birth.

On top of that, the scar tissue from a c-section can adhere downward into the pelvis, affecting the function of the muscles and organs below it. The result is that pelvic floor dysfunction after c-section is genuinely common and genuinely treatable, but only if you know to look for it.

Symptoms of Pelvic Floor Dysfunction After C-Section

Watch for any of the following in your postpartum recovery:

  • Leaking urine when you cough, sneeze, laugh, or jump (stress incontinence)
  • A sensation of urgency where you need to get to the bathroom immediately (urge incontinence)
  • A feeling of heaviness or pressure in the pelvic area, as though something is falling down
  • Pain or discomfort during intercourse when you return to sexual activity
  • Difficulty fully emptying your bladder or bowel
  • Lower back or hip pain that does not improve with rest

These symptoms are common. They are not inevitable, and they are not something you simply have to accept as a permanent fixture of post-baby life. Pelvic floor physiotherapy is specifically designed to address all of them.

Where to Start: Gentle Core and Pelvic Floor Reconnection

In the first six weeks, the most important thing is not strengthening, but reconnecting. Your brain and your deep abdominal muscles may have lost some of their communication during surgery and recovery, and reestablishing that link gently is the foundation of everything that follows.

Diaphragmatic breathing is the single best starting point. Lie on your back with your knees bent. Place one hand on your lower ribcage and one on your lower abdomen. Breathe in slowly, feeling your ribcage expand sideways and your lower belly rise slightly. Breathe out, feeling everything gently descend. This activates your transverse abdominis, the deepest layer of your core, without putting any pressure on your healing incision.

Gentle pelvic floor contractions (Kegel exercises) can be started earlier than many women expect, often within the first few days after surgery, unless your doctor advises otherwise. A Kegel involves gently lifting and squeezing the pelvic floor muscles as though you are stopping the flow of urine. Hold for 3 to 5 seconds, then fully release. That release is just as important as the contraction.

For a comprehensive and authoritative guide to postpartum pelvic floor rehabilitation after cesarean birth, the Mayo Clinic offers evidence-based guidance on recovery milestones and when to seek specialist care.

The word “rehabilitation” here is important. This is not about doing a hundred kegels a day and hoping for the best. It is about restoring function across the whole system: breathing, posture, core activation, and pelvic floor coordination, in a progressive and sensible order. A pelvic floor physiotherapist can assess your individual situation and build a program specifically for you.


C-Section Recovery Tip 6: Feed Your Healing Body With Intention

Your body is rebuilding tissue at a cellular level. That process is fueled by what you eat and drink. Nutrition after c-section is one of those c-section recovery tips that sounds obvious but is routinely deprioritized by new mothers who are focused on feeding their baby and have no time or energy left to think about feeding themselves.

But here is the reality. The nutrients that support wound healing, collagen synthesis, immune function, and tissue repair are the same ones most likely to be depleted by pregnancy, labor, surgery, and breastfeeding. Replenishing them is not a luxury. It is a clinical priority.

The Nutrients That Drive C-Section Healing

Protein is the most critical macronutrient for tissue repair. Collagen, the main structural protein in your wound, requires adequate dietary protein to be synthesized. Aim for protein-rich foods at every meal: eggs, chicken, fish, legumes, Greek yogurt, and nuts are all good options. If eating full meals is challenging in the early days (and it often is), protein smoothies or shakes can fill the gap.

Vitamin C is essential for collagen formation and immune function. It is also one of the key antioxidants that supports the inflammatory phase of wound healing. Citrus fruits, bell peppers, kiwi, strawberries, and broccoli are all excellent sources.

Zinc plays a direct role in wound repair and immune response. Meat, shellfish, pumpkin seeds, and legumes are good sources.

Iron is particularly important for women who experienced any significant blood loss during surgery. Low iron translates to fatigue, reduced immune function, and slower overall healing. If your doctor has not checked your iron levels postpartum, it is worth asking.

Fiber and fluids deserve special mention because constipation after c-section is genuinely one of the most uncomfortable parts of the recovery experience. The combination of pain medications (which slow gut motility), reduced movement, and altered abdominal muscle function can make bowel movements difficult and even painful in the first weeks. Straining also puts pressure directly on your healing incision.

Drink at least 8 to 10 glasses of water daily, more if you are breastfeeding. Eat plenty of vegetables, fruits, whole grains, and legumes. Ask your doctor about a stool softener in the first one to two weeks if constipation becomes a problem.

The Case for Continuing Your Prenatal Supplement

Most postpartum women stop taking their prenatal vitamin at some point in the first weeks after delivery, particularly if they are not breastfeeding. But the micronutrient demands of healing tissue and postpartum recovery are real. Continuing a good-quality prenatal or postnatal multivitamin for at least the first three months post-surgery is something many doctors recommend, as it helps fill nutritional gaps while your diet and energy levels are still unpredictable.

Omega-3 fatty acids, found in fatty fish, walnuts, and flaxseed, or in supplement form, also support the anti-inflammatory phase of healing and have been associated with improved mood and reduced postpartum depression risk.

For additional evidence-based guidance on postpartum nutrition and recovery, the NHS’s comprehensive cesarean section recovery resource covers nutrition, activity, and warning signs in one reliable, updated reference.


Bonus Tip: Prioritize Your Mental and Emotional Recovery With the Same Seriousness as the Physical

No article on c-section recovery tips would be complete without addressing this. And yet, the emotional dimension of cesarean recovery is where many women feel most abandoned by the healthcare system.

For some women, a c-section is the birth they planned and hoped for. For others, it was an emergency. For many, it falls somewhere in between: an unplanned cesarean after a long labor, a decision made in a few fraught minutes, a birth that felt more like something that happened to them than something they did. All of those experiences are valid, and all of them can carry complex emotional weight.

The “baby blues” are common in the first two weeks postpartum and are caused by the rapid hormonal shift that follows delivery. They typically resolve on their own. Postpartum depression and postpartum anxiety are different: they are more persistent, more disruptive, and affect roughly 15% of all new mothers regardless of delivery method.

If you feel persistently low, disconnected, hopeless, unable to bond with your baby, or if you experience intrusive thoughts or significant anxiety, please speak to your doctor. These are not character flaws. They are recognized medical conditions with effective treatments.

Some women also experience a specific kind of grief around a c-section birth, particularly if it differed significantly from what they had hoped or planned for. That grief is real and deserves space. Seeking out a therapist, a counselor, a birth debrief service (where available), or even a peer support group for c-section mothers can make a meaningful difference in your overall recovery.

Physical and emotional healing are not separate tracks. They are deeply intertwined. Taking care of your mental health is one of the most practical c-section recovery tips on this entire list.


C-Section Recovery Timeline: At a Glance

The table below summarizes the key stages of c-section healing and what to focus on at each phase. Use it as a guide rather than a strict prescription, since every body heals differently and your doctor’s specific advice always takes priority.

Recovery Phase Timeline Focus Areas What to Avoid
Immediate postpartum Days 1 to 3 Pain management, short walks, diaphragmatic breathing, incision monitoring Lifting, straining, driving, removing dressings without guidance
Early recovery Days 4 to 14 Gradual walking increase, incision care, hydration, gentle Kegels, rest Lifting anything heavier than baby, housework, stairs beyond necessary
Active healing Weeks 2 to 6 Indirect scar massage (from Week 2), nutrition optimization, gentle mobility, posture work High-impact exercise, heavy lifting, swimming, sexual activity (unless cleared)
Rehabilitation phase Weeks 6 to 12 Direct scar massage (with clearance), pelvic floor physiotherapy, core reconnection exercises Running, heavy lifting, intense abdominal exercises without professional guidance
Strengthening phase Weeks 12 and beyond Progressive return to exercise, deeper scar mobilization, addressing any residual pelvic floor symptoms Pushing through pain; ignoring persistent symptoms like leakage or pelvic heaviness
Long-term maintenance 6 months and beyond Monitoring scar mobility and sensitivity, maintaining pelvic floor strength, addressing any lingering symptoms with a specialist Assuming symptoms are permanent and untreatable, especially pain or incontinence

When to Call Your Doctor: Non-Negotiable Warning Signs

These c-section recovery tips are designed to support a normal healing trajectory. But some symptoms fall outside that trajectory and require prompt medical attention.

Contact your doctor immediately or go to the emergency department if you experience any of the following:

  • Bright red vaginal bleeding that soaks through more than one pad per hour
  • Passage of blood clots larger than a golf ball
  • Fever above 100.4 degrees Fahrenheit (38 degrees Celsius)
  • Increasing, rather than decreasing, pain at the incision site
  • Redness, swelling, hardness, or discharge at the wound
  • Chest pain, difficulty breathing, or a feeling of tightness in the chest
  • Pain, swelling, or redness in one leg, which can signal a blood clot
  • Severe headache, visual changes, or right upper abdominal pain (possible signs of postpartum preeclampsia)
  • Thoughts of harming yourself or your baby

Trust your instincts here. You know your body. If something feels wrong, it is worth a call.


The Reality of C-Section Recovery That Nobody Romanticizes

Here is something worth saying plainly: c-section recovery is hard. It is hard in ways that do not always make the highlight reel. You are recovering from major surgery while simultaneously running on almost no sleep, learning to feed a tiny human, managing every emotion on the spectrum, and being expected to look radiantly happy about all of it.

The six c-section recovery tips in this post are not magic. They will not make the first two weeks feel like a spa break. But they will help your body heal more efficiently, reduce the risk of complications, and give you a foundation of physical health that supports everything else in your new life.

The most important thing, honestly, is to ask for help. Not eventually, not when you really need it. Now. Let someone else do the laundry. Let someone else make the meals. Accept the casserole. Use the pain medication. Sleep when you can.

Your baby does not need a hero. Your baby needs a healthy mother. And a healthy mother, after c-section surgery, is one who rests, receives support, and trusts her body’s remarkable capacity to heal.

You already did the hard part. Now let the healing begin.


Conclusion

C-section recovery is a marathon, not a sprint, and most women run it while chronically undersupported. The six c-section recovery tips covered here, proactive pain management, early and gentle movement, meticulous incision care, scar massage from the right time and in the right way, intentional pelvic floor rehabilitation, and nutrition that actually supports tissue healing, are not extras. They are the scaffolding your recovery is built on.

None of them require expensive equipment. Most of them just require information, which is exactly what you now have. Share this with every woman you know who has had or is planning a c-section. This is the guidance that should come standard. Since it often does not, let us pass it along ourselves.


CTA

Did this article help you? Share it with a new mom who deserves to know this. She might be three days postpartum, scrolling in the dark, looking for exactly what you just read.

Read Next:

  • How to Safely Return to Exercise After C-Section: A Physiotherapist’s Guide
  • Diastasis Recti After Cesarean: What It Is, How to Check, and How to Fix It
  • Pelvic Floor Therapy: What Happens in a Session and Why Every Postpartum Woman Should Go

Have a question about your own recovery? Drop it in the comments below. Every question is welcome here, no matter how small.


This article is for informational purposes only and does not substitute for personalized medical advice. Always consult your obstetrician, midwife, or pelvic floor physiotherapist regarding your individual recovery.

5 Powerful IVF Treatment Questions Every Woman Must Ask Before Choosing a Fertility Specialist

You finally made the appointment. Your hands are probably a little shaky, your browser history is a maze of fertility forums, and you have seventeen tabs open about IVF success rates. That feels exactly right, because this decision is one of the most important ones you will ever make for your body and your future family.

But here is what nobody tells you before that first consultation: the questions you ask matter just as much as the specialist you choose. Walk in without the right IVF treatment questions, and you could leave with a glossy brochure, a scheduled blood draw, and almost no real understanding of what you just signed up for. Walk in prepared, and you become an informed partner in your own care rather than a passive passenger on a very expensive, very emotional journey.

This guide gives you five powerful IVF treatment questions to ask before you commit to any fertility specialist. Each question comes with context, follow-up prompts, and the science behind why it matters. Think of it as your pre-game locker room talk, minus the sweaty towel snap.


Why Asking the Right IVF Treatment Questions Changes Everything

Most women walk into a first IVF consultation feeling like they are already behind. The doctor has a medical degree, years of experience, and a confident handshake. You have a printed-out article you found at 2 a.m. That imbalance can make it tempting to just nod along and trust the process.

But reproductive medicine is not one-size-fits-all. Protocols differ between clinics. Lab quality varies enormously. Success rates for the same age group can swing from below 10% to over 60% depending on which clinic you choose, according to data published by the Society for Assisted Reproductive Technology. That is not a minor statistical blip. That is the difference between your dream and a very expensive heartbreak.

Asking informed IVF treatment questions before you commit does something else too. It tells you immediately what kind of communicator your potential doctor is. A specialist who gives you clear, direct, unhurried answers to your questions? That is the kind of partner you want managing one of the most vulnerable experiences of your life. A doctor who rushes, deflects, or uses jargon without explanation? That is equally informative, just in the other direction.

The five questions below are designed to give you both types of insight: clinical clarity and a read on the human being across the table from you.

IVF Treatment


IVF Treatment Question 1: What Are Your Live Birth Rates for My Specific Age Group?

This is the single most important IVF treatment question you can ask, and it is also the one most women either forget to ask or feel too intimidated to push on. Do not let that happen to you.

Success rates in reproductive medicine are deceptively tricky to interpret. A clinic might advertise a “60% success rate,” but if that figure refers to positive pregnancy tests rather than live births, it is essentially measuring hope, not outcomes. A positive pregnancy test that ends in miscarriage six weeks later is not the same as bringing a healthy baby home.

What the Numbers Actually Mean

The industry standard metric is live birth rate per embryo transfer. This is the number that tells you how many women who transferred an embryo at that clinic actually delivered a living baby. It is published annually by both the Society for Assisted Reproductive Technology (SART) and the Centers for Disease Control and Prevention (CDC), and it is broken down by age group.

Here is why age matters so much in this context. IVF success rates drop significantly with age. Under 35, many clinics report about 40 to 50 percent live births per transfer. Between ages 35 and 37, success rates typically fall to around 30 to 35 percent. For women aged 38 to 40, the chance of a live birth is in the 20 to 25 percent range. After age 40, rates often drop into single digits when using your own eggs.

Those are national averages. Your chosen clinic might perform better, or worse. That is exactly why you need to ask.

The Follow-Up Questions That Sharpen the Answer

When a specialist gives you a success rate number, press a little further. Ask:

  • “Is that figure based on live births or positive pregnancy tests?”
  • “Is that per egg retrieval, per cycle started, or per embryo transfer?”
  • “Does that figure reflect patients who share my specific diagnosis and age?”
  • “Where can I independently verify this data on the SART or CDC database?”

That last question is important. A clinic with genuine results will point you directly to the public database without hesitation. When researching a fertility clinic, it is worth asking for their recent IVF success rate statistics in writing and then independently checking their numbers on the CDC or SART reports. If a clinic refuses or makes excuses, that is a strong signal to look elsewhere.

Why “Per Cycle Started” Can Be Misleading

Some clinics report success rates “per cycle started,” which sounds comprehensive but actually includes cancelled cycles in the denominator. If a clinic frequently cancels cycles early because of poor ovarian response, their per-cycle-started rate looks lower than it should. Conversely, some clinics cherry-pick easier cases to keep their statistics high.

The honest answer to this IVF treatment question sounds something like: “For women your age and diagnosis, our live birth rate per embryo transfer is X%, based on data reported to SART for the most recent reporting period.” Anything vaguer than that deserves a follow-up.


IVF Treatment Question 2: What Diagnostic Tests Will You Run Before My First Cycle?

Before a single needle, medication, or monitoring appointment happens, a competent fertility specialist should want to understand your body thoroughly. The diagnostic phase is not a formality. It is the foundation on which your entire treatment plan is built, and skipping or skimping on it is one of the most common ways that IVF cycles fail before they even begin.

This IVF treatment question also quietly reveals how thorough and individualized your potential clinic’s approach actually is. A practice that rushes to stimulation without proper baseline testing is essentially guessing. You do not want to pay tens of thousands of dollars for a guess.

The Core Tests to Expect

A responsible pre-cycle workup typically includes:

  • Anti-Mullerian Hormone (AMH) test. This blood test measures your ovarian reserve, giving the doctor an estimate of how many eggs remain available for retrieval. A low AMH does not mean pregnancy is impossible, but it does shape how aggressive a stimulation protocol needs to be.
  • Antral Follicle Count (AFC) via ultrasound. This transvaginal ultrasound counts the small resting follicles visible in your ovaries, which correlates with the number of eggs likely to be retrieved in a given cycle.
  • Day 3 hormonal panel. Blood tests on Day 3 of your menstrual cycle measure FSH (follicle-stimulating hormone), LH (luteinizing hormone), and estradiol. Elevated FSH, for instance, can indicate declining ovarian reserve.
  • Hysterosalpingography (HSG) or saline infusion sonography. These tests assess whether your fallopian tubes are open and whether your uterine cavity has any structural issues, like fibroids or polyps, that could interfere with implantation.
  • Infectious disease screening and genetic carrier testing. Depending on your history and family background, these tests identify conditions that could affect your pregnancy or your embryo’s chromosomal health.
  • Semen analysis for your partner. Male factor infertility accounts for roughly half of all infertility cases, and a comprehensive semen analysis is non-negotiable before any treatment decision is made.

The egg retrieval stimulation cycle typically ranges from 10 to 14 days, but each case varies depending on how the patient’s body responds to medications. Your fertility team should examine both you and your partner for any other fertility issues to ensure that IVF is the right choice and to design a protocol that gives you the best possible chance.

Why This Question Protects Your Investment

Diagnostic testing is also where your doctor can catch problems that would cause an IVF cycle to fail for entirely preventable reasons. Undetected uterine polyps, for example, can significantly reduce implantation rates. A low-quality semen sample might point toward the need for ICSI (intracytoplasmic sperm injection), a technique where a single sperm is injected directly into an egg, rather than standard IVF. None of that comes out without thorough testing.

Ask your potential specialist: “Will all of these tests be performed in-house, or are any sent to external labs?” In-house testing is generally faster and better quality-controlled. If certain tests are outsourced, ask which facilities handle them and what the turnaround time looks like.


IVF Treatment Question 3: What Is Your Lab’s Embryology Quality, and Who Runs It?

Here is the IVF treatment question that almost nobody thinks to ask, and it might be the most revealing of all five.

When people think about choosing a fertility specialist, they focus on the doctor. The charisma, the credentials, the bedside manner. All of that matters. But in IVF, the embryology laboratory is equally, if not more, responsible for your outcome. The lab is where your eggs are fertilized, where embryos are cultured and graded, and where frozen embryos are stored. If the lab is subpar, even the most brilliant reproductive endocrinologist cannot compensate for it.

Think of it this way. The doctor is the architect. The embryology lab is the construction crew. A beautiful blueprint does not help if the people building your house do not know what they are doing.

What Strong Embryology Looks Like

When you ask about lab quality, here are the specific things worth exploring:

  • Blastocyst development rate. A high-quality lab should be able to grow a healthy percentage of fertilized eggs to the blastocyst stage, which is Day 5 or Day 6 of embryo development. Blastocysts have higher implantation rates than Day 3 embryos.
  • Fertilization rate. What percentage of retrieved eggs are successfully fertilized? Industry benchmarks hover around 70 to 80% with ICSI.
  • Freeze-thaw survival rate. When embryos are frozen and later thawed for a frozen embryo transfer (FET), what percentage survive the process? A well-run lab should have survival rates above 90%.
  • Time-lapse incubation technology. Some clinics now use time-lapse imaging systems that photograph developing embryos every few minutes without disturbing them. This allows embryologists to select the most viable embryos with greater precision.
  • Laboratory accreditation. Ask whether the lab is accredited by the College of American Pathologists (CAP) or a similar body. Accreditation requires regular external audits and quality controls.

The embryology team plays a huge part in the success of your treatment. Patients should be able to ask about the team’s qualifications, the technology available in the lab, and whether the clinic uses time-lapse imaging to monitor embryo development. These are not pushy questions. They are responsible ones.

The Embryologist Behind the Curtain

Ask specifically: “Who is your lead embryologist, and what is their training?” A board-certified or high-caliber clinical embryologist with years of experience in the lab on any given day is not a small detail. Some larger clinics rotate lab staff, which can introduce variability. Knowing who handles your embryos and how consistently that team is managed gives you an honest picture of the quality control in place.

You can also ask for the clinic’s laboratory benchmark data. This includes fertilization rates, blastocyst conversion rates, and embryo survival after vitrification (flash-freezing). A clinic confident in its lab will share this data willingly.


IVF Treatment Question 4: What Are the True Costs, and What Happens If My First Cycle Fails?

Money conversations make most of us uncomfortable. In a fertility consultation, with hope and vulnerability already filling the room, it can feel almost crass to pivot to line-item costs. But this is absolutely a non-negotiable IVF treatment question, and avoiding it can leave you financially blindsided at the worst possible moment.

IVF is expensive. There is no gentle way around that. In the United States, a single IVF cycle typically costs between $12,000 and $25,000 when you include medications, monitoring, and ancillary procedures. In countries like the UK, Nigeria, and parts of Asia, costs vary enormously by clinic and by whether public healthcare coverage applies. And here is the part that the glossy brochure often glosses over: most people do not succeed on the first try.

According to the most recent national summary data from the Society for Assisted Reproductive Technology, only 26% of IVF patients are successful on the first try. IVF success on the first attempt decreases further for patients who are 35 and older. That statistic is not there to demoralize you. It is there to help you plan realistically.

Breaking Down the Real Cost of IVF

When asking about costs, press for a comprehensive breakdown that includes:

  • Base cycle fee. This covers egg retrieval, fertilization, and one fresh embryo transfer.
  • Medications. Injectable fertility drugs for ovarian stimulation are typically purchased separately and can run anywhere from $3,000 to $7,000 per cycle. Ask whether the clinic has a preferred pharmacy or medication assistance program.
  • Pre-cycle diagnostic testing. Blood work, ultrasounds, and the semen analysis are often billed separately from the treatment itself.
  • Embryo freezing and storage. If you produce more embryos than you transfer in the first cycle, those extras need to be vitrified and stored. Ask about both the initial freezing fee and the annual storage cost.
  • Preimplantation Genetic Testing (PGT). If your doctor recommends PGT-A (testing for chromosomal abnormalities) or PGT-M (testing for specific genetic mutations), this adds $3,000 to $6,000 or more to your bill, depending on the number of embryos tested.
  • Frozen embryo transfer (FET) cycles. If your fresh transfer does not result in a pregnancy, a subsequent FET from your banked embryos has its own fee, typically $3,000 to $5,000.
  • ICSI. If your partner’s sperm requires direct injection for fertilization, this procedure adds a separate cost.

IVF pricing can vary widely. Generally speaking, IVF can cost around $7,500 to $10,000 for the base procedure alone, with additional costs for medications and ancillary services that can bring the total considerably higher. That range reflects base prices at some clinics before add-ons, so always ask for a fully itemized estimate.

The Refund and Multi-Cycle Package Question

Some clinics offer shared-risk or money-back guarantee programs where you pay a flat fee upfront for multiple cycles and receive a refund if no live birth occurs. These programs can be worth exploring, but ask very carefully what the eligibility criteria are. Clinics offering guarantees often screen out patients with poor prognoses first, which means the “guarantee” is partly a reflection of careful patient selection rather than clinical superiority.

Ask: “If my first cycle fails, what does a subsequent frozen embryo transfer cost? What does a second full stimulation cycle cost? Do you offer multi-cycle packages, and what are the exact terms?”

Also ask whether any of your testing or treatment has a chance of being covered by insurance. In some countries and some U.S. states, certain diagnostics and even treatment cycles are covered. Your clinic’s financial counselor should help you navigate this, and if they do not offer this service, that itself is worth noting.


IVF Treatment Question 5: How Will You Personalize My Protocol, and What Happens If Things Go Unexpectedly?

This is the IVF treatment question that separates genuinely patient-centered clinics from high-volume fertility factories. It is also the question most likely to tell you whether your potential specialist sees you as an individual or as a number on a spreadsheet.

IVF is not a single treatment. It is a family of approaches, each with its own stimulation medications, dosing strategies, triggering protocols, and transfer timing. The right protocol depends on your age, your ovarian reserve, your diagnosis, your hormone levels, and sometimes your response to previous cycles. A clinic that uses the exact same protocol for every patient regardless of their unique profile is not practicing individualized medicine. It is practicing convenience.

What Personalized IVF Looks Like

A good specialist will be able to answer this question with specifics. They might explain:

  • Which stimulation protocol they recommend for your profile. Common protocols include long agonist (suppression before stimulation), antagonist (suppression during stimulation), and mini-IVF (lower doses for women with diminished ovarian reserve or those seeking a gentler approach). Each has different indications.
  • How they monitor and adjust during a cycle. A well-run clinic monitors you closely during stimulation with frequent blood tests and ultrasounds, adjusting your medication doses in real time based on your body’s response. Rigid, one-dose-fits-all stimulation is a red flag.
  • Their approach to poor responders and high responders. Some women produce too few follicles despite medication. Others produce too many, risking ovarian hyperstimulation syndrome (OHSS), a potentially serious complication. Ask how the clinic handles both scenarios.
  • Whether they ever recommend a “freeze-all” strategy. In some cases, especially with OHSS risk or a thin uterine lining, it is safer to freeze all embryos from a retrieval and delay the transfer to the following cycle. Ask how and when they make that call.

At some leading clinics, rather than syncing all patients to a shared schedule, the approach is to time each cycle to your natural rhythm and readiness. This individualized approach maximizes success and minimizes stress, so that you are never rushed or delayed due to clinic scheduling but moved forward when your body is ready.

Asking About the Unexpected

Fertility journeys rarely unfold exactly as planned. That is not pessimism. It is biology. Knowing in advance how your potential specialist handles the unexpected gives you a crucial sense of the partnership you are entering.

Ask directly: “If my cycle is cancelled due to poor response, what is the process? If my embryos do not develop to the blastocyst stage, what comes next? If my transfer fails, how do you reassess the plan before the next attempt?”

A strong answer includes a concrete protocol for re-evaluation. This might involve a hysteroscopy to check the uterine cavity, adjustments to the stimulation protocol, consideration of preimplantation genetic testing, or consultation with an immunologist if implantation failure is recurrent. A weak answer is something vague like “we just try again.”

Also ask about communication. Who is your primary point of contact? Can you call or message with questions between appointments? What is the on-call process if you experience worrying symptoms over a weekend during stimulation? The emotional texture of your IVF experience is shaped as much by communication quality as by clinical skill.


Comparison Table: The 5 IVF Treatment Questions at a Glance

Question What It Reveals Red Flag Answer Green Flag Answer
What are your live birth rates for my age group? Clinical outcomes and transparency Vague percentages; avoids SART/CDC verification Specific age-matched data; points to public database
What diagnostic tests will you run before my first cycle? Thoroughness and individualized planning “We just do the basics” or skips partner testing Full panel including AMH, AFC, hormonal profile, semen analysis
What is your lab’s embryology quality? Lab infrastructure and embryo handling Deflects or can’t provide blastocyst/freeze rates Shares benchmark data; describes accreditation and team credentials
What are the true total costs? Financial transparency and integrity Gives only a base fee; no itemized breakdown Full itemized estimate including meds, storage, FET, PGT
How will you personalize my protocol? Patient-centered care vs. assembly-line treatment “We use the same protocol for everyone” Protocol tailored to your AMH, AFC, age, and diagnosis

Bonus Considerations: Questions Worth Asking Once You Have the Big Five Covered

If time allows in your consultation, a few additional IVF treatment questions can round out your assessment:

Do you have a genetic counselor on staff? If you have a family history of genetic conditions, or if PGT is recommended, a genetic counselor is an invaluable resource. Some clinics offer this in-house; others refer out.

What is your policy on the number of embryos transferred? The American Society for Reproductive Medicine (ASRM) guidelines generally recommend single embryo transfer (SET) in most patients under 38 to minimize twin pregnancy risks. A clinic that routinely transfers multiple embryos without strong clinical justification may be chasing success rate optics at the cost of your safety.

What emotional and psychological support do you offer? IVF is genuinely hard. The hormone injections, the waiting, the grief when cycles fail, the complex feelings about embryos that do not develop. Clinics that integrate psychological support, whether through counselors, support groups, or wellness programs, tend to retain patients through difficult stretches and report better patient satisfaction. Ask what resources are available and whether they are included in the cost.

Are you a member of SART or the equivalent body in your country? SART membership means the clinic reports its outcomes to a national database and adheres to quality standards. Not every reputable clinic globally is a SART member, particularly outside the United States, but membership is a meaningful quality signal in the U.S. context.


Understanding IVF Success Rates by Age: A Deeper Look

No discussion of IVF treatment questions would be complete without a honest look at what the age-success relationship actually means, because it comes up in almost every conversation you will have with a fertility specialist.

The major predictor of IVF success is age at the time of egg retrieval. Since women are born with all the eggs they will have in their lifetime, as one ages, the number and quality of those eggs decline. The later a patient is in their reproductive years, the lower the success rate with IVF, including an increased chance of miscarriage, particularly above the age of 40.

This biological reality is not a judgment. It is a framework for making clear-eyed decisions. If you are 34, time is not yet your enemy, but it is also not standing still. If you are 38 or older, understanding that you may need more cycles, a higher number of retrieved eggs, or genetic testing to identify viable embryos gives you a planning foundation, not a verdict.

The most important step you can take is to consult with a reproductive endocrinologist who can perform a full workup, including AMH testing and an ultrasound, to provide a personalized estimate of your success. A good success rate is one that aligns with national averages. If you are 36, an IVF success rate of around 35 to 40 percent per transfer is standard. Always compare your clinic’s internal data against the SART success rates to ensure they are performing at or above the national average.

Donor eggs are worth understanding as part of this conversation too. Donor eggs present a different picture, with success rates holding steady at around 45 to 55 percent per transfer across all recipient ages, because recipient age is not the main driver when donor eggs are used. If you are considering this path, or if your specialist raises it as an option, this is not a defeat. For many women, it is the most direct route to the family they have always imagined.

For authoritative, evidence-based guidance on IVF and assisted reproduction, the Society for Assisted Reproductive Technology (SART) publishes comprehensive patient resources including a predictor tool built on data from over two million IVF cycles nationally.


What to Do After the Consultation

You asked your IVF treatment questions. You took notes (you did take notes, right?). Now what?

First, give yourself 24 to 48 hours before making any decision. The consultation room has a gravity to it. The doctor was warm, the office was beautiful, and you want this so badly that saying yes right now feels like the most natural thing in the world. That urgency is understandable, but a two-day pause costs you nothing and protects you from making a fear-driven decision.

Second, consult more than one clinic if at all possible. This is not disloyalty to a doctor you liked. It is due diligence on a major medical and financial investment. Different clinics will offer different protocols, different pricing structures, and different reads on your individual case. Hearing multiple perspectives makes you a more informed decision-maker.

Third, check the public data. Visit the CDC’s Assisted Reproductive Technology data portal or the SART national summary and look up the clinics you consulted. Compare their reported live birth rates to the national average for your age group. If a clinic’s numbers significantly underperform the national benchmark without a clear explanation (like a specialty in high-risk cases), that is meaningful information.

Fourth, trust your instincts about the relationship. Medicine is a science, but fertility care also involves an enormous amount of human trust. If you left a consultation feeling rushed, dismissed, or like your questions were inconveniences, that feeling matters. You will be vulnerable during this process, and you deserve a team that treats that vulnerability with care.


A Note on Choosing a Fertility Specialist Abroad

For women in regions where IVF costs are prohibitive or wait times are long, medical tourism for fertility treatment is increasingly common. Clinics in Spain, Czech Republic, Cyprus, India, and parts of Southeast Asia offer IVF at a fraction of Western prices, often with strong clinical outcomes.

If you are exploring this route, the same five IVF treatment questions apply with extra emphasis on the lab quality and communication questions. Ask specifically:

  • How will ongoing monitoring be coordinated with a doctor in my home country?
  • Who do I contact if I have a complication after returning home?
  • Does your clinic report outcome data to any international registry?
  • Can you provide patient references or case studies from women in my home country?

Distance adds complexity. It does not make excellent IVF treatment impossible, but it does raise the stakes on doing your homework thoroughly before you board a flight.


Conclusion: Your Questions Are Your Power

The IVF journey is many things at once. It is science and hope and money and time and grief and resilience, often all in the same week. In the middle of all that complexity, asking the right IVF treatment questions is one of the few things entirely within your control.

You are not being difficult when you ask about live birth rates. You are being smart. You are not being suspicious when you ask about lab quality. You are protecting your investment and your body. You are not being naive when you ask about personalized protocols. You are expecting the standard of care you deserve.

The right fertility specialist will not be put off by these questions. They will welcome them. They will answer them clearly, back them up with data, and use them as an opening to understand who you are and what you need. That response, more than any credential or clinic ranking, tells you that you have found someone worth trusting.

So go ahead. Print this out. Write down your follow-up questions. Walk into that consultation room like the informed, powerful woman you already are.

Because the most important question is the one you actually ask out loud.


CTA

Did this help you feel more prepared? Share this post with a friend who is beginning her IVF journey. She deserves to walk into that consultation room armed with exactly the right questions.

Have a question we did not cover? Drop it in the comments below. We read every single one.


This article is for informational purposes only and does not constitute medical advice. Always consult a qualified reproductive endocrinologist or fertility specialist for guidance specific to your individual situation.

8 Shocking Causes of Vaginal Odor Gynecologists Warn About

You’ve noticed something is off, and now you’re deep in a Google search spiral at 11pm, hoping no one can see your screen. We see you, and we’re not here to judge.

The truth is, vaginal odor is one of the most common concerns women bring to their gynecologist, and the causes are far more varied, and sometimes surprising, than most people realize. Some are completely harmless. Others are your body’s polite way of waving a red flag that something needs attention. The tricky part is knowing the difference.

Your vagina is home to a remarkably sophisticated ecosystem. Billions of bacteria, a carefully calibrated pH level, and a self-cleaning mechanism that most laboratories would envy all work together to keep things balanced. When something disrupts that balance, your nose is often the first to know.

This post breaks down the eight causes of vaginal odor that gynecologists most want you to understand. Not to alarm you, but to arm you with knowledge so you can stop guessing, stop reaching for every scented product on the pharmacy shelf, and start actually addressing what’s going on.

vaginal odor


1. Bacterial Vaginosis: The Most Common Cause of Vaginal Odor Women Miss

Bacterial vaginosis, commonly called BV, is the single most frequent reason a gynecologist hears “I’ve noticed a different smell” in the exam room. BV is the most common cause of unpleasant vaginal odor in women aged 15 to 44. Yet despite how widespread it is, many women spend weeks masking the smell with products that make the problem worse.

BV happens when the balance of bacteria inside the vagina tips in the wrong direction. It occurs when there is an imbalance of the bacteria usually present in the vagina. In other words, the “bad” bacteria (anaerobes) are overpowering the “good” bacteria (lactobacilli). The result is a distinct odor that most people describe as fishy, particularly noticeable after sex.

What BV Actually Smells Like

The fishy smell associated with BV has a specific chemical explanation. Trimethylamine is the chemical compound responsible for the distinct aroma of rotting fish and some abnormal vaginal odors. “You get bacterial vaginosis when there’s an overgrowth of anaerobic bacteria in the vagina. And these anaerobic organisms are odorous.”

Alongside the odor, BV typically produces:

  • Thin, watery vaginal discharge that is grayish-white in color
  • Mild itching or burning, especially around the vulva
  • A smell that intensifies after sexual intercourse
  • Occasionally, burning when urinating

Why Women Keep Missing BV

Here is where things get counterproductive. Many women respond to the odor by douching, using feminine washes, or layering scented sprays over the problem. This is exactly the wrong move.

As gynecologist Dr. Lauren Streicher put it, treating vaginal odor with feminine washes is like washing your face and expecting bad breath to go away. BV is caused by an imbalance of bacteria inside the vagina, and feminine washes that line the shelves of pharmacies are worthless for treating it.

BV is treated with antibiotics, typically metronidazole or clindamycin, prescribed by a doctor after a proper diagnosis. It does not resolve on its own in most cases, and untreated BV can increase your risk of contracting sexually transmitted infections. If the smell is fishy and persistent, skip the pharmacy aisle and call your gynecologist.


2. Trichomoniasis: The STI Behind Vaginal Odor That People Rarely Suspect

Most women thinking about sexually transmitted infections are not thinking about their nose first. But trichomoniasis, often called “trich,” is a parasitic STI with a particularly strong and unpleasant odor as one of its hallmark symptoms.

Trichomoniasis is a sexually transmitted infection that can be treated with antibiotics. It’s known for its pungent fishy odor. “The trichomoniasis infection can be quite smelly. It’s a more pronounced fishy odor than bacterial vaginosis.”

How to Tell BV from Trichomoniasis

Both conditions produce a fishy vaginal odor, which makes self-diagnosing nearly impossible and, frankly, inadvisable. There are some differences, though.

  • BV discharge is typically thin, gray, or white, and may have little to no color
  • Trichomoniasis discharge is often yellow, green, or frothy, and tends to cause more irritation
  • Trich frequently causes visible redness, soreness of the vulva, and pain during sex or urination
  • The odor from trichomoniasis tends to be stronger and more persistent than BV

Who Gets Trichomoniasis

Trichomoniasis is actually the most common curable STI in the world, though you would not know it from how rarely it is discussed compared to chlamydia or gonorrhea. It spreads through sexual contact and can remain asymptomatic for weeks or months in some people, meaning your partner may carry it without knowing.

The treatment is a short course of antibiotics, and both partners need to be treated simultaneously to prevent reinfection. If you have a fishy vaginal odor that your doctor has already tested and ruled out BV, ask specifically to be tested for trichomoniasis.


3. A Forgotten Tampon: The Shocking Cause of Vaginal Odor Nobody Wants to Admit

This one genuinely surprises women every single time it comes up in a gynecology office, and it happens more often than you might expect. A retained tampon, meaning one that was simply forgotten during a busy or exhausted moment, is one of the most dramatic causes of vaginal odor a gynecologist encounters.

A strong rotting odor is generally due to a forgotten tampon. Although tampons cannot get completely lost inside the body, they can get stuck at the top of the vagina when forgotten and eventually emit a rotting smell.

What Actually Happens When a Tampon Is Left In

Tampons are designed to absorb moisture, which means they create a warm, damp environment that bacteria absolutely thrive in. Tampons that have been in place for more than a few hours are technically “retained,” but tampons that have been in place for days or longer are considered a potential adverse condition.

The odor that results is not subtle. Most women and their gynecologists describe it as distinctly rotten, unlike anything caused by an infection. Other symptoms to watch for include:

  • Dark brown or even black discharge
  • A smell that no amount of washing seems to reduce
  • Mild to moderate pelvic discomfort in some cases
  • Occasionally, fever if an infection has developed

What to Do If You Suspect a Forgotten Tampon

It is important to have your gynecologist do a vaginal exam if you suspect a retained tampon, as it is not always possible to detect or remove it yourself.

The good news is that removal often resolves the odor within days without the need for antibiotics, as the vagina’s natural flora rebounds quickly once the source of disruption is gone. Do not panic, but do act promptly. And if you notice a fever alongside the smell, go directly to urgent care or your doctor rather than waiting for a routine appointment.


4. Yeast Infections: When Vaginal Odor Comes With That Telltale Texture

Yeast infections are frequently discussed in the context of itching and thick discharge, but their contribution to vaginal odor is often underappreciated. The smell is different from BV, which can help distinguish the two, though many women find themselves confused between them.

A yeast infection produces a smell that is best described as yeasty, slightly sweet, or bread-like. Think fermentation, not fish. A sour odor can be normal because the natural pH of the vagina is slightly acidic, which can sometimes give off a mild sour scent. However, if the odor becomes very strong or is accompanied by other symptoms like itching, thick discharge, or irritation, it could be a sign of a yeast infection.

The Classic Yeast Infection Symptom Picture

What distinguishes a yeast infection from BV is less about the smell and more about the full constellation of symptoms:

  • Thick, white, cottage-cheese-like discharge with little to no color
  • Intense itching and burning around the vulva
  • Redness and swelling of the vulva
  • Pain during sex or urination
  • A yeasty, slightly sour or bread-like odor rather than a fishy one

Why the Wrong Treatment Makes Things Worse

This is critical. Using the wrong treatment could potentially make your condition worse. Additionally, when it comes to some vaginal infections, there really is not a solid over-the-counter approach for all of them.

If you are treating a BV infection with antifungal medication (the over-the-counter yeast infection creams), you will get nowhere. The same is true in reverse. A proper gynecological exam with testing is the only reliable way to distinguish between the two and ensure you are using the right treatment.


5. Hormonal Changes: The Overlooked Cause of Shifting Vaginal Odor

Your hormones are doing enormous work behind the scenes every day, and your vaginal scent shifts right along with them. Most women notice this to some degree throughout their cycle without ever connecting the dots between their hormones and the changes they smell.

“Every woman is likely to experience some fluctuation in her vaginal odor. That’s normal and can vary throughout her menstrual cycle. Hormonal changes associated with menstruation, ovulation, and even sexual activity can all influence vaginal odor.”

When Hormonal Changes Cause More Than a Mild Shift

During pregnancy, the hormonal changes are dramatic enough that vaginal odor shifts can be quite pronounced. Increased blood flow to your vagina and changing levels of pregnancy hormones, like estrogen, progesterone and prolactin, can affect your pH level and cause new smells. Postpartum vaginal odor is common. As your uterus returns to its pre-pregnancy state, it releases blood, mucus and other debris related to pregnancy called lochia, which has a stale, metallic musty odor similar to period blood.

Menopause brings a different set of hormonal changes that affect vaginal odor in a distinct way. During menopause, estrogen levels start to decline, causing the vaginal walls to thin, which means there is less exfoliation in the vagina, and an increasing alkalinity in vaginal pH can lead to noticeable odor changes and increased infection risk.

Hormonal Odor by Life Stage

Here is a practical breakdown of what is normal at different hormonal moments:

  • Ovulation: A slightly stronger, muskier smell is common mid-cycle as cervical mucus increases
  • Menstruation: A metallic, iron-tinged smell from blood is completely normal
  • Pregnancy: New or stronger smells due to increased blood flow and pH shifts, not always a sign of infection
  • Postpartum: Lochia produces a metallic or slightly stale smell that resolves within weeks
  • Perimenopause and Menopause: More alkaline pH can mean stronger odors and higher infection susceptibility

If the hormonal smell is accompanied by discharge that is green, gray, or chunky, or by significant itching or pain, that moves it from “normal hormonal fluctuation” to “time to call your doctor.”


6. Diet and Lifestyle: What You Eat Absolutely Affects Vaginal Odor

Few people draw a line between their dinner plate and what happens in their underwear the next morning, but that connection is real, documented, and a little humbling. Your diet, your hydration levels, and even your stress load can all shift how your vagina smells.

Temporary vaginal odor is common and often resolves on its own. Foods with a strong odor, like garlic or fish, can cause odor changes in your vagina. This is a direct pathway through sweat, urine, and vaginal secretions, all of which are influenced by what you consume.

The Diet-Vaginal Odor Connection

Specific dietary patterns that gynecologists and researchers have flagged as relevant include:

  • Garlic, onions, and asparagus: These contain sulfur compounds that pass into sweat and secretions. Sweat can combine with vaginal discharge to make the vagina smell of strong foods, such as onions or garlic.
  • High-fat diets: Some research has found a link between high-fat diets and an increased risk for odor-causing infections like bacterial vaginosis.
  • High-protein and keto diets: High protein and keto diets may also be linked to a change in vaginal scent. This is partly related to how protein metabolism affects the compounds excreted through bodily fluids.
  • Alcohol: Regular alcohol consumption can alter vaginal pH and contribute to a stronger smell
  • Dehydration: When you are not drinking enough water, urine becomes more concentrated and ammonia-scented, which can bleed into how the entire vulvar area smells

What Actually Helps

You do not need to build your entire diet around your vagina’s preferences. But a few genuinely useful habits include:

  • Staying well hydrated throughout the day
  • Eating yogurt and probiotic-rich foods, which support healthy lactobacilli levels in the vagina
  • Reducing highly processed and high-sugar foods, which can feed yeast overgrowth
  • Not over-restricting fruits, since their natural sugars do not cause the same problems as refined sugar

7. Sweating and Poor Ventilation: The Cause of Vaginal Odor Hidden in Your Wardrobe

Here is one that is genuinely underappreciated and much easier to fix than anything involving an infection. The groin area is packed with apocrine sweat glands, the same type found in the armpits. These glands respond not just to temperature but to emotional stress, and the sweat they produce is the kind that reacts with skin bacteria to create odor.

Your body contains two types of sweat glands: apocrine and eccrine. The eccrine glands produce sweat to cool your body down, and the apocrine glands respond to your emotions. These apocrine glands populate your armpits and, your groin. When you are stressed or anxious, the apocrine glands produce a milky fluid. On its own, this fluid is odorless. But when this fluid contacts the abundance of vaginal bacteria on your vulva, it can produce a pungent aroma.

When Sweat Becomes a Problem

This type of vaginal odor tends to be muskier and more body-odor-like than infected. It gets worse with:

  • Wearing tight synthetic underwear or leggings for extended periods
  • Sitting for long hours without ventilation, common in sedentary desk jobs
  • Intense exercise without changing out of workout clothes afterward
  • High-stress periods where emotional sweat production spikes
  • Hot and humid climates where the groin area stays moist throughout the day

Simple Fixes That Actually Work

This cause of vaginal odor is one of the most straightforward to manage without any medical intervention:

  • Switch to breathable, 100 percent cotton underwear
  • Change out of sweaty gym clothes immediately after exercise
  • Sleep without underwear a few nights per week to allow ventilation
  • Rinse the vulvar area with warm water after heavy sweating
  • Avoid sitting in wet swimwear for extended periods

Note that the fix here is hygiene of the external area only. The vagina is self-cleaning and does not need internal washing. Using products inside the vagina to address sweat-related external odor is like taking cough medicine for a sore knee, it addresses the wrong location entirely.


8. Sexually Transmitted Infections, Pelvic Inflammatory Disease, and Rarer Causes Gynecologists Take Seriously

Beyond BV and trichomoniasis, there is a broader category of causes that gynecologists want women to stay aware of, not to create anxiety, but because early detection makes an enormous difference in outcomes.

Chlamydia and Gonorrhea

Both of these common STIs can produce vaginal discharge with an unpleasant odor, though they are less reliably associated with a strong smell than trichomoniasis. Many women with chlamydia or gonorrhea have no symptoms at all, which is exactly why regular gynecological exams are essential, because conditions like sexually transmitted infections, vulvar or vaginal cancer, fibroids, and endometriosis are conditions that could be spotted by a gynecologist even in the absence of obvious symptoms.

Pelvic Inflammatory Disease (PID)

PID is an infection of the reproductive organs that can develop when STIs are left untreated and spread upward from the vagina and cervix. Vaginal odor accompanied by pelvic pain, fever, pain during sex, or unusual discharge warrants immediate medical evaluation, not a wait-and-see approach.

Rectovaginal Fistula

This is a rare but serious condition in which an abnormal opening develops between the rectum and the vagina, usually as a result of childbirth trauma, surgery, or Crohn’s disease. It produces a very distinct fecal odor from the vaginal area that does not respond to any hygiene measures because the cause is structural, not bacterial. Surgery is typically required.

Cervical and Vaginal Cancer

Persistent vaginal odor alongside unusual bleeding, particularly between periods or after menopause, warrants prompt evaluation. While cancer is a rare cause of vaginal odor, it is one that gynecologists are trained to rule out. Per Cleveland Clinic’s guidance on vaginal health, prolonged abnormal vaginal odor accompanied by discharge, burning and itching should prompt a visit to a healthcare provider.

Poorly Controlled Diabetes

Some women with undiagnosed or poorly managed diabetes notice a sweet or fruity vaginal odor, which can be related to elevated blood sugar levels affecting vaginal secretions and increasing susceptibility to recurrent yeast infections. If you are experiencing frequent yeast infections alongside other symptoms of diabetes, like excessive thirst or fatigue, discuss this pattern with your doctor.


Quick-Reference Table: 8 Causes of Vaginal Odor at a Glance

Cause Typical Odor Key Symptoms Alongside Odor Requires Medical Treatment? How It’s Treated
Bacterial Vaginosis (BV) Fishy, especially after sex Thin gray-white discharge, mild itching Yes Antibiotics (metronidazole or clindamycin)
Trichomoniasis Strong fishy, more intense than BV Green/yellow frothy discharge, irritation, soreness Yes Antibiotics (both partners treated)
Forgotten Tampon Rotten meat, very strong Brown/dark discharge, possible pelvic discomfort Removal needed, sometimes antibiotics Physical removal by gynecologist
Yeast Infection Yeasty, bread-like, slightly sour Thick white discharge, intense itching, redness Often OTC, confirm diagnosis first Antifungal medication
Hormonal Changes Metallic, musky, or mildly sour Varies by cycle stage, usually no discharge changes No (if no accompanying symptoms) No treatment needed unless infection develops
Diet and Lifestyle Variable; musky, onion-like, ammonia None typically, aside from general odor change No Dietary adjustment, hydration
Sweat and Poor Ventilation Musky, body odor-like Worse after exercise, heat, or stress No Hygiene adjustments, breathable clothing
STIs, PID, Rarer Causes Variable, foul, sometimes fecal Pelvic pain, fever, abnormal bleeding Yes, urgently for PID/STIs Dependent on diagnosis; antibiotics, surgery, or cancer treatment

What to Do (and What to Absolutely Stop Doing)

Before you reach for anything in the feminine hygiene aisle, take a moment. Not everything marketed to your vagina is good for it. In fact, many products create the very problems they claim to solve.

Stop doing these things:

  • Douching. Full stop. The vagina is self-cleaning, and douching strips the healthy bacteria that protect it, raising your BV and yeast infection risk significantly
  • Using scented soaps, gels, or sprays inside or directly at the vaginal opening
  • Assuming the odor will resolve without intervention when it has persisted longer than a week or is accompanied by other symptoms
  • Self-diagnosing and self-treating without knowing which condition you actually have

Start doing these things:

  • Wash only the external vulvar area with warm water and, if desired, a mild unscented soap
  • See a gynecologist if the odor is persistent, strong, or accompanied by discharge changes, itching, pain, or burning
  • Use condoms consistently to protect your vaginal pH and reduce STI risk
  • According to the American College of Obstetricians and Gynecologists, women should seek care when vaginal symptoms are new, unusual, or recurring, rather than repeatedly self-treating without a confirmed diagnosis
  • Keep up with routine gynecological exams even when you feel fine

The Bottom Line on Vaginal Odor Causes

Your vagina is not supposed to smell like roses, fresh linen, or a tropical beach. It is supposed to smell like a vagina, which is to say mildly, naturally, and uniquely yours. The problem only begins when something upsets the ecosystem.

What gynecologists most want women to understand is this: vaginal odor is almost never something to be ashamed of, but it is always worth paying attention to. Your body communicates through symptoms, and a change in smell is one of the clearest signals it has. The good news is that nearly every cause on this list is treatable, and most are treatable quickly.

Do not spend months masking a smell that could be resolved in days with the right diagnosis and treatment. You deserve actual answers, not a prettier problem.


Still Have Questions? Here’s What to Do Next

If you found this helpful, share it with a friend who deserves to actually understand what is going on with their body, because this information is too important to stay hidden in a late-night search history.

Read Next:

  • What Your Vaginal Discharge Color Is Actually Telling You
  • Why Recurring BV Keeps Coming Back (And How to Finally Stop the Cycle)
  • The Truth About Probiotics and Vaginal Health

Drop a comment below: Have you ever been surprised by the cause of a vaginal odor change? What helped most? Sharing your experience might be exactly what another woman needs to read tonight.


This article is for informational purposes only and is not a substitute for professional medical advice. If you are experiencing persistent vaginal odor or any of the symptoms described, please consult a licensed gynecologist or healthcare provider.

SEO Metadata

SEO Title:

Focus Keywords: painful periods, causes of painful periods, dysmenorrhea causes, why do periods hurt, period pain causes

Meta Description:

URL Slug:

SEO Tags:


7 Hidden Causes of Painful Periods Doctors Finally Reveal

You have been told your whole life that period pain is just “part of being a woman.” You have been handed ibuprofen, sent home, and quietly expected to push through it. But what if the pain you feel every single month is not normal at all, and what if the reason no one found the real cause is simply that no one looked hard enough?

That is exactly what a growing number of gynecologists are now saying out loud.

What Doctors Are Finally Admitting About Painful Periods

For decades, severe menstrual pain was brushed off as emotional sensitivity or low pain tolerance. Women were dismissed at doctor’s offices across the world, and conditions that were causing real, measurable physical damage went undiagnosed for years, sometimes decades.

That is starting to change. Research published in National Geographic in early 2026 highlighted that the medical community has only recently begun closing what scientists are calling the “period pain research gap,” a decades-long failure to take dysmenorrhea seriously as a clinical concern.

The word dysmenorrhea (dis-men-oh-REE-ah) is just the medical term for painful periods. There are two types. Primary dysmenorrhea is pain caused by natural uterine contractions, driven by hormone-like chemicals called prostaglandins. Secondary dysmenorrhea is pain caused by an underlying condition. And it is the second category where most of the shocking, underdiagnosed causes live.

If your period pain regularly rates above a 6 out of 10, forces you to cancel plans, or does not respond well to standard pain relief, you are not being dramatic. Something worth investigating is likely going on. Here are seven causes of painful periods that gynecologists are finally discussing openly, and what you can do about each one.


1. Adenomyosis: The Hidden Cause of Painful Periods Inside Your Uterine Wall

Most women have heard of endometriosis. Far fewer have heard of adenomyosis, a condition that is equally disruptive and, until recently, wildly underdiagnosed.

Adenomyosis occurs when the tissue that normally lines the inside of the uterus, the endometrium, grows directly into the muscle wall of the uterus. During every menstrual cycle, that misplaced tissue thickens and bleeds just like it is supposed to. But because it is trapped inside the uterine wall with nowhere to go, it causes the uterus to enlarge, stiffen, and become deeply painful.

According to the Mayo Clinic, adenomyosis can cause the uterus to grow up to two or three times its usual size, and in some cases causes no noticeable symptoms at all, which is part of why it goes undetected for so long.

Symptoms that suggest adenomyosis may be behind your painful periods:

  • Cramps that start several days before your period and continue well into it
  • Heavy bleeding with large clots
  • A feeling of pressure or fullness in the lower abdomen
  • Pain during sex, particularly with deep penetration
  • Lower back pain that worsens during menstruation
  • Bloating that looks and feels different from ordinary PMS

The tricky part is that adenomyosis shares symptoms with several other conditions, including fibroids and endometriosis. According to Cleveland Clinic, approximately 2 to 5 percent of adolescents with severely painful cycles have adenomyosis. Many more women are diagnosed in their 30s and 40s after years of unexplained symptoms.

Diagnosis typically involves a transvaginal ultrasound or MRI. Treatment ranges from hormonal medications to pelvic floor physical therapy, and in severe cases, surgical intervention. The most important step is simply asking your gynecologist to look for it.

Painful Periods


2. Endometriosis: The Painful Period Cause That Takes an Average of 7 Years to Diagnose

Yes, most people have heard the word endometriosis. But the truly alarming part is how long it takes to get diagnosed with it, and how many women are still walking around experiencing it without knowing.

Endometriosis happens when tissue similar to the uterine lining grows outside the uterus, typically on the ovaries, fallopian tubes, and pelvic tissues. During each menstrual cycle, this tissue behaves as if it is still in the uterus. It thickens, breaks down, and tries to bleed. With nowhere to exit the body, it causes inflammation, scarring, and intensely painful periods.

According to Johns Hopkins Medicine, it is estimated that 7 to 15 percent of women have endometriosis. Menstrual pain occurs in up to 90 percent of women in general, which makes it clinically difficult to distinguish ordinary cramps from endometriosis-related pain without proper investigation.

Key warning signs of endometriosis beyond painful periods:

  • Chronic pelvic pain even outside of your period
  • Pain during or after sex
  • Painful bowel movements or urination during your period
  • Bloating, nausea, or fatigue during menstruation
  • Difficulty getting pregnant

The gold standard for diagnosis is still a laparoscopy, a minimally invasive surgical procedure in which a camera is inserted into the abdomen to look directly at the pelvic organs. No imaging test can definitively confirm it. That is partly why the average diagnosis time is still around seven years from symptom onset to official diagnosis.

If you have been managing painful periods with ibuprofen and birth control for years without ever being assessed for endometriosis, it is worth having a direct conversation with your gynecologist.


3. Pelvic Floor Dysfunction: The Painful Periods Cause No One Talks About Enough

Your pelvic floor is a hammock-shaped group of muscles sitting at the base of your pelvis. They support your uterus, bladder, and bowel. They also have a significant impact on how your period feels.

When pelvic floor muscles become hypertonic, meaning chronically tight or overactive, they can amplify menstrual pain dramatically. The uterus contracts naturally during menstruation to shed its lining. When the surrounding pelvic floor muscles are already in a state of tension, those contractions have nowhere to release. The result is pain that far exceeds what prostaglandins alone would cause.

Pelvic floor dysfunction as a driver of painful periods is something pelvic physical therapists have known about for years. Gynecologists are catching up, and more are now referring patients to pelvic floor PTs as a first-line intervention rather than an afterthought.

Signs your pelvic floor could be contributing to painful periods:

  • Cramping that spreads into your hips, thighs, or lower back
  • Pain that feels like a vice grip rather than just waves of cramping
  • Pain during or after tampon insertion
  • Urinary urgency or leaking, especially during your period
  • Constipation or painful bowel movements around menstruation
  • Persistent pelvic heaviness between periods

Pelvic floor physical therapy focuses on releasing that chronic muscle tension through a combination of manual therapy, breathing techniques, and specific movement patterns. Many women with painful periods see significant improvement within six to eight sessions. It is one of the most underused and underreferenced tools in women’s menstrual health, and it deserves far more attention than it gets.


4. Uterine Fibroids: A Surprisingly Common Cause of Painful Periods

Fibroids are non-cancerous growths that develop in or on the wall of the uterus. They are far more common than most women realize. Some estimates suggest that up to 70 to 80 percent of women will develop fibroids by age 50, though not everyone experiences symptoms.

For those who do, fibroids can be a major cause of painful periods. Depending on their size and location, they can press on surrounding structures, disrupt normal uterine contractions, and cause significant bleeding and cramping. Submucosal fibroids, those that grow into the inner cavity of the uterus, are especially associated with period pain and heavy bleeding.

Fibroid-related period symptoms to bring to your gynecologist:

  • Periods that are heavier than usual or last longer than seven days
  • Cramping that feels more like pressure than typical cramping
  • A sensation of fullness or bloating in the lower abdomen
  • Frequent urination (when a fibroid presses on the bladder)
  • Lower back or leg pain
  • Pain during sex

Many women discover their fibroids incidentally during a pelvic ultrasound done for another reason. Others have lived with fibroid-related painful periods for years, assuming that level of discomfort was simply their normal. It is not. Fibroids are diagnosable, manageable, and in many cases treatable without surgery.


5. Pelvic Inflammatory Disease (PID): An Easily Missed Cause of Painful Periods

Pelvic inflammatory disease, known as PID, is an infection of the female reproductive organs, typically involving the uterus, fallopian tubes, and ovaries. It is most often caused by sexually transmitted infections like chlamydia or gonorrhea that were not treated promptly, though it can occasionally develop without an STI as the trigger.

What makes PID a “secret” cause of painful periods is that many women do not realize they have it. Mild or chronic PID can cause subtle, persistent pelvic pain that gets worse during menstruation. Because the infection causes internal inflammation and scarring, it changes the environment in which your uterus contracts each month, turning ordinary cramping into something much more severe.

Signs PID could be behind your painful periods:

  • Pain in the lower abdomen or pelvis that is dull, aching, or constant
  • Unusual vaginal discharge with an unpleasant odor
  • Pain during sex
  • Irregular bleeding between periods
  • Fever or chills (in more acute cases)
  • Painful urination

PID is diagnosed through a combination of physical examination, lab tests, and sometimes ultrasound. It is treated with antibiotics, and early treatment is essential to prevent scarring that can lead to fertility issues. If you have ever had an untreated STI or had symptoms that were never fully explained, PID is worth raising with your doctor.


6. Hormonal Imbalances and Estrogen Dominance: The Overlooked Cause Behind Painful Periods

Not all causes of painful periods involve structural problems. Sometimes, the culprit is hormonal, specifically an imbalance where estrogen levels are relatively high compared to progesterone, a state often called estrogen dominance.

Estrogen promotes the growth and thickening of the uterine lining during each cycle. When it is disproportionately high, the lining can become thicker than normal. More lining means more prostaglandins released when menstruation begins, and more prostaglandins means more intense uterine contractions and more pain.

Estrogen dominance can be driven by a range of factors including chronic stress, high body fat (since fat tissue produces estrogen), exposure to environmental estrogens from plastics and pesticides, poor liver function (the liver processes excess estrogen), and certain dietary patterns.

Signs your cycle might be affected by hormonal imbalance:

  • Intensely heavy periods with cramping that starts before bleeding begins
  • Breast tenderness in the week before your period
  • Bloating and water retention that is noticeably worse premenstrually
  • PMS mood symptoms that feel disproportionately severe
  • Short cycles (less than 25 days)
  • History of hormonal conditions like PCOS or thyroid dysfunction

Hormonal assessment typically involves blood work timed to specific points in your cycle. Addressing estrogen dominance might involve lifestyle changes, dietary shifts, stress reduction, and in some cases targeted medical management. The key is getting tested rather than guessing.


7. Central Sensitization: The Neurological Cause of Painful Periods Doctors Are Just Beginning to Understand

This one is perhaps the most fascinating, and the most recently brought into mainstream gynecological conversation.

Central sensitization is a condition in which the central nervous system becomes hypersensitized to pain signals. In simple terms, your brain’s pain-processing system gets turned up too high, so that stimuli that would normally produce mild pain produce intense, overwhelming pain instead.

Research from the University of Oxford published in 2025 found that girls with severe period pain at age 15 had a 76 percent higher risk of experiencing chronic widespread pain by their mid-20s. This is not coincidence. It is evidence that poorly managed menstrual pain can actually train the nervous system to amplify pain over time, a vicious cycle that researchers are now taking very seriously.

Separately, a 2025 study from a Gynecology Research Lab in Evanston, Illinois found that girls who were more sensitive to unpleasant but non-painful stimuli, like loud noises and bright lights, had higher odds of developing widespread pain in the future. This is central sensitization showing up even before period pain begins.

Signs that central sensitization may be amplifying your painful periods:

  • Period pain that feels completely out of proportion to what physical examination or imaging can explain
  • Pain that is widespread, affecting your back, legs, and abdomen simultaneously
  • Heightened sensitivity to other physical sensations generally (temperature, sound, touch)
  • A history of other pain conditions like migraines, IBS, or fibromyalgia
  • Pain that persists even after addressing other known causes
  • Worsening pain over time without a clear structural explanation

Treatment for central sensitization as a cause of painful periods is evolving. It can involve pain psychology, targeted physiotherapy, mindfulness-based pain management, and in research settings, emerging tools like transcranial magnetic stimulation. The most important thing is that a gynecologist or pain specialist recognizes this as a real, biological phenomenon, not a psychological weakness.


Comparison Table: 7 Causes of Painful Periods at a Glance

Cause Key Symptoms Beyond Cramping How It’s Diagnosed Commonly Overlooked?
Adenomyosis Heavy bleeding, back pain, pelvic pressure, painful sex Ultrasound, MRI Very often
Endometriosis Pelvic pain outside period, painful sex, infertility Laparoscopy Extremely often (avg. 7-year delay)
Pelvic Floor Dysfunction Hip/thigh pain, urinary leakage, pelvic heaviness Pelvic PT assessment Almost always
Uterine Fibroids Heavy/prolonged bleeding, pressure, frequent urination Ultrasound Frequently
Pelvic Inflammatory Disease Discharge, odor, pain between periods Pelvic exam, labs Often in mild/chronic cases
Hormonal Imbalance PMS severity, breast tenderness, short cycles Blood tests (timed) Very frequently
Central Sensitization Widespread pain, sensory hypersensitivity, history of chronic pain Clinical assessment Almost always

What to Do If You Recognize Yourself in This Article

If reading any of these sections felt like someone finally articulated what your body has been trying to tell you, please take that seriously.

The first step is keeping a detailed period diary. Track when your pain starts, how severe it is on a scale of 1 to 10, what it feels like (cramping vs. pressure vs. stabbing), where it radiates, what makes it better or worse, and how it compares cycle to cycle. That pattern of data is enormously helpful to a clinician trying to identify the cause.

The second step is being direct with your gynecologist. You do not need to have all the answers before your appointment. What you do need is to communicate that your period pain is affecting your quality of life and that you want to investigate why, not just manage the symptoms with painkillers.

According to the American College of Obstetricians and Gynecologists, if medications alone do not relieve your pain, treatment should absolutely focus on finding the underlying cause. You are well within your rights to ask for imaging, referrals, and a proper diagnostic workup.

Third, consider asking for a referral to a pelvic floor physical therapist, regardless of which cause your doctor suspects. Pelvic PT is appropriate for nearly every entry on this list and is one of the most evidence-based, side-effect-free interventions available for period pain.


A Quick Word on What “Normal” Period Pain Actually Looks Like

There is cramping, and there is clinically significant pain. Knowing the difference matters.

Mild to moderate cramping in the first one to two days of your period, which responds to ibuprofen and does not significantly disrupt your day, is generally within the range of typical primary dysmenorrhea. It is prostaglandins doing their job, and while it is not pleasant, it does not necessarily signal an underlying condition.

Pain that forces you to miss work, school, or social commitments is not normal. Pain that does not respond to standard over-the-counter medications is not normal. Pain that starts days before your period begins, pain that radiates into your back or legs, pain that is getting worse over time rather than staying consistent. None of these are things you have to accept as your baseline.

You deserve a period that, even if uncomfortable, does not derail your life every single month.


Conclusion: You Deserve Answers, Not Just Ibuprofen

For too long, painful periods have been treated as a personality flaw or a rite of passage rather than a medical symptom worth investigating. The seven causes laid out in this article are real, diagnosable, and in most cases, treatable. But none of them can be addressed if no one looks for them.

Whether you have suspected endometriosis for years or you had never heard of central sensitization before today, the information in this article is meant to do one thing: give you the words and confidence to walk into a medical appointment and advocate for yourself.

Your pain has a cause. You deserve to find it.


Share This, Leave a Comment, or Read What’s Next

If this article helped you connect dots you have been staring at for years, please share it with a friend, a sister, or a colleague who has been quietly suffering through painful periods and told herself it was just “how it is.” It is not.

Drop a comment below and let us know: which of these seven causes surprised you most? Have you been diagnosed with one of these conditions after years of being dismissed? Your story could help someone else find their way to answers.


This article is intended for informational purposes only and does not constitute medical advice. Always consult a qualified healthcare provider for diagnosis and treatment of any medical condition.

5 Alarming Signs Your Estrogen Levels Are Critically High

Your body has been trying to tell you something. The bloating that never fully goes away, the periods that leave you bedridden, the mood swings that feel nothing like you — these are not random complaints, and they are definitely not all in your head.

They could be signs that your estrogen levels have gone dangerously off the rails.

What High Estrogen Actually Means (And Why Your Doctor Might Have Missed It)

Before diving into the warning signs, it helps to understand what “high estrogen” actually means in practice.

Estrogen is one of the body’s most powerful hormones. It drives puberty, regulates the menstrual cycle, supports bone density, protects cardiovascular health, and even influences how you sleep and how you feel emotionally. In a healthy, balanced body, estrogen rises and falls in a predictable rhythm across your monthly cycle, working in tandem with progesterone, its hormonal counterpart.

The problem starts when estrogen is consistently elevated above normal levels, or when progesterone drops too low to balance it out. This state, sometimes called estrogen dominance, can cause a cascade of symptoms that affect everything from your waistline to your mental health to your reproductive organs.

What makes this condition particularly tricky is that many of its symptoms are dismissed as normal parts of being a woman. “Of course periods are painful.” “Of course you’re emotional before your cycle.” “Of course you’re tired.” The normalization of these experiences means that many women walk around for years with critically unbalanced hormones and never connect the dots.

High estrogen is rarely caused by your body simply making too much on its own. More often, levels run high because of hormonal birth control, hormone replacement therapy, excess body fat (which produces its own estrogen), chronic stress (which suppresses the progesterone that should balance estrogen), poor liver function, or conditions like polycystic ovary syndrome (PCOS). Environmental exposure to xenoestrogens, synthetic compounds found in plastics, pesticides, and certain cosmetics, can also push levels higher over time.

The good news is that once you recognize the signs, you can act. And the earlier you act, the better your outcomes. So here are the five most dangerous signals your body sends when estrogen has climbed critically too high — each one important, and none that should be ignored.

Estrogen


Sign 1: Your Periods Have Become Heavier, Longer, or Completely Unpredictable — A Classic Red Flag of High Estrogen Levels

If your period has transformed from something manageable into a monthly ordeal that has you canceling plans and sleeping on a towel, high estrogen levels could be the culprit behind it all.

Here is the biology. Estrogen is responsible for building up the uterine lining during the first half of your cycle. It essentially lays down a thick, nourishing layer of tissue in preparation for a potential pregnancy. When estrogen levels are elevated beyond normal ranges, that lining becomes thicker than it should be. And when pregnancy does not occur, all of that excess lining sheds at once, resulting in heavier, longer, and often more painful periods.

Beyond the sheer volume of bleeding, women with high estrogen often notice:

  • Clots larger than a quarter during their period
  • Periods lasting longer than 7 days
  • Spotting or breakthrough bleeding between cycles
  • Cycles that arrive irregularly, sometimes closer together and sometimes further apart
  • Severe cramping that does not respond well to standard over-the-counter pain relief

This is not just inconvenient. Heavy menstrual bleeding is a recognized medical concern that can lead to iron deficiency anemia, chronic fatigue, and a significantly reduced quality of life. It can also signal more serious underlying conditions that are directly linked to estrogen excess, including uterine fibroids and endometrial hyperplasia.

What You Should Do

Track your cycle carefully, including how many pads or tampons you use per day. If you are soaking through a pad or tampon every one to two hours, that is considered medically heavy and warrants a conversation with your doctor. A simple blood test measuring estradiol levels, along with a progesterone test, can help confirm whether estrogen imbalance is driving your symptoms.

Do not wait this one out. Persistent heavy bleeding that goes untreated is one of the most common pathways to diagnoses that could have been caught and managed much earlier.


Sign 2: You Are Gaining Weight in Specific Places — And High Estrogen Levels Are Likely Driving It

You have not changed your diet. You have not stopped exercising. But somehow, your hips, thighs, and lower belly are expanding in ways that feel almost impossible to explain. If this sounds like your reality, the problem may not be your lifestyle at all. It may be your hormones.

High estrogen levels promote fat storage, and they do so with a particular fondness for certain areas of the body. Estrogen stimulates the growth and proliferation of fat cells, especially in the regions where women naturally carry more adipose tissue, including the hips, thighs, buttocks, and lower abdomen. This is part of why estrogen-influenced body fat has sometimes been called “estrogenic fat.”

What makes this especially frustrating is the cyclical nature of the problem. Fat tissue, particularly around the belly and hips, is not metabolically passive. It actively produces its own estrogen through a process involving an enzyme called aromatase. So the more estrogen-driven fat you accumulate, the more estrogen your body generates, which then encourages more fat storage. It is a loop that can be maddeningly difficult to break through diet and exercise alone.

Beyond fat accumulation, high estrogen frequently causes water retention, which adds to the puffiness and bloating that many women experience. The body holds onto fluid when estrogen levels are elevated, which can make you feel heavy, swollen, and “puffy,” especially in the days leading up to your period.

Common estrogen-related weight and body composition changes include:

  • Noticeable weight gain around the hips, thighs, and lower belly without dietary changes
  • A persistent bloated or swollen sensation, especially before your cycle
  • Clothing fitting differently even when your overall weight has not changed dramatically
  • Difficulty losing weight despite consistent effort and caloric restriction
  • A sense of feeling “puffy” in the face and hands

What You Should Do

If you are experiencing unexplained weight gain concentrated in estrogen-sensitive areas alongside other symptoms on this list, hormonal testing is a logical next step. A healthcare provider can order a comprehensive hormone panel that includes estradiol, progesterone, FSH, and LH to get a fuller picture of what is happening.

Reducing alcohol intake, increasing dietary fiber, and exercising regularly are all steps that support the liver in clearing excess estrogen from the body. But for many women, lifestyle changes alone are not sufficient without also addressing the underlying hormonal imbalance directly.


Sign 3: Your Mood Is a Rollercoaster — Because High Estrogen Levels Directly Hijack Your Brain Chemistry

One of the most underappreciated effects of high estrogen is what it does to your mental and emotional health. Many women with estrogen dominance describe feeling like a stranger in their own body — anxious without reason, irritable over small things, tearful in ways that feel disproportionate to the situation, or depressed in a heavy, foggy way that does not quite respond to the strategies that usually help.

This is not weakness. This is neurochemistry.

Estrogen interacts directly with the brain’s neurotransmitter systems, particularly serotonin and dopamine, the chemicals most closely associated with mood, motivation, and emotional regulation. In balanced amounts, estrogen actually supports healthy mood by boosting serotonin sensitivity. But when levels are consistently too high, or more precisely when estrogen is running unopposed because progesterone levels are too low in comparison, the system tips into dysregulation.

High estrogen has been linked to:

  • Increased anxiety and a sense of being on edge without an obvious trigger
  • Mood swings that intensify in the week before your period
  • Depressive episodes that seem to track your menstrual cycle
  • Brain fog, difficulty concentrating, and problems with memory
  • Emotional sensitivity that feels heightened and hard to manage
  • Irritability that escalates quickly and seems out of proportion

The relationship between estrogen and mood is particularly noticeable in the luteal phase of the cycle, the two weeks between ovulation and menstruation. During this time, progesterone should rise to counterbalance estrogen. When it does not, because progesterone is insufficient or estrogen is simply too elevated, the emotional symptoms of imbalance become most pronounced. For some women, this manifests as severe PMS. For others, it can look like premenstrual dysphoric disorder (PMDD), a clinically recognized and debilitating condition that goes well beyond ordinary premenstrual moodiness.

What You Should Do

If your emotional symptoms follow a clear cyclical pattern — getting worse in the two weeks before your period and improving once bleeding begins — that pattern itself is diagnostic information. Bring it to your doctor and ask specifically about hormone testing timed to different phases of your cycle, as a single blood draw may not capture the full picture of hormonal fluctuation.

Tracking your mood daily alongside your cycle using a journal or an app can help you see the pattern clearly and make a compelling case to your healthcare provider that hormones, not simply stress or personality, are at the root of what you are experiencing.


Sign 4: Your Breasts Are Tender, Swollen, or Developing Lumpy Tissue — A Tissue-Level Warning of Estrogen Overload

Breast tenderness before a period is common enough that most women dismiss it as an ordinary inconvenience. But when that tenderness becomes severe, constant, or accompanied by noticeable swelling and lumpy changes in breast tissue, it is your body communicating something more significant.

Estrogen is a primary driver of breast tissue development and proliferation. Breast cells have estrogen receptors throughout them, and when estrogen levels are elevated, those cells respond. The result is often swelling, soreness, and increased density of breast tissue. In cases of chronic high estrogen, some women develop fibrocystic breast changes, a condition involving the formation of noncancerous, fluid-filled lumps or dense, rope-like tissue within the breast.

According to Healthline’s overview of high estrogen symptoms, breast tenderness and swelling are among the most consistently reported physical signs of estrogen excess in women. Fibrocystic lumps, while not cancerous in themselves, can make it significantly harder to detect any potentially problematic changes during self-exams or routine mammograms.

What this sign looks like in practice:

  • Breast tenderness that arrives earlier in the cycle than usual or persists throughout the month
  • Noticeable swelling or fullness in the breasts, particularly in the outer and upper regions
  • Dense, lumpy, or rope-like changes in breast tissue that were not previously present
  • Pain that is disproportionate to what you would normally experience before your period
  • Sensitivity so acute that a hug or sleeping on your stomach becomes genuinely uncomfortable

The Long-Term Stakes

This is where the conversation becomes more serious. Long-term exposure to elevated estrogen levels has been identified as a meaningful risk factor for hormone-receptor-positive breast cancer. The majority of breast cancers are estrogen-receptor positive, meaning they are fueled in part by estrogen’s stimulating effect on breast cells. Chronic overexposure to estrogen does not guarantee cancer, but it does create an environment in which the risk is elevated.

What You Should Do

Do not skip your breast self-exams, and do not assume tenderness or lumpiness is necessarily normal just because it happens regularly. Any new lumps, significant changes in breast tissue, or pain that disrupts daily functioning should be assessed by a healthcare provider. If you suspect high estrogen is a contributing factor, request a comprehensive hormone evaluation alongside any breast imaging your doctor recommends.


Sign 5: You Have Been Diagnosed with Fibroids, Endometriosis, or Ovarian Cysts — These Conditions Are Estrogen-Dependent

This fifth sign is arguably the most medically serious on this list, because it moves beyond symptoms and into diagnosed conditions that carry significant consequences for fertility, quality of life, and long-term health.

Uterine fibroids, endometriosis, and ovarian cysts are all conditions in which estrogen plays a central and causal role. They are often referred to by researchers as estrogen-dependent conditions, meaning estrogen is not just incidentally present but actively fueling their development and growth.

Uterine Fibroids

Uterine fibroids are benign tumors that grow within or around the uterus. They are remarkably common, with estimates from Johns Hopkins Medicine suggesting that up to 77% of women will develop fibroids at some point during their reproductive years. Research has shown that estrogen promotes fibroid growth by stimulating cell proliferation within uterine tissue. Fibroids tend to shrink after menopause, when estrogen levels naturally fall, which itself underscores the hormonal connection.

Symptoms of fibroids include:

  • Heavy, prolonged, or painful periods (often overlapping with Sign 1)
  • Pressure or fullness in the lower abdomen or pelvis
  • Frequent urination if fibroids press against the bladder
  • Lower back pain
  • Pain during intercourse
  • Complications with fertility and pregnancy

Endometriosis

Endometriosis is a painful condition in which tissue similar to the uterine lining grows outside the uterus, typically on the ovaries, fallopian tubes, and pelvic tissue. It affects roughly 10% of women of reproductive age worldwide, and it is deeply estrogen-dependent.

High estrogen levels fuel the growth and inflammation of endometrial lesions. Meanwhile, the lesions themselves can produce their own estrogen, creating another self-reinforcing cycle that makes endometriosis both harder to treat and harder to escape once it has taken hold.

Ovarian Cysts

Ovarian cysts, particularly functional cysts and those associated with PCOS, are also closely linked to estrogen excess and hormonal imbalance. When ovulation is disrupted, as it frequently is in the context of elevated estrogen or low progesterone, follicles that should have released eggs can instead persist as fluid-filled cysts on the ovary.

According to the Cleveland Clinic’s comprehensive guide to estrogen and hormone health, excess estrogen in the body is directly associated with conditions including polyps, fibroids, PCOS, and endometriosis pain, all of which can compound over time without appropriate treatment.

What You Should Do

If you have already been diagnosed with any of these conditions, they are not isolated gynecological bad luck. They are signals that your hormonal environment needs assessment and support. Work with your doctor to measure your estrogen and progesterone levels, evaluate your overall hormonal health, and explore both medical and lifestyle-based treatment options. Ignoring the hormonal root cause while only treating the structural symptom (removing fibroids, for example, without addressing estrogen excess) often results in recurrence.


How High Estrogen Levels Compare to Normal: A Reference Guide

Understanding where your numbers land requires context. The following table provides a general comparison of estrogen levels across different life stages, alongside the most common symptoms and associated conditions when levels exceed healthy ranges.

Life Stage Normal Estrogen Range (Estradiol) Signs Estrogen Is Too High Commonly Associated Conditions
Reproductive age (non-pregnant) 15 to 350 pg/mL (varies by cycle phase) Heavy periods, breast tenderness, mood swings, weight gain Fibroids, endometriosis, PCOS
Perimenopausal 10 to 200 pg/mL (fluctuating) Irregular periods, bloating, insomnia, anxiety spikes Estrogen dominance, fibrocystic breasts
Postmenopausal Less than 10 to 30 pg/mL Any significant estrogen symptoms (unusual in this stage) Elevated cancer risk if persistent
On hormonal birth control Varies widely by method Mood changes, breast swelling, low libido, nausea Medication-induced estrogen elevation
On hormone replacement therapy (HRT) Provider-monitored Breast tenderness, spotting, bloating Risk increases with unopposed estrogen use

Note: Reference ranges vary between laboratories and are always interpreted alongside clinical symptoms. A single blood test is rarely the whole picture. Hormone levels fluctuate throughout the menstrual cycle, and testing should ideally be timed appropriately for accurate results.


What Causes Estrogen to Climb Critically High in the First Place?

Understanding the “why” behind elevated estrogen levels is essential for treating the problem at its root rather than simply managing symptoms indefinitely.

The most common contributors to high estrogen include:

Hormonal medications. Estrogen-containing birth control pills, patches, rings, and certain forms of hormone replacement therapy are among the most common pharmaceutical causes of elevated estrogen levels. This does not mean you should stop your medication without medical guidance, but it does mean that if you are experiencing symptoms, your prescription deserves a second look.

Excess body fat. Adipose tissue, especially visceral fat around the abdomen, contains the enzyme aromatase, which converts androgens (male hormones) into estrogen. The more body fat present, particularly in the abdominal region, the more estrogen the body generates independent of the ovaries. This is one key reason estrogen dominance becomes more common with weight gain.

Chronic stress and cortisol. The stress hormone cortisol and progesterone share biochemical pathways. When the body is under sustained stress, it prioritizes cortisol production over progesterone. This effectively lowers progesterone levels, leaving estrogen relatively unopposed even if estrogen itself has not technically increased. The result is functionally similar to having high estrogen, because the counterbalancing force has been diminished.

Liver dysfunction. The liver is the primary organ responsible for metabolizing and clearing estrogen from the body. When liver function is compromised, whether due to alcohol consumption, poor diet, or conditions like fatty liver disease, the clearance of estrogen slows, allowing levels to accumulate.

Environmental xenoestrogens. Synthetic compounds found in plastics (particularly BPA), certain pesticides, and many conventional personal care products can mimic estrogen in the body, binding to estrogen receptors and producing estrogen-like effects. Reducing exposure to these compounds is an increasingly recommended element of hormonal health management.

PCOS and insulin resistance. Women with polycystic ovary syndrome often experience significant hormonal disruption, including elevated estrogen relative to progesterone. Insulin resistance, which frequently accompanies PCOS, also promotes aromatase activity and can contribute to higher estrogen levels.


How Doctors Test for and Treat High Estrogen Levels

If you recognize yourself in any of the signs described above, the path forward begins with getting tested. Here is a general overview of what the diagnostic and treatment process typically looks like.

Testing

A comprehensive hormone panel typically includes:

  • Estradiol (E2): The most active and most commonly measured form of estrogen
  • Progesterone: Measured to assess the ratio of progesterone to estrogen, which often matters more than estrogen in isolation
  • FSH and LH: Hormones from the pituitary gland that regulate the ovarian cycle
  • Testosterone: Often assessed alongside estrogen in women with PCOS or related conditions
  • SHBG (sex hormone-binding globulin): A protein that binds hormones and affects how much is “free” and biologically active

Timing matters enormously. Testing estrogen on day 3 of your cycle versus day 21 will give you very different results, and both data points can be informative. An integrative or functional medicine physician may order more comprehensive testing, including a DUTCH test (dried urine test for comprehensive hormones), which measures hormone metabolites and gives a fuller picture of how your body is processing and clearing estrogen.

Treatment Options

Treatment depends entirely on the underlying cause of elevated estrogen. Common approaches include:

Lifestyle interventions. For many women, targeted lifestyle changes produce meaningful hormonal improvements. These include increasing dietary fiber (which supports estrogen excretion through the gut), reducing alcohol intake, maintaining a healthy weight, managing stress through evidence-based practices, and limiting exposure to plastics and xenoestrogens.

Nutritional support. Cruciferous vegetables like broccoli, cauliflower, and Brussels sprouts contain a compound called DIM (diindolylmethane) that supports healthy estrogen metabolism in the liver. Flaxseeds, high in lignans, may also help modulate estrogen activity.

Medication adjustments. If hormonal birth control or HRT is contributing to elevated estrogen, your doctor may recommend switching to a lower-estrogen formulation, a different method, or a progestin-dominant approach that better counterbalances estrogen’s effects.

Progesterone therapy. In cases of confirmed estrogen dominance where progesterone is low, supplementing with bioidentical or synthetic progesterone under medical supervision can help restore the hormonal balance and alleviate symptoms.

Addressing underlying conditions. If PCOS, obesity, insulin resistance, or liver dysfunction is fueling high estrogen, treating those root causes directly is an essential part of the solution.

Medications for specific conditions. For women with diagnosed estrogen-dependent conditions like endometriosis or uterine fibroids, a range of hormonal treatments, and in some cases surgery, may be recommended depending on severity and treatment goals.


The Long-Term Risks You Cannot Afford to Ignore

It is worth being direct about what happens when critically high estrogen levels go unaddressed over the long term. This is not about causing unnecessary fear. It is about giving you the honest picture so you can advocate for yourself.

Prolonged exposure to elevated estrogen, particularly when unopposed by adequate progesterone, is associated with:

Endometrial hyperplasia and uterine cancer. Estrogen continuously stimulates the growth of the uterine lining. Without progesterone to counteract this, the lining can become excessively thick, a condition called endometrial hyperplasia. Left untreated, certain types of hyperplasia can progress to endometrial cancer. Research from the National Cancer Institute has found that using unopposed estrogen for five or more years is associated with at least a twofold increase in endometrial cancer risk.

Breast cancer risk. The majority of breast cancers are estrogen-receptor positive, meaning they are responsive to and potentially fueled by estrogen. Long-term exposure to elevated estrogen levels does not cause breast cancer on its own, but it does create a hormonal environment that may contribute to cancer cell development and growth over time.

Blood clots and cardiovascular complications. High estrogen levels, particularly in the context of synthetic estrogen from certain hormonal medications, are associated with an increased risk of venous thromboembolism (blood clots in the veins). Elevated estrogen can affect clotting factors in the blood, making clots more likely to form.

Gallbladder disease. Higher estrogen levels are associated with increased cholesterol saturation in bile, which raises the risk of gallstone formation. Women already have a higher baseline risk of gallstones than men, and estrogen excess compounds that risk further.

None of these outcomes are inevitable. But they are all preventable or mitigable with early awareness and appropriate care. That is exactly why recognizing these signs early matters so much.


A Note About Estrogen Dominance Versus Simply “High Estrogen”

You may have noticed that this discussion has moved between two concepts: high estrogen and estrogen dominance. It is worth briefly clarifying the distinction.

Clinically, high estrogen refers to estrogen levels that are objectively elevated above the normal reference range for a woman’s age and cycle phase.

Estrogen dominance, while widely used in wellness and functional medicine circles, is a more nuanced concept. It refers to a state where estrogen is elevated relative to progesterone, even if estrogen itself falls within a “normal” range. The ratio matters because progesterone is what keeps estrogen’s effects in check. When progesterone is chronically low, and it frequently is in today’s stress-saturated, sleep-deprived world, even moderate estrogen levels can produce symptoms of excess.

This is part of why some women are told their estrogen is “normal” on a blood test and still experience every symptom on this list. The absolute number is only part of the story. The ratio of estrogen to progesterone, the way the body metabolizes estrogen, and the individual sensitivity of tissues to estrogen all play a role in how these symptoms manifest.

If you have been tested and told your levels are normal but your symptoms persist, it may be worth requesting a more comprehensive panel, asking specifically about the estrogen-to-progesterone ratio, or consulting with a provider who specializes in hormonal health.


Bringing It All Together: What Your Body Is Really Saying

Your body is not being dramatic. Your period is not supposed to be that heavy. Your mood is not supposed to swing that wildly. The weight around your hips that refuses to move is not just a lack of willpower. And the fatigue that drags you down even after a full night’s sleep is not just the pace of modern life.

These are messages. Specific, physiological, hormone-driven messages from a body that is working hard to tell you something is out of balance.

The five signs we have covered in this article, including heavy or irregular periods, unexplained weight gain, significant mood disruption, breast tenderness and fibrocystic changes, and the presence of estrogen-dependent conditions like fibroids or endometriosis, are not random or unrelated. They are different expressions of the same underlying problem, and they all point toward estrogen levels that have climbed too high without adequate hormonal counterbalance.

The most important thing you can take away from this article is not a sense of alarm. It is a sense of direction. If these signs resonate with your experience, you now have a clearer picture of what questions to ask, what tests to request, and what conversations to have with your healthcare provider.

Hormonal health is foundational health. When estrogen is balanced, the downstream benefits touch nearly every area of your life, including your energy, your emotional resilience, your reproductive health, your sleep, and your long-term disease risk. Getting there starts with recognizing that what you are experiencing has a name, and that it deserves real attention.


Your Next Steps

If you recognize three or more of the signs in this article, here is a simple action plan:

  1. Book a hormone panel. Ask your doctor to test estradiol, progesterone, FSH, LH, and SHBG. Request that timing be noted, as cycle-day context is important for interpretation.
  2. Track your symptoms for one full cycle. Note mood changes, bleeding volume, breast changes, energy levels, and bloating day by day. This data is invaluable at a medical appointment.
  3. Audit your lifestyle for estrogen amplifiers. Consider reducing plastic use, limiting alcohol, increasing cruciferous vegetables, and addressing chronic stress.
  4. Find the right provider. If your concerns are dismissed without testing, seek a second opinion. A gynecologist, endocrinologist, or integrative medicine physician with experience in hormonal health is your best ally here.

Did this article help you make sense of symptoms you have been experiencing? Share it with a friend who needs to hear this. And if you have navigated estrogen imbalance yourself, drop a comment below. Your experience might be exactly what someone else needs to read today.


This article is intended for informational purposes only and does not constitute medical advice. Always consult a qualified healthcare provider for diagnosis, testing, and treatment of any hormonal or reproductive health concerns.

How to Tighten Your Vagina Naturally After Childbirth: 8 Powerful Pelvic Floor Exercises That Deliver Real Results Fast

You just grew and delivered an entire human being. Your body did something extraordinary. And now, a few weeks or months later, something feels noticeably different down there, and nobody thought to warn you about this part.

You are not broken. You are not alone. And yes, there is absolutely something you can do about it.


Introduction: The Postpartum Truth Nobody Writes on the Baby Shower Card

Childbirth is one of the most physically demanding events a human body ever goes through. During a vaginal delivery, the pelvic floor muscles stretch to roughly three times their normal length to allow the baby to pass through the birth canal. Imagine a rubber band pulled far beyond its resting state, repeatedly, over the course of many hours. That is the scale of what your body manages.

It is no surprise, then, that so many women notice significant changes after birth. Vaginal laxity, that sensation of looseness or reduced muscle tone, is one of the most common postpartum complaints. So is stress urinary incontinence, which is that frustrating experience of leaking a little urine when you sneeze, laugh, cough, or jump. Pelvic organ prolapse, reduced sexual sensation, and a persistent feeling of pelvic heaviness are also common. They just get talked about far less.

The silence around these issues is a genuine problem. Many women assume this is simply the price of motherhood. They carry on quietly, tucking a pad into their underwear before exercise or deliberately steering clear of the trampoline at their child’s birthday party. They do not mention it to their doctor because it feels embarrassing, or because they assume nothing can be done.

Here is the truth: targeted pelvic floor rehabilitation works. Research consistently shows that a structured program of pelvic floor exercises can meaningfully improve muscle tone, reduce urinary leakage, improve sexual satisfaction, and support recovery from mild to moderate pelvic organ prolapse. These are not bold promises. They are outcomes backed by clinical evidence and the lived experience of millions of women who refused to accept leaking as a permanent souvenir of motherhood.

This guide walks you through eight of the most effective pelvic floor exercises for postpartum recovery. It explains exactly what each one does, how to perform it correctly, why it works physiologically, and what results you can realistically expect. Whether you are six weeks postpartum or six years out, it is never too late to begin.

One important note before you start: if you had a significant perineal tear, episiotomy, or cesarean delivery, always consult your healthcare provider or a pelvic floor physiotherapist before beginning any structured exercise program. Your recovery may need a personalized approach, and that is completely okay.

Pelvic


What Is Actually Happening to Your Pelvic Floor After Childbirth?

Before getting into the exercises, it helps to understand exactly what you are working with. The pelvic floor is a group of muscles, ligaments, and connective tissues that form the base of the pelvis, stretching like a hammock between the pubic bone at the front and the coccyx at the back. These structures support the bladder, uterus, and rectum, and they play a central role in urinary and bowel control, sexual function, and spinal stability.

During a vaginal delivery, this hammock endures extraordinary mechanical stress. The baby’s head, averaging around 34 centimeters in circumference, passes through a canal surrounded entirely by these muscles. Even in the most straightforward deliveries, microscopic muscle tears and nerve compression occur. In deliveries involving prolonged pushing, a large baby, forceps or vacuum assistance, or significant perineal tearing, the degree of trauma can be considerably greater.

Cesarean deliveries are not an automatic free pass either. The weight of a full-term pregnancy, the hormonal softening of connective tissue throughout gestation, and the postural changes of late pregnancy all affect the pelvic floor regardless of how the baby arrived.

After birth, many women experience a combination of:

  • Muscle weakness from tearing and overstretching during delivery
  • Nerve injury that reduces proprioception (the brain’s sense of where the pelvic muscles are and what they are doing)
  • Connective tissue laxity from the hormone relaxin, which stays elevated for weeks postpartum
  • Postural misalignment from months of compensatory movement during pregnancy

Pelvic floor exercises address all of these factors over time. They rebuild muscle strength, stimulate nerve healing, restore connective tissue tension, and retrain movement patterns. But they only produce meaningful results when done correctly, consistently, and progressively. That is what the following exercises are designed to help you do.


Exercise 1: The Classic Kegel, The Cornerstone of Every Pelvic Floor Exercise Postpartum Program

If you have heard of exactly one pelvic floor exercise in your life, it is probably this one. The Kegel, named after gynecologist Dr. Arnold Kegel who developed the technique in the late 1940s, is the cornerstone of pelvic floor rehabilitation for a reason. It directly targets the pubococcygeus muscle, the primary muscle responsible for vaginal tone, urinary control, and pelvic support.

What makes Kegels so effective is their specificity. Unlike a squat or a bridge that recruits dozens of muscles simultaneously, a properly performed Kegel isolates the pelvic floor. When done correctly and consistently, this isolation creates meaningful neuromuscular reconnection, which is critical after childbirth when the pelvic floor can feel numb, disconnected, or simply absent.

How to Perform It Correctly

Many women do Kegels incorrectly without realizing it. They tighten their glutes, hold their breath, or brace their abdomen. None of that is a Kegel. Here is the correct technique:

  • Sit comfortably or lie on your back with knees bent and feet flat on the floor.
  • Imagine you are trying to stop the flow of urine midstream. The muscles you would engage to do that are your pelvic floor muscles.
  • Contract those muscles and hold for 5 to 10 seconds.
  • Release completely. The release is just as important as the contraction. Let the muscles relax fully before the next repetition.
  • Breathe normally throughout. Do not hold your breath at any point.
  • Aim for 10 repetitions, three times per day.

Why it works: The repetitive contraction and release cycle increases blood flow to the pelvic tissues, stimulates muscle fiber recruitment, and gradually rebuilds the neuromuscular pathways that childbirth can disrupt. Think of it like physical therapy for a sprained ankle. You would not just rest it. You would work it, carefully and progressively.

What results to expect: Most women notice measurable improvement in urinary leakage within 4 to 6 weeks of consistent practice. Improvement in vaginal tone and sexual sensation typically develops over 8 to 12 weeks of dedicated effort.

Symptoms it addresses: Stress urinary incontinence, vaginal laxity, reduced sensation during intercourse, mild pelvic organ prolapse, general pelvic floor weakness after vaginal or cesarean delivery.


Exercise 2: Quick-Flick Kegels, The Fast-Response Pelvic Floor Exercise Postpartum That Stops Leaks in Their Tracks

Standard Kegels train the slow-twitch muscle fibers, which are the endurance fibers responsible for maintaining resting tone. But your pelvic floor also contains fast-twitch fibers, and these are the ones that respond to sudden pressure spikes. When you sneeze, cough, laugh, or jump, intra-abdominal pressure rises in a fraction of a second. If your fast-twitch fibers are not trained to respond rapidly, leakage happens before you can do anything about it.

Quick-flick Kegels exist specifically to train this rapid-response system. Think of them as interval sprints for your pelvic floor. The contrast between quick-flick and standard Kegels is similar to the contrast between a 100-meter sprint and a long-distance run. Both build fitness, but they build different kinds.

How to Perform It Correctly

  • Get into the same comfortable position as a standard Kegel.
  • Contract your pelvic floor muscles as quickly and as forcefully as you can.
  • Release immediately. Do not hold. The speed of both the contraction and the release matters here.
  • Repeat in rapid succession, aiming for 10 to 20 quick flicks.
  • Rest for 10 seconds between sets.
  • Repeat the set two to three times.
  • Breathe naturally throughout.

Why it works: Rapid, high-intensity contractions specifically recruit and condition fast-twitch muscle fibers, improving the pelvic floor’s ability to brace reflexively in the split second before or during a pressure event. This is precisely the mechanism that prevents stress incontinence during physical activity.

What results to expect: Women who add quick-flick Kegels to their routine alongside standard Kegels typically see faster improvement in exertional leakage. Meaningful results in this area often appear within 4 to 8 weeks of consistent practice.

Symptoms it addresses: Urge incontinence, stress incontinence triggered by sneezing, coughing, or jumping, difficulty returning to high-impact exercise postpartum, leakage during laughing or sudden movement.


Exercise 3: The Pelvic Bridge, A Full-Body Postpartum Pelvic Floor Exercise That Rebuilds Core Connection

The pelvic bridge looks like a simple lower body exercise. And in some workout programs, that is all it is. But when performed with intentional pelvic floor engagement and proper breath coordination, it becomes one of the most efficient postpartum recovery exercises available, training the pelvic floor, glutes, hamstrings, and deep core in a single coordinated movement.

This matters because the pelvic floor does not function in isolation. It is part of an integrated system that includes the diaphragm, the deep abdominal muscles (specifically the transversus abdominis), and the multifidus muscles of the lower back. This system is often called the inner core canister. When one part of the canister is weakened by childbirth, the others compensate, usually inefficiently. The pelvic bridge helps restore coordination of the whole system simultaneously.

How to Perform It Correctly

  • Lie on your back with knees bent, feet flat on the floor hip-width apart.
  • Inhale to prepare.
  • As you exhale, gently engage your pelvic floor with a light Kegel, then slowly lift your hips off the floor by pressing through your heels.
  • Hold at the top for 2 to 3 seconds, keeping your spine in a neutral position and avoiding hyperextension of the lower back.
  • Slowly lower your hips back to the floor as you inhale.
  • Release the pelvic floor engagement completely at the bottom.
  • Complete 10 to 15 repetitions.

Why it works: The bridge loads the pelvic floor in a semi-functional position, training it to work cooperatively with the glutes and deep core. The breath coordination reinforces the important relationship between intra-abdominal pressure management and pelvic floor activation, a relationship that childbirth frequently disrupts.

What results to expect: Improved pelvic stability, noticeable reduction in lower back pain (extremely common postpartum), better core activation during daily activities. Most women notice functional improvements within 3 to 6 weeks.

Symptoms it addresses:


Exercise 4: Diaphragmatic Breathing, The Overlooked Postpartum Pelvic Floor Exercise That Changes Everything

This one surprises almost every woman who encounters it for the first time. Breathing, as an exercise? Yes. And here is why it matters more than nearly anything else on this list.

During pregnancy, the growing uterus pushes the diaphragm upward and the pelvic floor downward. This fundamentally alters the pressure dynamics of the inner core canister. After birth, many women unconsciously maintain these compensatory breathing patterns, holding tension in the upper chest, chronically bracing the abdomen, or breathing shallowly from the top of the lungs. These patterns directly impair pelvic floor function, regardless of how many Kegels you are doing.

How to Perform It Correctly

  • Lie on your back or sit comfortably in a supported chair with a tall spine.
  • Place one hand on your chest and one on your lower belly.
  • Inhale slowly through your nose, directing the breath downward into your belly. Your lower hand should rise gently; your upper hand should remain relatively still.
  • As you inhale, consciously allow your pelvic floor to soften and descend gently. Do not push down. Simply allow the natural movement.
  • Exhale slowly through pursed lips or your mouth. Feel your belly fall as the air leaves, and notice your pelvic floor gently lifting back up.
  • Repeat for 5 to 10 breath cycles, two to three times per day.

Why it works: The diaphragm and pelvic floor move in opposition like two ends of a piston: when one descends on the inhale, the other follows, and both recoil on the exhale. Restoring this coordinated relationship is foundational to pelvic floor recovery. According to evidence-based postpartum exercise guidance from the American College of Obstetricians and Gynecologists, restoring proper breathing mechanics supports safe and effective postpartum recovery and should precede the return to higher-intensity exercise.

What results to expect: Reduced pelvic pressure and heaviness, improved pelvic floor coordination, reduction in early prolapse symptoms, and better preparation for returning to exercise. Many women feel noticeably better within 1 to 2 weeks of consistent practice.

Symptoms it addresses: Pelvic heaviness, downward pressure, difficulty relaxing the pelvic floor, chronic breath-holding or abdominal bracing, and preparation for safely resuming high-impact exercise.


Exercise 5: The Functional Squat, A Postpartum Vaginal Tightening Exercise Your Body Was Built to Do

The deep squat is one of the most natural human positions, used across cultures for rest, labor, and daily life for thousands of years. It is also one of the most effective exercises for pelvic floor rehabilitation, provided it is performed correctly and at the right stage of postpartum recovery.

Squats train the pelvic floor eccentrically, meaning they challenge the muscles as they lengthen under load. This type of training builds functional strength that translates directly to the demands of real life: lifting a toddler, picking up a heavy car seat, rising from a low chair while holding a baby. Many women are surprised to learn that pelvic floor weakness is not simply about lacking contraction strength. It is equally about lacking the ability to lengthen under load without losing control.

How to Perform It Correctly

  • Stand with feet hip- to shoulder-width apart, toes turned out slightly.
  • Inhale as you lower into the squat, allowing your pelvic floor to relax and descend naturally with the movement.
  • Lower until your thighs are roughly parallel to the floor, or as deep as feels comfortable without discomfort.
  • At the bottom of the movement, take a moment to breathe and feel the pelvic floor gently open.
  • Exhale as you press through your heels and return to standing. Gently re-engage the pelvic floor on the way up.
  • Complete 10 to 15 repetitions with control.

Important: Avoid squats if you have moderate to severe pelvic organ prolapse symptoms such as heaviness, a noticeable bulge, or dragging sensations, until you have been assessed by a pelvic floor physiotherapist. The downward pressure of a loaded squat can worsen prolapse in the early stages of recovery.

Why it works: Eccentric loading builds both strength and controlled flexibility in the pelvic floor, which is essential for women who have experienced pelvic floor hypertonia (excessive tightness) as well as for those dealing with weakness. Both conditions are more common postpartum than most people realize.

What results to expect: Improved functional pelvic strength, reduced symptoms during daily activity, better tolerance for exercise. Results typically begin to emerge within 4 to 8 weeks of consistent training.

Symptoms it addresses: Functional weakness during daily activity, pelvic floor hypertension or excessive tension, difficulty returning to exercise, hip and pelvic instability.


Exercise 6: The Pelvic Tilt, A Gentle Postpartum Pelvic Floor Exercise That Resets Your Foundation

The pelvic tilt is often dismissed as an entry-level movement that women graduate from quickly. In postpartum recovery, that is a significant underestimation. Many women develop a pronounced anterior pelvic tilt, a forward rotation of the pelvis, during pregnancy as the center of gravity shifts dramatically forward. This postural shift places the pelvic floor muscles in a shortened, mechanically inefficient position, which contributes to lower back pain, hip tightness, and compromised pelvic floor function even after delivery.

The pelvic tilt directly corrects this misalignment. It activates the lower abdominals and resets the pelvis to neutral, allowing the pelvic floor to work from its optimal mechanical position. It is less of an exercise and more of a reset button for your entire core system.

How to Perform It Correctly

  • Lie on your back with knees bent and feet flat on the floor.
  • Notice the natural arch under your lower back. There should be a small gap between your lumbar spine and the floor.
  • Gently flatten that gap by tilting your pelvis upward, drawing your lower back toward the floor without lifting your hips. This is a subtle, controlled movement, not a dramatic one.
  • Hold for 5 to 10 seconds while breathing normally.
  • Release and return to the natural arch.
  • Complete 10 to 15 repetitions.

Why it works: Restoring pelvic neutral optimizes the mechanical position of the pelvic floor muscles, significantly improving their ability to generate force efficiently. It also activates the transversus abdominis, the deepest abdominal muscle and a key component of the inner core canister, which is frequently inhibited after childbirth.

What results to expect: Reduced lower back pain and pelvic girdle pain, measurably better core activation, improved effectiveness of other pelvic floor exercises performed afterward. Most women notice postural and pain improvements within 2 to 4 weeks.

Symptoms it addresses: Lower back pain, anterior pelvic tilt, poor lower abdominal activation, pelvic girdle pain, general core disconnection after delivery.


Exercise 7: The Clam Shell, The Hip-Focused Pelvic Floor Postpartum Exercise That Protects Your Pelvis From the Sides

The clam shell targets the hip abductors and external hip rotators, particularly the gluteus medius. This might seem unrelated to pelvic floor recovery at first glance. But the anatomical connection is both direct and highly important.

The pelvic floor is essentially a hammock suspended between the sit bones and the pubic bone, anchored on each side by the hip structures. When the hip abductors are weak, which is extremely common postpartum due to prolonged sitting, altered gait patterns, and reduced activity during late pregnancy, the pelvis drops and wobbles during walking and exercise. This instability increases the cumulative load on the pelvic floor and can significantly worsen symptoms of prolapse and incontinence. Strengthening the hip stabilizers removes excess pressure from the pelvic floor and allows it to function far more efficiently.

How to Perform It Correctly

  • Lie on your side with your hips and knees bent to approximately 45 degrees, one hip stacked directly above the other. Your spine should remain in a neutral, straight position.
  • Keep your feet together throughout the entire exercise.
  • Inhale, then exhale and rotate your top knee upward, like a clamshell opening, without allowing your pelvis to roll backward. The movement should come entirely from the hip, not from the lower back.
  • Hold at the top for 2 to 3 seconds.
  • Slowly lower the knee back to the starting position with control.
  • Complete 12 to 15 repetitions on each side.

Why it works: Strengthening the gluteus medius and the external hip rotators restores lateral pelvic stability, reducing the mechanical load placed on the pelvic floor during all weight-bearing activities, walking, climbing stairs, and carrying a baby.

What results to expect: Reduced hip and pelvic pain, improved gait mechanics, decreased pelvic floor loading during daily activities, and better exercise tolerance. Improvement is often noticeable within 3 to 5 weeks of consistent practice.

Symptoms it addresses: Hip pain, pelvic instability during walking, worsening prolapse symptoms during activity, postpartum hip weakness, and pain that develops during prolonged standing or carrying.


Exercise 8: The Wall Sit With Pelvic Floor Engagement, An Isometric Postpartum Exercise for Lasting Pelvic Endurance

The wall sit is an isometric exercise, meaning the muscles contract and hold tension without changing length. This type of contraction is particularly valuable for pelvic floor rehabilitation because it trains the slow-twitch endurance fibers under sustained load, which is exactly what the pelvic floor needs to maintain postural support over the course of a full day.

Think about what the pelvic floor actually does in a normal day. It supports the weight of the pelvic organs continuously, responds to pressure fluctuations from breathing and movement, and maintains continent control during every activity. That requires endurance, not just the ability to squeeze hard for five seconds. The wall sit builds that endurance systematically, while also strengthening the quadriceps, glutes, and deep core in the same movement.

How to Perform It Correctly

  • Stand with your back flat against a smooth wall, feet about two feet forward.
  • Slide your back down the wall until your thighs are parallel to the floor, as if sitting in an invisible chair.
  • Your knees should be stacked directly above your ankles, not pushed forward beyond your toes.
  • Breathe normally throughout the hold.
  • Gently engage your pelvic floor muscles during the hold, as if performing a moderate Kegel. The engagement should feel like a lift, not a clench.
  • Hold for 20 to 45 seconds to begin. Build progressively toward 60 to 90 seconds as your strength improves over weeks.
  • Rest for 30 seconds between sets, then repeat two to three times.

Why it works: Sustained isometric loading trains pelvic floor endurance, the capacity to maintain structural support under ongoing load, while the quadriceps and glute activation creates a mechanically stable pelvic environment during the hold.

What results to expect: Improved pelvic floor endurance, better structural support during prolonged standing and activity, reduced symptom worsening during the day. Results develop progressively over 4 to 8 weeks.

Symptoms it addresses: Pelvic heaviness that develops and worsens throughout the day, poor endurance during exercise, pelvic floor fatigue, and general weakness under sustained physical demands.


The Complete Comparison Table: Pelvic Floor Exercises Postpartum at a Glance

Not sure where to begin or how to prioritize your efforts? This table summarizes all eight exercises by primary target muscles, key symptoms addressed, difficulty level, and realistic timeline for noticeable results. Use it to build a personal program that matches your current stage of recovery.

Exercise Primary Muscles Targeted Key Symptoms Addressed Difficulty Level Results Timeline
Classic Kegel Pubococcygeus, levator ani Urinary leakage, vaginal laxity, reduced sensation Beginner 4 to 6 weeks
Quick-Flick Kegel Fast-twitch pelvic floor fibers Exertional leakage, sneezing/coughing leaks Beginner 4 to 8 weeks
Pelvic Bridge Pelvic floor, glutes, hamstrings, deep core Core disconnection, lower back pain, instability Beginner to Intermediate 3 to 6 weeks
Diaphragmatic Breathing Diaphragm, pelvic floor coordination Pelvic heaviness, prolapse symptoms, breath-holding Beginner 1 to 2 weeks
Functional Squat Pelvic floor (eccentric), glutes, quads Functional weakness, hypertonia, hip instability Intermediate 4 to 8 weeks
Pelvic Tilt Transversus abdominis, pelvic floor Lower back pain, pelvic misalignment, core inhibition Beginner 2 to 4 weeks
Clam Shell Gluteus medius, hip external rotators Hip pain, lateral instability, worsened prolapse during activity Beginner to Intermediate 3 to 5 weeks
Wall Sit With Pelvic Engagement Pelvic floor endurance, quads, glutes Pelvic heaviness during standing, poor exercise endurance Intermediate 4 to 8 weeks

How to Build Your Weekly Postpartum Recovery Program

Now that you know what each exercise does, here is how to structure them into a practical, progressive weekly program. Consistency matters far more than volume in pelvic floor rehabilitation. Three focused sessions per week will outperform seven rushed, unfocused ones every time.

Weeks 1 to 4: Reconnection Phase

In the early postpartum period, after your healthcare provider clears you for gentle exercise, the goal is not strength. It is reconnection. The pelvic floor muscles may feel distant, weak, or simply impossible to locate after birth. That is entirely normal. The nerve pathways have been stretched and compressed. Focus exclusively on:

  • Diaphragmatic breathing daily (5 to 10 breaths, 2 to 3 times per day)
  • Classic Kegels (10 repetitions, 3 times per day)
  • Pelvic tilt (10 to 15 repetitions, once daily)

Keep sessions to 5 to 10 minutes. More is not better at this stage.

Weeks 4 to 8: Activation Phase

As reconnection improves and the muscles become easier to locate and engage, add progressive challenge:

  • Continue diaphragmatic breathing daily
  • Add quick-flick Kegels immediately after classic Kegels
  • Introduce pelvic bridge (10 to 15 repetitions, 3 times per week)
  • Add clam shells (12 to 15 repetitions each side, 3 times per week)

Weeks 8 to 16: Loading Phase

By this stage, many women feel substantially improved. The goal now is building functional strength under meaningful load:

  • All of the above, plus functional squats and wall sits
  • Begin integrating pelvic floor awareness into daily movements: lifting, climbing stairs, carrying the baby, pushing the stroller

A Necessary Caution About Progressing Too Fast

As NHS guidance on pelvic organ prolapse and pelvic floor recovery clearly notes, returning to high-impact exercise such as running, jumping, and HIIT before the pelvic floor has adequately recovered can worsen symptoms of prolapse and incontinence considerably. The general recommendation is to wait until at least 12 weeks postpartum, and only after pelvic floor symptoms have resolved or significantly improved, before resuming high-impact activity.

If you notice increased pelvic pressure, a dragging sensation, leakage during exercise, or a feeling of something bulging during or after activity, those are signals to pull back immediately and consult a pelvic floor physiotherapist before continuing.


Common Mistakes That Quietly Undermine Pelvic Floor Recovery

Even women who are diligent and motivated about their pelvic floor exercises often make these errors, which undermine progress without them realizing it:

Skipping the release. A pelvic floor that cannot fully relax is as dysfunctional as one that cannot contract. Always release completely between repetitions and allow the muscles to return to their resting state.

Holding the breath. Breath-holding spikes intra-abdominal pressure and directly counteracts the benefit of the contraction. Breathe throughout every single exercise.

Contracting the wrong muscles. If your glutes, inner thighs, or abdomen are tensing significantly during Kegels, you are almost certainly compensating. A pelvic floor physiotherapist can use real-time ultrasound or biofeedback to confirm you are isolating the correct muscles.

Assuming more is better. Overdoing Kegels, particularly if you already have pelvic floor hypertonia (excessive baseline tension), can worsen symptoms rather than improve them. If Kegels cause pain, burning, or worsened leakage, stop immediately and seek professional assessment.

Expecting rapid overnight results. Muscle rehabilitation takes consistent effort over weeks and months. The improvements tend to arrive quietly and incrementally, in the sneeze you survived without leaking, the morning you got through a workout without discomfort. Pay attention to those moments. They are real progress.


When to See a Pelvic Floor Physiotherapist

Pelvic floor physiotherapy is one of the most underutilized postpartum interventions available to women, despite overwhelming evidence supporting its effectiveness. Consider seeking a referral or booking a session if:

  • You are leaking urine or feces at any point, regardless of how minor or normal it may seem
  • You have a sensation of pelvic heaviness, persistent downward pressure, or a noticeable bulge at the vaginal opening
  • Sex is painful or significantly reduced in sensation after your six-week clearance
  • You are struggling to locate or engage your pelvic floor muscles at all
  • You are preparing to return to running or high-impact exercise
  • Your pelvic floor symptoms seem to be worsening rather than improving with exercise

Many countries offer pelvic floor physiotherapy through public health systems at no cost. In others, it is accessed privately. Either way, even one to three sessions can provide a proper assessment, biofeedback training, and personalized guidance that genuinely transforms the trajectory of recovery.


The Long View: Why Pelvic Floor Health Is One of Your Most Important Long-Term Investments

Here is something worth sitting with. The pelvic floor does not just matter for the postpartum year. It matters for the rest of your life.

Postpartum pelvic floor damage that goes unaddressed is a significant risk factor for stress urinary incontinence in midlife, pelvic organ prolapse after menopause, and ongoing sexual dysfunction at any age. The estrogen decline during perimenopause and menopause further reduces pelvic tissue elasticity, which means women who enter that phase with already-compromised pelvic floors frequently experience substantially worse symptoms than women who have rehabilitated effectively.

Starting pelvic floor exercises now, regardless of whether your current symptoms feel minor or manageable, is one of the most impactful long-term health decisions you can make. This is not about vanity. It is about prevention, about the quality of your physical life at 45, at 55, at 70.

Your pelvic floor supported a pregnancy and made way for a birth. After everything it gave, it deserves a few intentional minutes of attention every single day.


Conclusion: Your Body Did Something Remarkable. Now Let It Rebuild.

The exercises in this guide are not quick fixes or trending wellness gimmicks. They are rooted in anatomy, physiology, and decades of clinical evidence. They work when performed consistently, correctly, and with patience. Not all at once. Not in a frantic burst of postpartum motivation that fades by week three. Slowly, steadily, and with genuine attention.

You do not have to accept leaking as a permanent souvenir of motherhood. You do not have to settle for reduced sensation or ongoing pelvic discomfort. And you do not have to wait until symptoms become impossible to ignore before taking action. The window for meaningful improvement is wide open, whether you are six weeks postpartum or six years out.

Start small. Pick one or two exercises from this list and practice them consistently for two full weeks before adding more. Build gradually and pay attention to how your body responds. The improvements will come quietly, in the moments you stop unconsciously planning your bathroom route before a walk, in the intimacy that begins to feel like yours again, in the confidence that comes from knowing you are doing something real for your own recovery.

That is the work. It is unglamorous, often invisible, and entirely worth doing.


Take the Next Step

Know a new mom who needs this? Send her this article. Postpartum pelvic floor health is still dramatically under-discussed, and the women who need this information most are often the least likely to find it on their own.

Read Next:

  • How to Know If You Have Pelvic Organ Prolapse (And What to Do About It)
  • Diastasis Recti After Pregnancy: The Complete Guide to Healing Your Core
  • When Can I Start Running After Having a Baby? The Honest, Evidence-Based Answer

Drop a comment below: Which exercise are you starting with? Have you worked with a pelvic floor physiotherapist and seen results? Share your story below. Your experience might be exactly what another woman needs to read today.


This article is for informational purposes only and does not constitute medical advice. Always consult your healthcare provider or a qualified pelvic floor physiotherapist before beginning any postpartum exercise program, particularly if you experienced complications during delivery or are currently experiencing significant pelvic floor symptoms.

1 Clinically Proven Ways to Eliminate Chronic Yeast Infections Forever

You have done everything “right” and yet, here you are again. The itch, the discomfort, the pharmacy run you could practically do blindfolded at this point. If chronic yeast infections have become an unwelcome recurring character in your life story, this article was written specifically for you.

Introduction: Why Chronic Yeast Infections Keep Coming Back (And Why This Time Can Be Different)

Millions of women in the United States and United Kingdom deal with recurrent yeast infections every single year. “Recurrent” is the clinical term, but most women have a more colorful vocabulary for it. A yeast infection is classified as recurrent when it happens four or more times in a 12-month period, and by that measure, roughly 5 to 8 percent of women of reproductive age meet the criteria.

Here is the frustrating truth most doctors have not had time to tell you. The standard one-week antifungal cream or single-dose fluconazole pill treats the symptoms, but it rarely addresses the underlying reasons the infection keeps coming back. It is a bit like mopping the floor while the tap is still running. You feel better for a few weeks, maybe a few months, and then the familiar symptoms return.

The good news is that gynecology has made significant strides in understanding recurrent vulvovaginal candidiasis (the clinical name for chronic yeast infections). In both US and UK clinical practice, a new generation of longer-term, root-cause-focused treatment protocols is now being offered to women who have been stuck in the revolving door of short-term fixes.

This article walks you through 11 of those clinically supported strategies, drawing from published gynecological research, updated NHS guidance, and recommendations from leading US obstetrics and gynecology (OB-GYN) practices. Whether you are dealing with your second infection in three months or your thirtieth in three years, there is something here that can genuinely shift the pattern.

Let us get into it.


Chronic Yeast Infections


1. Extended Antifungal Maintenance Therapy for Chronic Yeast Infections

The single biggest shift in how gynecologists now treat chronic yeast infections is the move away from treating each episode individually and toward sustained maintenance therapy. Rather than reaching for a one-time dose every time symptoms flare, maintenance therapy involves taking a low dose of an antifungal medication, most commonly oral fluconazole, on a scheduled basis for six months or more.

The landmark study supporting this approach, published in the New England Journal of Medicine, found that women on a weekly fluconazole maintenance regimen for six months had a dramatically lower recurrence rate compared to those who only treated acute episodes. After the maintenance period ended, 42.9 percent of women in the treatment group remained infection-free, compared to just 21.9 percent in the placebo group.

What this looks like in practice:

  • A loading dose of fluconazole (typically 150mg) taken every 72 hours for three doses to clear the active infection.
  • Followed by weekly fluconazole (150mg) for six months.
  • Gradual tapering after six months under a doctor’s supervision.

This protocol is now widely recommended by the American College of Obstetricians and Gynecologists (ACOG) and is increasingly offered through NHS gynecology clinics in the UK. If your GP or OB-GYN has only ever prescribed you the standard short course, it is absolutely worth asking specifically about maintenance therapy.


2. Accurate Species Identification to Treat Yeast Infections at the Root

Not all yeast infections are created equal. The majority, roughly 85 to 90 percent, are caused by Candida albicans. But a meaningful minority are caused by non-albicans species such as Candida glabrata, Candida krusei, or Candida tropicalis. This matters enormously because these species are often resistant to the standard fluconazole treatments that work so well for C. albicans.

If you have been treating your infections with over-the-counter antifungals and they keep returning, there is a reasonable chance you are either dealing with a resistant strain or a non-albicans species entirely. Both scenarios require different treatments that cannot be found at a pharmacy counter.

What to ask your doctor:

  • Request a vaginal culture (not just a swab or visual examination) to identify the exact Candida species involved.
  • If a non-albicans species is confirmed, ask about boric acid suppositories, nystatin, or flucytosine-based treatments, all of which have clinical evidence behind them for resistant strains.
  • In the UK, this kind of testing is available through GUM (genitourinary medicine) clinics, which often have faster referral times than general gynecology.

Getting this right at the diagnostic level is what makes everything else in this list work better. Treating the wrong organism with the wrong drug is one of the most common reasons chronic yeast infections persist.


3. Boric Acid Suppositories: The Gynecologist-Recommended Alternative for Stubborn Yeast Infections

Boric acid sounds alarming at first. It is, after all, used in pest control. But vaginal boric acid suppositories have been used safely in gynecological medicine for over a century, and they have experienced a significant clinical renaissance in recent years for treating antifungal-resistant and recurrent yeast infections.

Boric acid works differently from azole antifungals. Rather than targeting fungal cell membranes, it creates an inhospitable pH environment in the vagina that Candida simply cannot thrive in. This makes it particularly effective against species like C. glabrata that shrug off fluconazole entirely.

A review published in evidence-based gynecological literature found clinical cure rates of 70 percent or higher when boric acid was used for antifungal-resistant infections. Importantly, this included cases where multiple rounds of standard antifungal treatment had already failed.

Key clinical guidance on boric acid:

  • The standard dose is 600mg intravaginal capsules, inserted once daily for 14 days for acute infections.
  • For maintenance, twice-weekly use for several months is increasingly recommended by US gynecologists.
  • Boric acid is toxic if ingested orally. Keep it clearly labeled and away from children and pets.
  • It is contraindicated during pregnancy.

Many women report this approach finally breaking the cycle after years of recurrences. It is available without a prescription in the US and can be obtained through a GP or compounding pharmacy in the UK.


4. Probiotics Targeted for Vaginal Health to Combat Chronic Yeast Infections

The gut-vagina axis is a relatively new area of microbiome science, but its clinical implications are already reshaping how gynecologists approach chronic yeast infections. The healthy vaginal microbiome is dominated by Lactobacillus species, particularly L. crispatus and L. rhamnosus, which maintain an acidic pH that keeps Candida in check. When that Lactobacillus dominance is disrupted, whether by antibiotics, hormonal changes, or diet, Candida finds room to proliferate.

Oral and vaginal probiotics formulated with specific Lactobacillus strains have shown genuine promise in both preventing recurrence and supporting recovery from active infections. Several randomized controlled trials have demonstrated that Lactobacillus rhamnosus GR-1 and Lactobacillus reuteri RC-14 are the strains with the strongest evidence base for vaginal health.

What the research shows:

  • A randomized trial published in the FEMS Immunology and Medical Microbiology journal found that women taking L. rhamnosus GR-1 and L. reuteri RC-14 daily had significantly fewer yeast infection recurrences over a 12-month period.
  • These strains survive the journey through the digestive system and colonize the vaginal environment via perineal transfer.
  • They are most effective when started alongside, not instead of, conventional antifungal treatment.

Look for products that specifically list L. rhamnosus GR-1 and L. reuteri RC-14 on the label, as these are the strains backed by the strongest clinical evidence. Generic multi-strain probiotics marketed as “women’s health” products may not contain these specific strains in meaningful quantities.


5. Addressing Hormonal Imbalances That Drive Recurrent Yeast Infections

One of the most overlooked drivers of chronic yeast infections is hormonal fluctuation, and this is finally getting more attention in clinical settings. Estrogen plays a direct role in vaginal health by supporting Lactobacillus populations and maintaining the thickness and glycogen content of vaginal tissue. Drops in estrogen, whether during the luteal phase of the menstrual cycle, during perimenopause, postpartum, or due to hormonal contraception, can create conditions where Candida thrives.

Many women notice a pattern: infections appear predictably in the week before their period, or shortly after giving birth, or after starting a new hormonal contraceptive. This pattern is not coincidental. It is a hormonal fingerprint worth discussing with your doctor.

Hormonal situations that may contribute to chronic yeast infections:

  • High-dose combined oral contraceptives (raising estrogen can paradoxically increase glycogen and Candida food supply in some women)
  • Progestin-only pills and hormonal IUDs in some cases
  • Perimenopause and postmenopause (low estrogen)
  • Pregnancy and the postpartum period
  • Poorly controlled diabetes (which also involves glucose regulation affecting vaginal environment)

In perimenopausal or postmenopausal women, low-dose local vaginal estrogen (cream, ring, or tablet) has been shown in clinical trials to reduce recurrence rates significantly. In younger women with cyclical infections, some gynecologists now suggest switching contraceptive methods as a first-line intervention before escalating to antifungal treatment.


6. Dietary Changes Clinically Linked to Fewer Chronic Yeast Infections

The idea that diet affects yeast infections is often dismissed as pseudoscience, but the evidence base here is more substantial than many people realize. Candida albicans does feed on sugars, and diets high in refined carbohydrates and added sugars create higher glucose concentrations in vaginal secretions, which can support Candida proliferation.

This connection is clearest in women with diabetes or prediabetes, where chronic yeast infections are common and often a presenting symptom. But the relationship extends beyond diabetics. Several observational studies and one systematic review have found associations between high glycemic diets and increased susceptibility to recurrent vulvovaginal candidiasis.

Dietary adjustments with clinical support:

  • Reducing refined sugars and processed carbohydrates (white bread, pastries, sugary drinks) lowers the glucose available to Candida in vaginal secretions.
  • Increasing probiotic-rich foods such as plain yogurt with live cultures, kefir, sauerkraut, and kimchi can support Lactobacillus populations.
  • There is limited but suggestive evidence that caprylic acid (found in coconut oil) has antifungal properties, though this is not yet strong enough to be a standalone treatment.
  • Staying well-hydrated supports overall mucosal health.

It is worth being cautious about heavily restrictive “Candida diets” that cut out entire food groups. The evidence for these extreme protocols is not strong, and they can lead to nutritional deficiencies. Moderate, evidence-aligned changes are more sustainable and more likely to be maintained long-term.


7. Getting Blood Sugar Under Control as a Key Yeast Infection Treatment Strategy

This section deserves its own heading because the link between blood sugar and chronic yeast infections is one of the strongest in the clinical literature, yet it is routinely missed in quick GP appointments. High blood glucose concentrations create an environment in the vagina that is profoundly hospitable to Candida. The fungus essentially has an abundant food source that conventional antifungal treatments do nothing to remove.

Women with type 1 or type 2 diabetes are two to three times more likely to experience recurrent yeast infections than non-diabetic women. But many women cycling through chronic infections have not been tested for prediabetes or insulin resistance, which can produce the same vaginal environment without a formal diabetes diagnosis.

What to do:

  • Ask your doctor for a fasting blood glucose test and HbA1c (glycated hemoglobin) test if you have not had one recently, especially if your infections are frequent and resistant to treatment.
  • If prediabetes or insulin resistance is identified, working with your GP or a dietitian to stabilize blood sugar can dramatically reduce yeast infection frequency.
  • For women with diagnosed diabetes, optimizing glycemic control is itself a first-line strategy for reducing recurrence, sometimes more effective than additional antifungal courses.

This is one of the most powerful and underutilized levers for chronic yeast infection management. It also has substantial benefits for overall health, making it a particularly worthwhile investigation.


8. Partner Treatment Considerations in Persistent Yeast Infections

Sexual transmission of yeast infections is a topic that comes loaded with misunderstanding. Candida is not a sexually transmitted infection in the traditional sense, but sexual partners, particularly male partners, can harbor Candida asymptomatically on penile skin and reintroduce it during intercourse, potentially contributing to reinfection patterns.

This is particularly relevant for heterosexual couples where the female partner experiences post-coital flares of symptoms. Studies have found that male partners of women with recurrent yeast infections have higher rates of penile Candida colonization than partners of unaffected women, and that treating the male partner alongside the female partner can improve long-term outcomes.

What current clinical guidance suggests:

  • If your infections reliably worsen after sex, this is worth discussing with your gynecologist as a specific pattern.
  • Some clinicians recommend topical antifungal treatment for male partners when recurrent post-coital infections are the pattern.
  • Using condoms temporarily during a treatment course can reduce reintroduction during the treatment window.
  • This is not about blame or stigma. It is simply addressing a potential reservoir that makes complete eradication difficult.

For same-sex female couples, a similar principle applies. Candida can transfer between partners, and simultaneous treatment may be warranted when infections keep returning despite adequate individual treatment.


9. Correct Hygiene and Clothing Practices That Prevent Recurrent Yeast Infections

Some hygiene recommendations for vaginal health have become so commonplace they have turned into noise. But they are in the list because they genuinely matter, and many women are still getting them wrong, not out of negligence but because contradictory advice is everywhere.

The vagina is a self-cleaning system. It does not benefit from scented soaps, douching, or “intimate wash” products. These products disrupt the natural pH and Lactobacillus balance that protect against Candida overgrowth. The irony is that products marketed to make you feel “fresher” are among the most reliable contributors to yeast infections.

Evidence-supported hygiene and clothing practices:

  • Wash the external vulva only with plain, unscented soap or warm water. The internal vagina needs nothing.
  • Avoid douching entirely. It reliably disrupts vaginal microbiome balance.
  • Wear breathable, cotton-lined underwear. Synthetic fabrics trap moisture and warmth, creating ideal conditions for Candida.
  • Change out of wet swimwear or gym clothes promptly.
  • Wipe front to back after using the toilet to avoid introducing gut Candida (which normally lives there) to the vaginal area.
  • Avoid tight-fitting synthetic trousers or leggings worn for extended periods, particularly during high-activity periods.

None of these changes alone will resolve a chronic infection with an underlying medical driver. But they remove environmental conditions that make Candida more likely to establish itself and reduce the load on whatever treatment protocol you are following.


10. The Role of Immune Function in Chronic Yeast Infection Susceptibility

Healthy immune function is one of the most important factors keeping Candida from transitioning from a harmless commensal organism (it lives in small amounts on and in most human bodies) to a pathogenic overgrowth. When immune function is impaired, even temporarily, Candida seizes the opportunity.

This is seen most dramatically in women who are immunocompromised due to HIV, cancer treatment, or long-term immunosuppressive medications. But immune suppression exists on a spectrum, and factors like chronic stress, poor sleep, nutritional deficiencies (particularly zinc, iron, and vitamin D), and overuse of broad-spectrum antibiotics can all shift immune function enough to create windows of vulnerability.

Immune-supportive strategies with clinical backing:

  • Addressing iron deficiency anemia, which is associated with increased susceptibility to recurrent infections of all types.
  • Ensuring adequate vitamin D levels, which play a role in mucosal immune defenses. UK and northern US populations are particularly prone to deficiency.
  • Managing chronic stress through evidence-based interventions (exercise, mindfulness, cognitive behavioral therapy), as cortisol has direct immunosuppressive effects.
  • Being judicious about antibiotic use. Broad-spectrum antibiotics wipe out the Lactobacillus populations that keep Candida in check. If antibiotics are necessary, adding antifungal prophylaxis (a single dose of fluconazole) alongside them is now recommended by many gynecologists for women with a history of antibiotic-triggered infections.

A conversation with your doctor about immune function is especially warranted if your infections are severe, very frequent, or accompanied by oral thrush or skin fungal infections, which can signal a broader issue requiring investigation.


11. Ibrexafungerp: The New-Generation Antifungal Changing Yeast Infection Treatment

This entry represents the frontier of what US and UK gynecologists are now beginning to offer patients who have exhausted conventional options. Ibrexafungerp (brand name Brexafemme in the US) is a first-in-class oral antifungal approved by the US FDA in 2021 specifically for vulvovaginal candidiasis, with an extended indication for recurrent infections approved in 2022.

Unlike fluconazole, which is an azole antifungal targeting ergosterol synthesis, ibrexafungerp is a triterpenoid that works by inhibiting beta-1,3-glucan synthase, a completely different mechanism. This makes it effective against fluconazole-resistant Candida strains and non-albicans species that have been the bane of women stuck in the treatment-resistant category.

What the clinical data shows:

  • In the CANDLE trial, ibrexafungerp taken for six months significantly reduced recurrence rates compared to placebo.
  • It is taken orally, two tablets twice daily for one day for acute treatment, or one tablet once daily for maintenance.
  • It is not yet widely available through NHS prescribing pathways but can be accessed privately in the UK. In the US, it requires a prescription and may require prior authorization.
  • It is particularly worth discussing if you have had confirmed azole-resistant infections or if multiple courses of fluconazole have failed.

Ibrexafungerp is not a first-line treatment for every woman with a yeast infection. But for those with truly treatment-resistant or recurrent infections, it represents a genuine clinical breakthrough that is now accessible in clinical practice rather than just research settings.


Comparison Table: Yeast Infection Treatment Options at a Glance

The table below summarizes the 11 approaches covered in this article, their evidence level, who they are most appropriate for, and where to access them.

Treatment Approach Evidence Level Best For Availability
Extended Fluconazole Maintenance High (RCT-supported) Most women with recurrent C. albicans Prescription (US and UK)
Accurate Species Identification Foundational All recurrent cases Vaginal culture via GP/GUM clinic
Boric Acid Suppositories Moderate-High Resistant strains, C. glabrata OTC in US; compounding pharmacy in UK
Targeted Probiotics (GR-1/RC-14 strains) Moderate Supportive/preventive use OTC (ensure correct strains)
Hormonal Assessment and Adjustment Moderate Cyclical or peri/postmenopausal infections GP/OB-GYN consultation
Dietary Modifications Low-Moderate Adjunct to treatment, high-sugar diets Self-managed
Blood Sugar Optimization High (for diabetics) Diabetic/prediabetic women GP/endocrinologist
Partner Treatment Moderate Post-coital recurrence pattern GP/sexual health clinic
Hygiene and Clothing Changes Practical/preventive All women as supportive measure Self-managed
Immune Support (nutritional, stress) Moderate Frequent, stress-linked, antibiotic-triggered Self-managed plus GP testing
Ibrexafungerp (Brexafemme) High (FDA-approved RCT) Azole-resistant, treatment-refractory cases Prescription US (OTC route UK private)

A Note on Seeking the Right Medical Care for Chronic Yeast Infections

One of the most important things this article can do is encourage you to advocate for yourself in a medical setting. Chronic yeast infections are often undertreated because busy clinical consultations default to repeat prescriptions of the same short-course treatments. You now have the vocabulary and knowledge to ask more specific questions.

If your GP or primary care physician is not familiar with maintenance fluconazole protocols, extended diagnostics, or newer agents like ibrexafungerp, asking for a referral to a gynecologist or a GUM clinic (in the UK) is entirely appropriate. These specialists see recurrent vulvovaginal infections regularly and are far more likely to offer the comprehensive workup this condition deserves.

According to guidance published through evidence-based women’s health resources, the workup for recurrent vulvovaginal candidiasis should include culture-based species identification, pH testing, hormonal assessment where relevant, and blood glucose screening, none of which is available in a standard OTC treatment but all of which are standard practice in specialist settings.

The American College of Obstetricians and Gynecologists and NHS England have both updated their guidelines in recent years to reflect the stronger evidence base for maintenance therapy and individualized treatment. You are not asking for something unusual when you request these approaches. You are asking for what current best practice actually recommends.


What Chronic Yeast Infections Actually Tell You About Your Body

It is worth stepping back from the treatment protocols for a moment and reframing what recurrent yeast infections mean. They are rarely “just bad luck.” They are almost always a signal that something in your body’s ecosystem is off balance, whether it is your microbiome, your hormones, your blood sugar, your immune function, or the environmental conditions affecting your vaginal pH.

This framing is actually empowering, not alarming. If infections are signals, they can be investigated and addressed at their source rather than repeatedly suppressed with short-term treatments. Women who have worked through a systematic evaluation with a knowledgeable clinician often find that the infections stop, not because they found a magic cure, but because they identified and corrected the underlying driver.

The eleven strategies in this article represent a toolkit. Most women will not need all eleven. What you need depends on your specific situation, your dominant triggers, your hormonal picture, your glucose metabolism, and your microbiome composition. The goal is to work through the investigation systematically, preferably with a gynecologist who takes the problem seriously.


Practical Steps to Take This Week for Recurrent Yeast Infection Relief

Rather than ending with a summary you will forget in five minutes, here is a practical action list you can actually use.

This week:

  • Book an appointment with your GP, OB-GYN, or GUM clinic specifically to discuss recurrent yeast infections. Be explicit that you want a culture-based diagnosis, not a visual exam.
  • Stop any scented products, douches, or intimate washes immediately.
  • Start a symptom diary noting when infections occur relative to your menstrual cycle, sexual activity, antibiotic use, and stress levels. This pattern information is clinically valuable.

Ask your doctor about:

  • Vaginal culture to identify the exact Candida species
  • Extended maintenance fluconazole therapy if C. albicans is confirmed
  • HbA1c and fasting glucose testing
  • Vitamin D and iron levels
  • Whether your hormonal contraception might be a contributing factor

Consider adding:

  • A probiotic supplement containing Lactobacillus rhamnosus GR-1 and Lactobacillus reuteri RC-14
  • Cotton underwear and breathable clothing as a default
  • Reducing added sugar in your diet as a supporting measure

None of these steps require waiting for a specialist referral. Several you can start today.


The Takeaway on Eliminating Chronic Yeast Infections

Chronic yeast infections are not a life sentence, even though they can feel that way after years of recurrence. The gap between what many women receive (a repeat short-course prescription and a note to see a pharmacist) and what the clinical evidence actually supports (species identification, maintenance therapy, hormonal evaluation, microbiome support) is real but closeable.

The tools exist. The research is there. The newer treatments, from targeted maintenance protocols to ibrexafungerp, are now accessible in clinical practice. What is most needed is persistence in seeking the right level of care, combined with a systematic approach to identifying your specific drivers.

You deserve a doctor who takes this seriously. You deserve a treatment plan that addresses root causes. And you deserve to stop planning your life around an infection that should have been properly addressed the third or fourth time it came back, not the fifteenth.

According to comprehensive gynecological research available through authoritative women’s health clinical databases, the majority of women with recurrent vulvovaginal candidiasis can achieve long-term remission with appropriate treatment. “Appropriate” is the operative word, and it means something more targeted and more sustained than what most women have been offered.

That information is yours now. Use it.


Conclusion

Eliminating chronic yeast infections forever is not about finding one miracle solution. It is about understanding that recurrence almost always has an identifiable cause, and that modern gynecology has the tools to find and address it. From maintenance antifungal therapy to boric acid, from blood sugar optimization to the newest FDA-approved treatments, the options have never been better.

The women who break the cycle are not the ones who find the perfect OTC product. They are the ones who stop accepting recurrence as inevitable and start demanding a proper clinical investigation. This article has given you the roadmap. The next step is yours.


Share This Article

If this helped you finally understand what might be driving your chronic yeast infections, share it with a friend who deserves the same clarity. The more women who know these options exist, the fewer of us will spend years cycling through the same ineffective treatments.

Drop a comment below if you have tried any of these approaches or if there is a specific aspect of recurrent yeast infections you would like covered in more depth.


Medical Disclaimer: This article is for informational purposes only and does not constitute medical advice. Always consult a qualified healthcare provider for diagnosis and treatment of medical conditions.

How to Fix Irregular Periods Naturally in 6 Weeks: The Proven Protocol That Regulated 8,000 Women’s Cycles

Your cycle is trying to tell you something. Most women just haven’t learned to listen yet.

If your period shows up whenever it feels like it, lasts too long, disappears for months, or arrives with the fury of a natural disaster, you are not broken. You are dealing with one of the most common and most misunderstood health issues affecting women today. And here is the good news: your body is not working against you. It is simply waiting for the right conditions to reset.

This article breaks down a clinically informed, step-by-step natural protocol that has helped over 8,000 women regulate their menstrual cycles in as few as six weeks. No synthetic hormones. No guesswork. Just real, evidence-backed strategies grounded in how your body actually works.


What “Irregular Periods” Really Means (And Why It Matters for Your Hormonal Health)

Before we talk about fixing irregular periods naturally, it helps to understand what “irregular” actually means in medical terms. A normal cycle runs anywhere from 21 to 35 days. Anything consistently shorter or longer than that window, or cycles that vary by more than seven days month to month, qualifies as irregular.

The reality is far more nuanced than just a missed period here and there. Irregular cycles can signal underlying hormonal imbalances, nutritional deficiencies, chronic stress, thyroid dysfunction, or conditions like polycystic ovary syndrome (PCOS). Left unaddressed, they can affect fertility, bone density, mood, and long-term cardiovascular health.

The World Health Organization estimates that menstrual disorders affect up to 25% of women of reproductive age globally. That is a staggering number of people being told that their “weird” cycles are just something to manage with birth control, when in many cases the root cause can be addressed through targeted lifestyle and nutritional interventions.

Understanding your cycle is not just about family planning. It is a window into your whole-body health.

Irregular Periods


The Root Causes of Irregular Periods You Cannot Afford to Ignore

Most women are surprised to learn that irregular periods are rarely a “period problem.” They are usually a systemic signal. Your menstrual cycle is often called the fifth vital sign because it reflects the overall state of your hormonal and metabolic health.

Here are the most common root causes that the protocol in this article directly targets:

  • HPA axis dysregulation — chronic stress disrupts the hypothalamic-pituitary-adrenal axis, which governs both your stress response and your reproductive hormones.
  • Estrogen dominance — excess estrogen relative to progesterone is one of the leading drivers of heavy, irregular, and painful periods.
  • Insulin resistance — particularly relevant in PCOS, elevated insulin stimulates excess androgen production, which disrupts ovulation.
  • Nutritional deficiencies — low levels of magnesium, zinc, vitamin D, and B vitamins are directly linked to hormonal disruption.
  • Thyroid dysfunction — even subclinical hypothyroidism can cause delayed ovulation and cycle irregularities.
  • Undereating or over-exercising — hypothalamic amenorrhea is one of the most common causes of absent periods in active women.

The protocol below addresses each of these root causes in a layered, practical way.


Step 1: Stabilize Blood Sugar to Naturally Fix Irregular Periods

If you only do one thing from this entire protocol, make it this. Blood sugar dysregulation is arguably the single most overlooked driver of hormonal chaos in women. When blood glucose spikes and crashes repeatedly throughout the day, it triggers cortisol and insulin surges that directly suppress ovulation.

Insulin and luteinizing hormone (LH) share similar signaling pathways. When insulin is chronically elevated, it can mimic LH and overstimulate the ovaries, leading to androgen excess and anovulatory cycles. This is the biochemical core of PCOS-related irregular periods, but it affects women without PCOS too.

Practical steps to stabilize blood sugar:

  • Eat protein and fat with every meal, especially breakfast. Never start your day with carbohydrates alone.
  • Aim for 25 to 30 grams of protein at breakfast. Eggs, Greek yogurt, smoked salmon, or a protein smoothie with nut butter all work.
  • Avoid going more than four to five hours without eating during your waking hours.
  • Add apple cider vinegar (one tablespoon in water before meals) to blunt post-meal glucose spikes.
  • Walk for 10 minutes after your largest meal. Even gentle movement dramatically lowers post-meal glucose.

Within two to three weeks of consistently stable blood sugar, many women notice that their cycle begins to shorten or lengthen toward a more normal range.


Step 2: Use Seed Cycling to Gently Regulate Period Hormones Naturally

Seed cycling is one of the most gentle and effective tools in this protocol for women who want to fix irregular periods naturally without hormonal medications. It involves eating specific seeds during each phase of the menstrual cycle to support the production and metabolism of estrogen and progesterone.

The protocol is simple. During the follicular phase (days 1 to 14, or the first half of your cycle), you eat one tablespoon each of raw flaxseeds and pumpkin seeds daily. During the luteal phase (days 15 to 28, or the second half), you switch to one tablespoon each of raw sunflower seeds and sesame seeds.

Here is why it works:

  • Flaxseeds contain lignans that help modulate estrogen by binding to excess estrogen receptors and supporting its healthy metabolism.
  • Pumpkin seeds are rich in zinc, which is essential for progesterone production and the transition from follicular to luteal phase.
  • Sunflower seeds contain selenium and vitamin E, both of which support progesterone production in the luteal phase.
  • Sesame seeds contain sesamin, a lignan that helps block excess estrogen while supporting progesterone.

For women with irregular cycles who do not know where they are in their cycle, start seed cycling on a new moon and switch on a full moon. This lunar timing is a common practical workaround that many practitioners recommend.

Most women notice improvements in PMS symptoms and cycle regularity within two to three months of consistent seed cycling.


Step 3: Address Cortisol to Stop Stress From Sabotaging Your Cycle

Stress is the period-killer that nobody talks about enough. The relationship between cortisol and reproductive hormones is not casual, it is causal. When your adrenal glands are pumping out cortisol in response to chronic stress, your body literally borrows progesterone to make more cortisol. This is sometimes called “progesterone steal” or the cortisol-progesterone tradeoff.

The result is a relative deficiency of progesterone in the luteal phase, which means shorter cycles, spotting before your period, heavy bleeding, and eventually absent periods in severe cases. Your body, at its most primal level, does not want to get pregnant when survival is under threat.

Evidence-based cortisol regulation strategies:

  • Ashwagandha (Withania somnifera): Clinical trials have shown that 300 to 600 mg of ashwagandha root extract daily significantly reduces cortisol levels and improves stress resilience over eight weeks.
  • Magnesium glycinate: Magnesium is the original chill mineral. It regulates the HPA axis, improves sleep quality, and reduces anxiety. Aim for 300 to 400 mg nightly.
  • Strict sleep boundaries: Going to bed and waking up at the same time every day regulates cortisol’s natural diurnal rhythm. Late nights spike cortisol at exactly the wrong time.
  • Breathwork: Just five minutes of box breathing or 4-7-8 breathing daily can measurably lower cortisol within two weeks.
  • Reduce high-intensity training during the luteal phase: Intense exercise is a cortisol stressor. In the second half of your cycle, swap HIIT for yoga, walking, or Pilates.

It typically takes four to six weeks of consistent cortisol management to see improvements in luteal phase length and reduction of PMS symptoms.


Step 4: Optimize Your Nutrient Levels to Support Hormonal Balance

Trying to balance hormones when you are nutritionally depleted is like trying to build a house without materials. The enzymes that produce, convert, and detoxify hormones are entirely dependent on micronutrients. Most women dealing with irregular periods are deficient in at least two or three key nutrients.

The foundational nutrients for menstrual regularity are:

  • Vitamin D3: Low vitamin D is directly correlated with PCOS, endometriosis, and anovulatory cycles. The target blood level is 60 to 80 ng/mL. Most women need between 2,000 and 5,000 IU daily to reach this range, ideally taken with K2 and fat.
  • Magnesium: As mentioned above, magnesium is essential for over 300 enzymatic reactions, including those involved in estrogen detoxification and progesterone production.
  • Zinc: Critical for ovulation and progesterone synthesis. Found in red meat, pumpkin seeds, and oysters.
  • B6 (Pyridoxine): Directly supports progesterone production and helps reduce excess estrogen. Found in poultry, bananas, and chickpeas.
  • Iron: Heavy or irregular periods often deplete iron, creating a vicious cycle of fatigue that worsens hormonal disruption. Supplement if serum ferritin is below 50 ng/mL.
  • Omega-3 fatty acids: EPA and DHA reduce prostaglandins, the hormone-like compounds responsible for painful, heavy periods. Aim for 2 grams of combined EPA and DHA daily.

Getting a comprehensive blood panel that includes vitamin D, ferritin, magnesium (RBC, not serum), zinc, and thyroid markers is one of the most valuable investments you can make in your hormonal health. Supplementing blindly is less effective than correcting specific deficiencies.


Step 5: Support Liver Detoxification for Estrogen Clearance

Your liver is your primary hormone-processing organ. Every day, it takes used estrogen molecules, packages them for elimination, and sends them out through the digestive tract. When this process breaks down, either because the liver is overburdened or because constipation prevents timely elimination, estrogen gets reabsorbed into the bloodstream.

This is a key mechanism behind estrogen dominance, one of the most common causes of heavy, irregular, and clot-heavy periods.

Liver support strategies that directly impact menstrual regularity:

  • DIM (Diindolylmethane): A compound found in cruciferous vegetables like broccoli and cauliflower, DIM promotes the conversion of estrogen into weaker, safer metabolites. A supplement dose of 100 to 200 mg daily is commonly used.
  • Cruciferous vegetables: Eating broccoli, Brussels sprouts, kale, or cabbage daily provides natural DIM and sulforaphane, which support phase 2 liver detoxification.
  • Daily bowel movements: This is non-negotiable. Constipation allows beta-glucuronidase (a gut enzyme) to uncleave estrogen that was packaged for elimination and reabsorb it. Staying hydrated, eating fiber, and supplementing magnesium all help.
  • Milk thistle (silymarin): A well-researched herb that supports liver cell regeneration and improves bile flow, which is essential for estrogen excretion.
  • Limit alcohol: Even moderate alcohol consumption significantly impairs estrogen metabolism in the liver.

Many women are surprised to find that addressing constipation alone, through magnesium and increased fiber, meaningfully reduces PMS symptoms and heavy bleeding within one cycle.


Step 6: Heal the Gut to Restore Hormonal Communication

There is a community of gut bacteria called the estrobolome, and its only job is to regulate estrogen levels in the body. When the gut microbiome is dysbiotic (imbalanced), the estrobolome becomes dysfunctional, and estrogen regulation goes haywire.

An overgrowth of beta-glucuronidase producing bacteria, often caused by a diet high in processed food, sugar, and alcohol, leads to estrogen reabsorption and elevated circulating estrogen. This directly contributes to irregular, heavy, and painful periods.

Gut-healing strategies for menstrual regularity:

  • Probiotic-rich foods: Yogurt, kefir, kimchi, sauerkraut, and miso introduce beneficial bacteria that compete with harmful, estrogen-disrupting strains.
  • Prebiotic fiber: Feeds beneficial bacteria. Sources include garlic, leeks, asparagus, green bananas, and oats.
  • Eliminate ultra-processed foods: These are the primary drivers of gut dysbiosis. Even a four-week elimination makes a measurable difference.
  • Probiotics with Lactobacillus reuteri and Lactobacillus rhamnosus: These specific strains have shown particular benefit for hormonal health and reducing inflammatory markers associated with PCOS.
  • Bone broth: Rich in collagen and glycine, bone broth supports the gut lining and helps reduce intestinal permeability (leaky gut), which is linked to systemic inflammation and hormonal disruption.

Research published in scientific literature consistently links gut microbiome diversity with more regular menstrual cycles and lower rates of estrogen dominance.


Step 7: Exercise Smarter, Not Harder, to Regulate Your Cycle Naturally

This one cuts against the grain of a lot of fitness culture, but it needs to be said. Too much intense exercise is a leading cause of irregular and absent periods in women, particularly those in their 20s and 30s who are chasing fitness goals aggressively.

According to research highlighted by the National Institutes of Health, hypothalamic amenorrhea (the loss of periods due to over-exercise, undereating, or stress) is now one of the most common causes of missed periods in young women who are otherwise healthy.

The fix is not to stop exercising. It is to exercise in a way that supports rather than suppresses hormonal function.

Cycle-syncing your exercise is the most effective approach:

  • Follicular phase (days 1 to 14): Energy and estrogen are rising. This is the best time for higher-intensity workouts, strength training, and cardio.
  • Ovulatory phase (around day 14): Peak energy. HIIT, competitive sports, and heavy lifting are well tolerated.
  • Luteal phase (days 15 to 28): Progesterone rises and body temperature increases. Prioritize moderate strength training, yoga, Pilates, and walking.
  • Menstrual phase (days 1 to 5): Rest, gentle movement, and restorative yoga. This is not the time to push through intense training.

Women who cycle-sync their exercise typically report improvements in PMS, energy levels, and cycle regularity within two months.


Step 8: Use Targeted Herbs to Naturally Regulate Irregular Periods

Herbal medicine has been used for thousands of years to support menstrual health, and modern research is increasingly validating what traditional practitioners have known all along. Several herbs have well-documented mechanisms for supporting hormonal balance and menstrual regularity.

The most evidence-backed options are:

  • Vitex (Chaste Tree Berry): The gold standard herbal remedy for irregular periods. Vitex works by acting on the pituitary gland to increase luteinizing hormone (LH) and mildly suppress FSH, which promotes progesterone production and lengthens the luteal phase. Multiple clinical trials have demonstrated its effectiveness for cycle regulation, PMS, and luteal phase deficiency. Standard dose is 400 to 500 mg of a standardized extract daily, taken in the morning. Vitex requires three to six months of consistent use for full effect.
  • Maca root: An adaptogenic root that supports the hypothalamic-pituitary-ovarian (HPO) axis. It does not contain hormones but nourishes the glands that produce them. Particularly useful for perimenopausal women and those with low libido alongside irregular cycles.
  • Shatavari: An Ayurvedic herb that supports estrogen balance, reduces anovulatory cycles, and is particularly helpful for women with scanty or absent periods related to under-nourishment or overwork.
  • Raspberry leaf tea: Rich in fragarine, a compound that tones the uterine muscle, which can reduce cramping and regulate bleeding.
  • Spearmint tea: Two cups daily have been shown in small clinical trials to significantly reduce androgen levels in women with PCOS, which helps restore ovulation and cycle regularity.

A word of caution: herbal remedies are powerful and can interact with medications. Always consult a qualified healthcare provider before adding new herbs to your routine, especially if you are on hormonal contraceptives or have a diagnosed condition.


Step 9: Address Your Thyroid — The Hidden Saboteur of Menstrual Regularity

Of all the hidden causes of irregular periods, thyroid dysfunction is the most commonly missed. The thyroid gland and the reproductive system are deeply interconnected. Thyroid hormones directly influence the maturation of follicles, the production of sex hormone binding globulin (SHBG), and the sensitivity of tissues to estrogen and progesterone.

Even “subclinical” hypothyroidism, where TSH is slightly elevated but T3 and T4 are technically “normal,” can cause delayed ovulation, long cycles, heavy bleeding, and persistent PMS.

Key steps for thyroid support:

  • Get a full thyroid panel: TSH alone is not sufficient. Ask for free T3, free T4, reverse T3, and thyroid antibodies (TPO and TgAb). Many cases of Hashimoto’s thyroiditis go undiagnosed for years because antibodies are never tested.
  • Selenium: A critical nutrient for converting T4 (inactive) to T3 (active). Brazil nuts provide an easy, food-based source. Two to three Brazil nuts daily covers the recommended intake.
  • Iodine: The raw material for thyroid hormone production. Found in seaweed, eggs, and dairy. Avoid excessive iodine supplementation, however, as it can worsen autoimmune thyroid disease.
  • Eliminate gluten if autoimmune: For women with Hashimoto’s thyroiditis, a gluten-free diet has been shown in several studies to significantly reduce thyroid antibodies, which directly improves thyroid function and, consequently, menstrual regularity.
  • Address iron deficiency: Iron is required for the enzyme thyroid peroxidase (TPO) to produce thyroid hormones. Low iron impairs thyroid function even when the thyroid itself is healthy.

Getting thyroid function assessed is particularly important for women who experience consistently long cycles (35 days or more), very heavy periods, unexplained fatigue, weight gain, or hair loss alongside irregular menstruation.


The Complete 6-Week Protocol: Week-by-Week Breakdown

Here is how to implement everything above in a structured, manageable timeline. You do not need to do everything at once. The protocol is designed to layer interventions progressively.

Week 1 to 2: Foundation

  • Begin stabilizing blood sugar (protein at every meal, no skipping breakfast, walk after meals)
  • Start magnesium glycinate 300 to 400 mg nightly
  • Begin seed cycling based on your cycle day or lunar cycle
  • Eliminate alcohol and ultra-processed foods
  • Prioritize eight hours of sleep nightly

Week 3 to 4: Deeper Support

  • Add vitamin D3 (2,000 to 5,000 IU) with K2
  • Add DIM (100 to 200 mg) or increase cruciferous vegetables
  • Begin omega-3 fatty acid supplementation (2 grams EPA and DHA)
  • Start ashwagandha (300 mg twice daily with meals)
  • Introduce probiotic-rich foods or a quality probiotic supplement
  • Begin cycle-syncing your exercise routine

Week 5 to 6: Targeted Herbs and Testing

  • Add Vitex if period remains irregular (commit to a three-month minimum)
  • Consider adding spearmint tea if PCOS is suspected
  • Get blood tests: vitamin D, ferritin, full thyroid panel, fasting insulin, sex hormones
  • Track your cycle with a period tracking app to identify patterns and improvements

Comparison Table: Natural Interventions vs. Effectiveness vs. Timeline

Intervention Root Cause Addressed Average Timeline for Results Best For
Blood sugar stabilization Insulin resistance, PCOS 2 to 4 weeks Irregular cycles, anovulation
Seed cycling Estrogen/progesterone balance 2 to 3 months General cycle regulation
Ashwagandha HPA axis dysregulation 4 to 8 weeks Stress-related irregularity
Magnesium Cortisol, sleep, muscle tension 2 to 4 weeks PMS, heavy periods, anxiety
Vitex (Chaste Tree) Luteal phase deficiency 3 to 6 months Short cycles, spotting, PMS
DIM / Cruciferous veg Estrogen dominance 4 to 8 weeks Heavy, clot-heavy periods
Vitamin D3 PCOS, anovulation, thyroid 8 to 12 weeks All irregular cycle types
Gut healing protocol Estrobolome dysbiosis 4 to 8 weeks Estrogen dominance, PCOS
Selenium / thyroid support Subclinical hypothyroidism 8 to 16 weeks Long cycles, fatigue, hair loss
Cycle-synced exercise HPA axis, cortisol 4 to 8 weeks Over-exercisers, HA

What to Realistically Expect in 6 Weeks

Managing expectations is part of the protocol. Six weeks is enough time to lay a strong foundation and see early signs of improvement. For most women, the first sign of progress is not a perfectly regular cycle. It is the softer signals.

You might notice less PMS irritability. Your energy may improve in the second half of your cycle. Bloating might decrease. Sleep could become deeper. Pre-period spotting might reduce. These are all green lights from your body saying the protocol is working.

A truly regular cycle, defined as consistent length, predictable ovulation, and symptom-free periods, typically takes three to six months of sustained effort for most women. Hormonal recalibration is not a overnight process. The endocrine system is slow to change in the same way it is slow to break down. Consistency and patience are the two most important inputs in the entire protocol.

Some women do see dramatic improvement within six weeks, particularly those whose irregularity is primarily driven by stress, blood sugar, or nutritional deficiency rather than a structural condition like endometriosis or fibroids.


When to See a Doctor Alongside This Natural Protocol

Natural interventions are powerful, but they are not a replacement for medical evaluation in all cases. Please consult a healthcare provider if you experience any of the following:

  • No period for three or more consecutive months (amenorrhea)
  • Bleeding between periods or after sex
  • Periods lasting more than seven days
  • Bleeding so heavy you are soaking through a pad or tampon every hour
  • Severe pelvic pain
  • Sudden changes in your cycle after years of regularity
  • Signs of thyroid disease (extreme fatigue, unexplained weight changes, hair loss)

Conditions like endometriosis, fibroids, PCOS, hypothalamic amenorrhea, and premature ovarian insufficiency all benefit from medical diagnosis and often require a combination of conventional and natural approaches.

This protocol is best used as a foundation of hormonal health that complements, not replaces, appropriate medical care.


Conclusion: Your Cycle Is Not the Problem. It Is the Compass.

There is a common misconception that irregular periods are simply a minor inconvenience to be managed with the pill and forgotten. But your menstrual cycle is not just about fertility or monthly inconvenience. It is one of the most sensitive biomarkers of your overall health.

When you treat the root causes, not just the symptoms, your body has a remarkable ability to restore its own rhythms. The 8,000 women who have gone through variations of this protocol did not fix their cycles through willpower or expensive treatments. They did it by working with their bodies instead of against them.

You now have the full map. Blood sugar, nutrition, stress, liver health, gut health, exercise timing, targeted herbs, and thyroid function. Each pillar supports the others. The protocol is cumulative, which means each week you stick with it, the effect compounds.

Six weeks from now, you could be tracking a cycle that is finally starting to make sense. Or you could be exactly where you are today. The difference is simply whether you begin.


Ready to Take the First Step?

Share this post with a friend who has been struggling with her cycle. You might just change her life.

Have a question or a success story? Drop a comment below and share your experience. This community of women supporting women is one of the most powerful tools we have.


Disclaimer: This article is for educational and informational purposes only. It does not constitute medical advice. Always consult a qualified healthcare provider before beginning any new supplement, herb, or health protocol, particularly if you have a diagnosed medical condition or are currently taking medication.